

You want to spice up your Minecraft gaming experience? With mods, that’s no problem. Our simple guide explains how to install them.
Minecraft is a creative playground. Here, players have been able to give free rein to their imagination for years. But even Minecraft has limits. Fortunately, there are ways and means to break them. Above all, with the help of mods, you can raise Minecraft to a whole new level. Be it through better graphics, new functions, new mobs or entirely new worlds. You can find a list of the best mods for the block worlds here:
If you already know which mod you want, but just need help installing it, welcome! In this article, we’ll show you step by step what to look out for during the installation process.
What should I look for first?
1. uses Minecraft Java
There are two different Minecraft versions on the PC. Minecraft Java and Minecraft Bedrock (also called Minecraft for Windows). In the launcher, you can see which version you are using on the left side. The Java version also has Java Edition under the logo.
Proper mods are only available for Minecraft Java. Bedrock does have so-called addons and there is the marketplace, but these are very limited options. You can only get really fancy mods with Java.
2. create a backup:
If you are unsure about mods, you should first make a backup of your game files. By backup, we mean that you make a copy of the unmodified original. This way, you don’t run the risk of your game having problems and having to reinstall it completely. Creating a backup is quite simple.
- On your keyboard, press the Windows key (the symbol at the bottom left) and the R key.
- Now a text box called Run should appear at the bottom left. Enter the following text into this text box: %Appdata%
- Then click OK. Now a folder with many subfolders should open. At the very top you should find a folder called .minecraft
- Click OK.
- Copy this folder by right clicking and selecting copy or by pressing Ctrl + C. Then paste the whole folder somewhere else on your PC where you can find it again later.
- It’s best to create a new folder and call it Minecraft Backup. Copy the folder into it. This way you are on the safe side. If you want to restore an unchanged version of Minecraft, paste this protected folder back where you got it from.
Think about the power of your PC
Minecraft is not a particularly demanding game, thanks to the block look. But some mods can change that. Especially if you want to improve the graphics. Make sure that the memory of your computer is not already completely used up. You also run the risk that Minecraft will start to jerk. This depends entirely on your computer’s performance. If the game no longer runs smoothly after a graphics mod, you may simply have a computer that is too weak.
Use the correct version
Every mod is different and some even need different mods to work properly. Here we can only advise you to read the description of the mods very carefully. Pay particular attention to which version is required. This is easy to see even with a moderate knowledge of English. The version numbers are usually written somewhere. For example, 1.8 or 1.7.2 or something like that.
Your game is usually on the latest version, but you can always install older versions and thus play mods that have not yet been updated. This is often necessary for large projects. How to install an older version of Minecraft:
Click on the Installations tab at the top of the launcher.
- Now click on New Installation at the bottom.
- Next, give the version a name so you know what you need it for.
- Then unfold the version field with one click.
- Scroll through the long list here and select the version you need for the mod. Take the release versions, not the snapshots.
Install mods with a manager
Mods naturally play a big role in a game as creative as Minecraft. So not only have new mods been tinkered with over the years, the installation process has also made great strides. In the meantime, it is hardly a major problem to install mods on your PC. The best way to do this is to use one of two methods:
Minecraft mods with Forge
If you want to start the Minecraft Java Edition via the Minecraft Launcher, and especially if you want to install individual mods in a controlled manner, then you should install Forge first. This is a very important tool that helps you keep track of your mods, simplifies the installation and ensures that there are no unexpected clashes between mods. To install mods with Forge, you should follow these steps:
* (Visit the Forge page) and install a version of the program. The Forge version must match the mod version you want to have. To start with, we simply recommend the latest version. This is currently 1.18.2. Click on “Installer” in the middle of the screen. If an advertising page appears, ignore it and click on the red skip button in the top right-hand corner (it takes a few seconds for it to appear).
– The Forge installer will now download and land in your download folder. Just click on the file and make sure that “Install client” is selected in the next window at the top. Click on Ok. The programme will be installed.
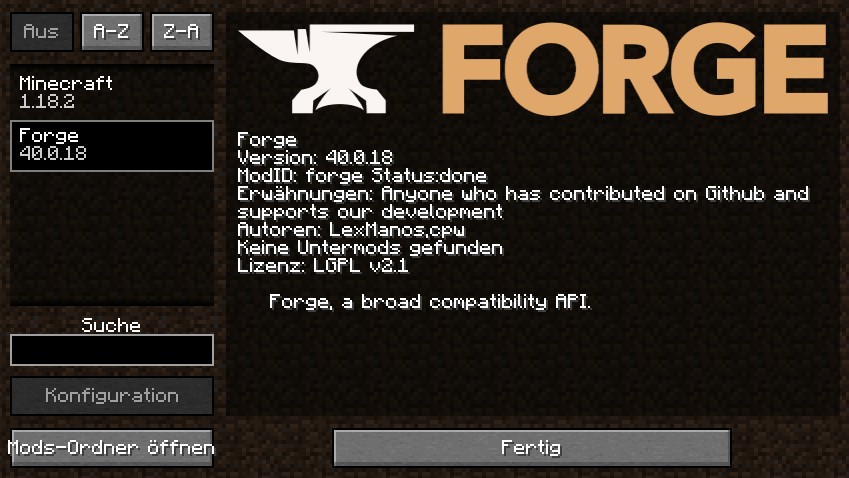
– If you now start the Minecraft launcher, you should be able to open the version menu to the left of the play button and select Forge. The red warning triangle only indicates that this is a modded version of Minecraft.
* If you now start the game and are in the main menu, you can select the item Mods. All your mods will be displayed here later. But first click on Open Mods Folder at the bottom left. You should see an empty folder. If you now download a mod, e.g. from (Cursforge), you simply have to place the corresponding file in this folder. The mod will then appear in the mod menu and you can start.
Minecraft mods with the Curseforge app
It has also become quite easy to install and launch mods for Minecraft via the Twitch app. In the meantime, however, this function has been outsourced to the Curseforge app. You can use it to download and manage mods for all kinds of games. Also for Minecraft. This is how it works:
– Visit the (official website of the Curseforge app). Here you can click directly on the download for Windows or macOS
– Download the program and start the installation via the CurseForge installer. It’s all pretty straightforward.
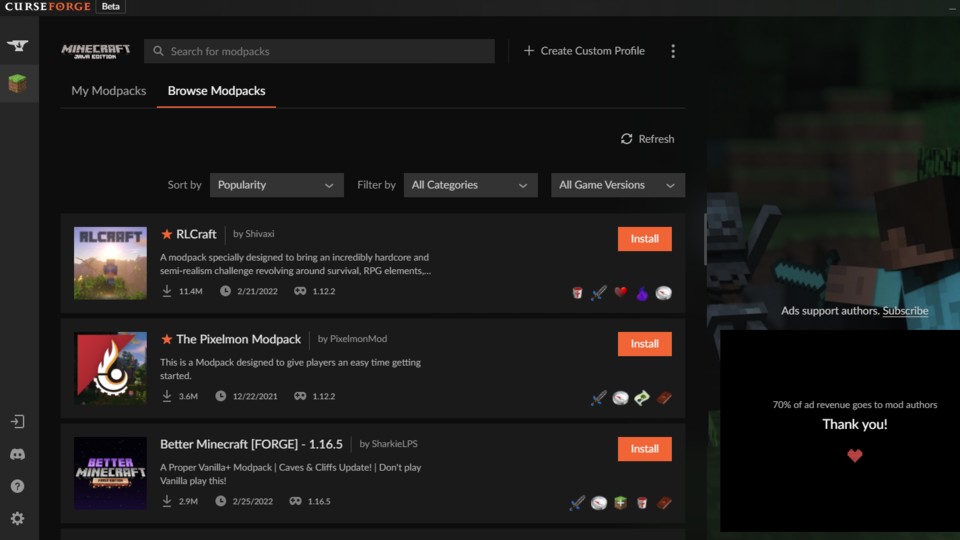
– Once the installation is complete, you can open the Curseforge app. First, look for Minecraft in the game selection. Then switch from “My Modpacks” to “Browse Modpacks” at the top of the tab.
– What you see now is a huge selection of mods available on the Cursforge website. You don’t have to do much more at this point than simply click on “Install” on the right and wait for the mod to be installed. This happens automatically. Then you can press play. This will start Minecraft and the mod. You may have to log in with your account first.
Install mods manually
The best way to install mods is to use a manager. You can see how this works further up in the article. You can also install mods manually, but we do not recommend this, as it is very inconvenient. It is necessary, for example, if you have downloaded the mod files directly and they are now on your PC. If this is the case, proceed as follows:
- On your keyboard, press the Windows key (the symbol at the bottom left) and the R key.
- Now a text box called Run should appear at the bottom left. Enter the following text into this text box: %Appdata%
- Then click OK. Now a folder with many subfolders should open. Very high up you should find a folder called .minecraft, click on it.
- Click on OK.
- Now look here for another folder called Versions.
- In this folder you should now find a folder for each Minecraft version you have installed. So for example, a folder for 1.18.2.
- Copy the folder for the version that is compatible with your mod (info should be where you downloaded the mod) and paste it into the same folder. Windows will then automatically attach a copy.
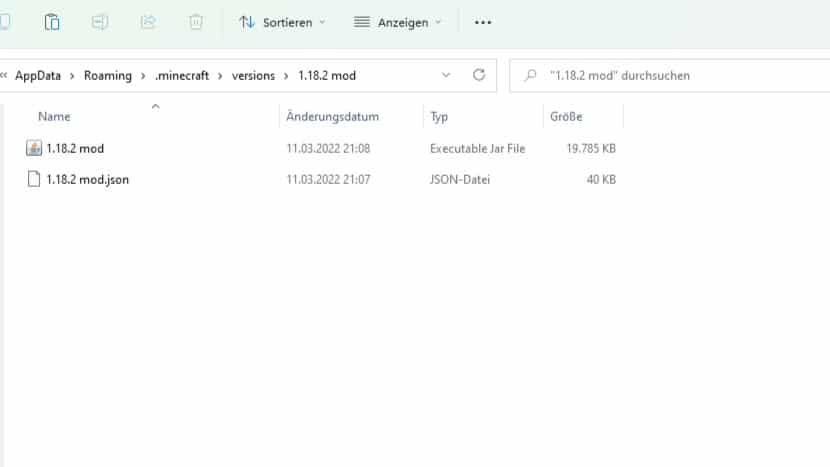
- Rename the copied folder. It’s best to rename it to something that makes it clear which mod you want to use. But something generic like 1.18.2 mod.
will do.
- Now go to the renamed folder and rename the jar file accordingly. Again, for example, 1.18.2 mod instead of 1.18.2. Do the same with the second file in this folder, the JSON file. The folder should then look like this:
Now it gets a bit confusing. Right-click on the JSON file and open it with, for example, Windows Editor or Notepad. You will see a huge complicated text desert. Press CTRL + F and then search for 1.18.2 (or your version).
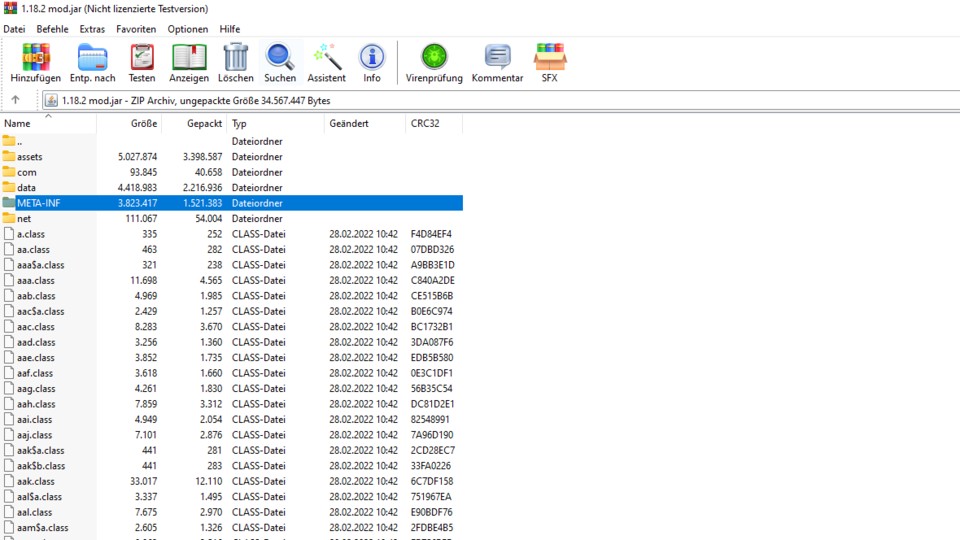
The programme should now highlight the number in the text block. Adjust this number so that it matches the name of the other files. So in our example, again 1.18.2 mod.Next, you should have a programme installed on your PC to open jar files. The best thing to do is to use WinRAR, (which you can get here for free). If you have the programme, right-click on the jar file and select Open with and then WinRAR. In the next window, look for the folder META-INF and simply delete this folder.
- So, almost done. Now you only have to open the mod file you loaded with WinRAR. Copy all the files in this folder and paste them into the same folder where you just deleted the file.
- You can simply select the files completely with the mouse and then drag them into the other folder. WinRAR will then briefly open a smaller window, just click on OK in the bottom left-hand corner.
- Click on OK.
- Now open the Minecraft Launcher, go to Installations and click on New Installation.
- Search the game directory for the Minecraft version you just created. So in the example 1.18.2 mod.Click on Create, then select the created version again on the main screen to the left of Games. When you start the game, you should be able to experience Minecraft with your mod.
Have you got any more helpful tips for installing mods? Feel free to post them in the comments! It will help us keep this article as useful as possible.
