

How do I create my own Minecraft skin and load it into the game? Our handy guide will tell you.
You don’t want to play Minecraft with the boring default skin, but want to pixelate your own character? We’ll explain how you can create your own skins and then easily add them to the game!
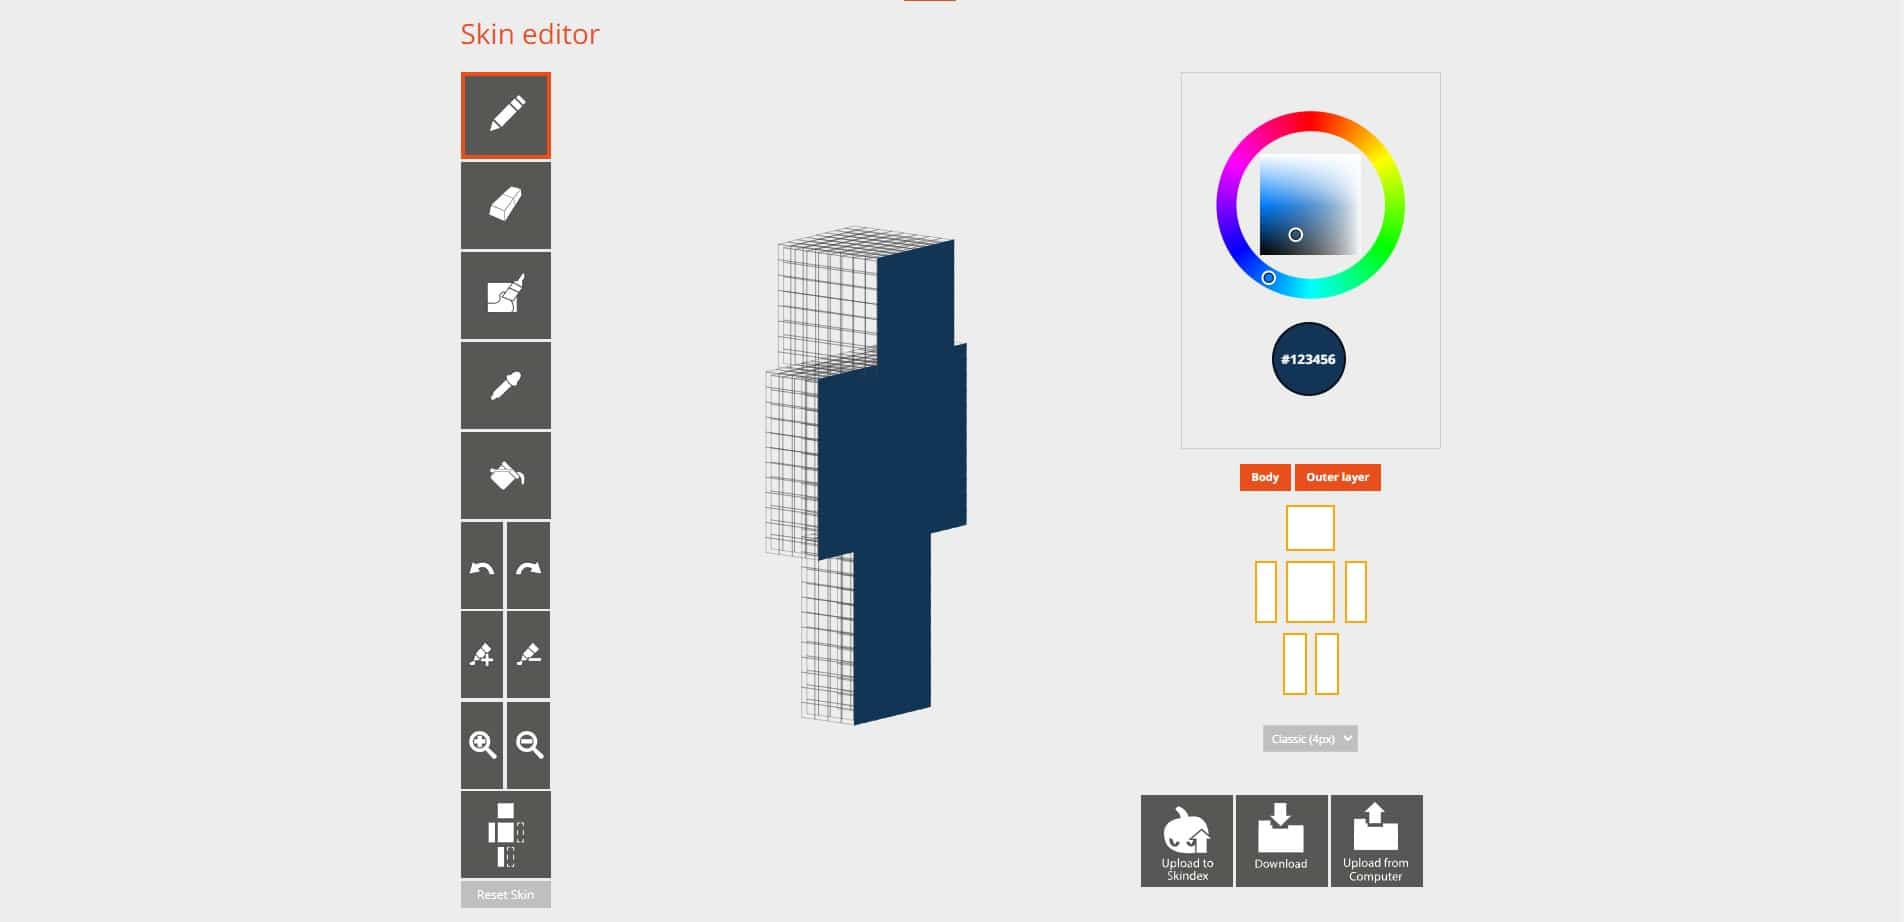
Create skin on Minecraftskins
One of the clearest editors can be found on minecraftskins.com Here you can draw your own skin with a simple interface
- On the left side you will find various tools such as pens, erasers, pipettes, filling tools and the mirror function.
- On the right side you will find your colour selection.
- Below you can set the layer you want to work on to achieve a 3D effect for jackets etc. Here you can also select individual body parts. Here you can also hide individual body parts.
- To rotate your figure, click next to the figure in the editor and drag it in the desired direction.
- Once you are satisfied, click on “Download” at the bottom right and you will receive a PNG file.
Create skin on Nova Skins
Alternatively, you can also create your own skins on minecraft.novaskins.me. This editor is a little more extensive, but also a little less clear.
- At the bottom of the screen you will find tools such as pens, erasers, pipettes, filling tools and the duplicate function. Here you can set your colours directly or choose from a colour palette. Here you can also hide individual body parts.
- In the upper right corner you select your layers to achieve a 3D effect for jackets, etc.
- To rotate your figure, click next to the figure in the editor and drag it in the desired direction.
- At the top of the screen you can set additional colour filters, activate and deactivate the grid, create a mirror effect and try out different poses.
- Once you are satisfied, click on “Save” at the top right and you will receive a PNG file.
How to add your own skins into the game
Wherever you created your skin, you will find the same PNG file in your downloads folder. But how do you insert it into your game and turn it into a skin?
- Go to (Minecraft.net) and log in with your Minecraft account.
- Under “My Games” you will find the Minecraft Java Edition. Click on the arrow next to the name.
- Under it, select the “Change Skin” option.
- Under “Upload custom skin”, click on “Select file” and find your PNG file.
- Your self-made or downloaded skin will then be transferred to the game.
Do you use a custom skin in Minecraft or do you play with default skin? Have you ever downloaded skins and have recommendations? Then post them in the comments!
