

Drive faster, escape the police better and save money: Our tester gives you tips on NfS Unbound so you don”t make the same mistakes he did
The street racer scene relies on secrecy. Where do I race, who are my rivals, how do I evade the police? We”ll tap into this secret knowledge for you, even if only virtually: In Need for Speed Unbound you”ll become the star of the racing underground and with our tips it”s much easier!
Here are seven tips that will not only make Need for Speed Unbound easier, but also increase your gaming fun. And it won”t hurt your virtual bank account either, because if you follow these tips, you”ll soon be rich in Unbound!
Table of Contents
Tip 1: Don”t take the prologue too seriously
At the beginning of Need for Speed Unbound, you are on the road with Yaz as an employee of the garage Riley”s Rides. You compete in your first races, get to know the game mechanics and drive around in the open world. But the game doesn”t tell you the most important thing: almost everything you do in this prologue will be worthless later on.
The story takes a more or less surprising turn after about an hour. After that, there is a time jump and you start again with an empty account. All the money you have earned up to that point is gone.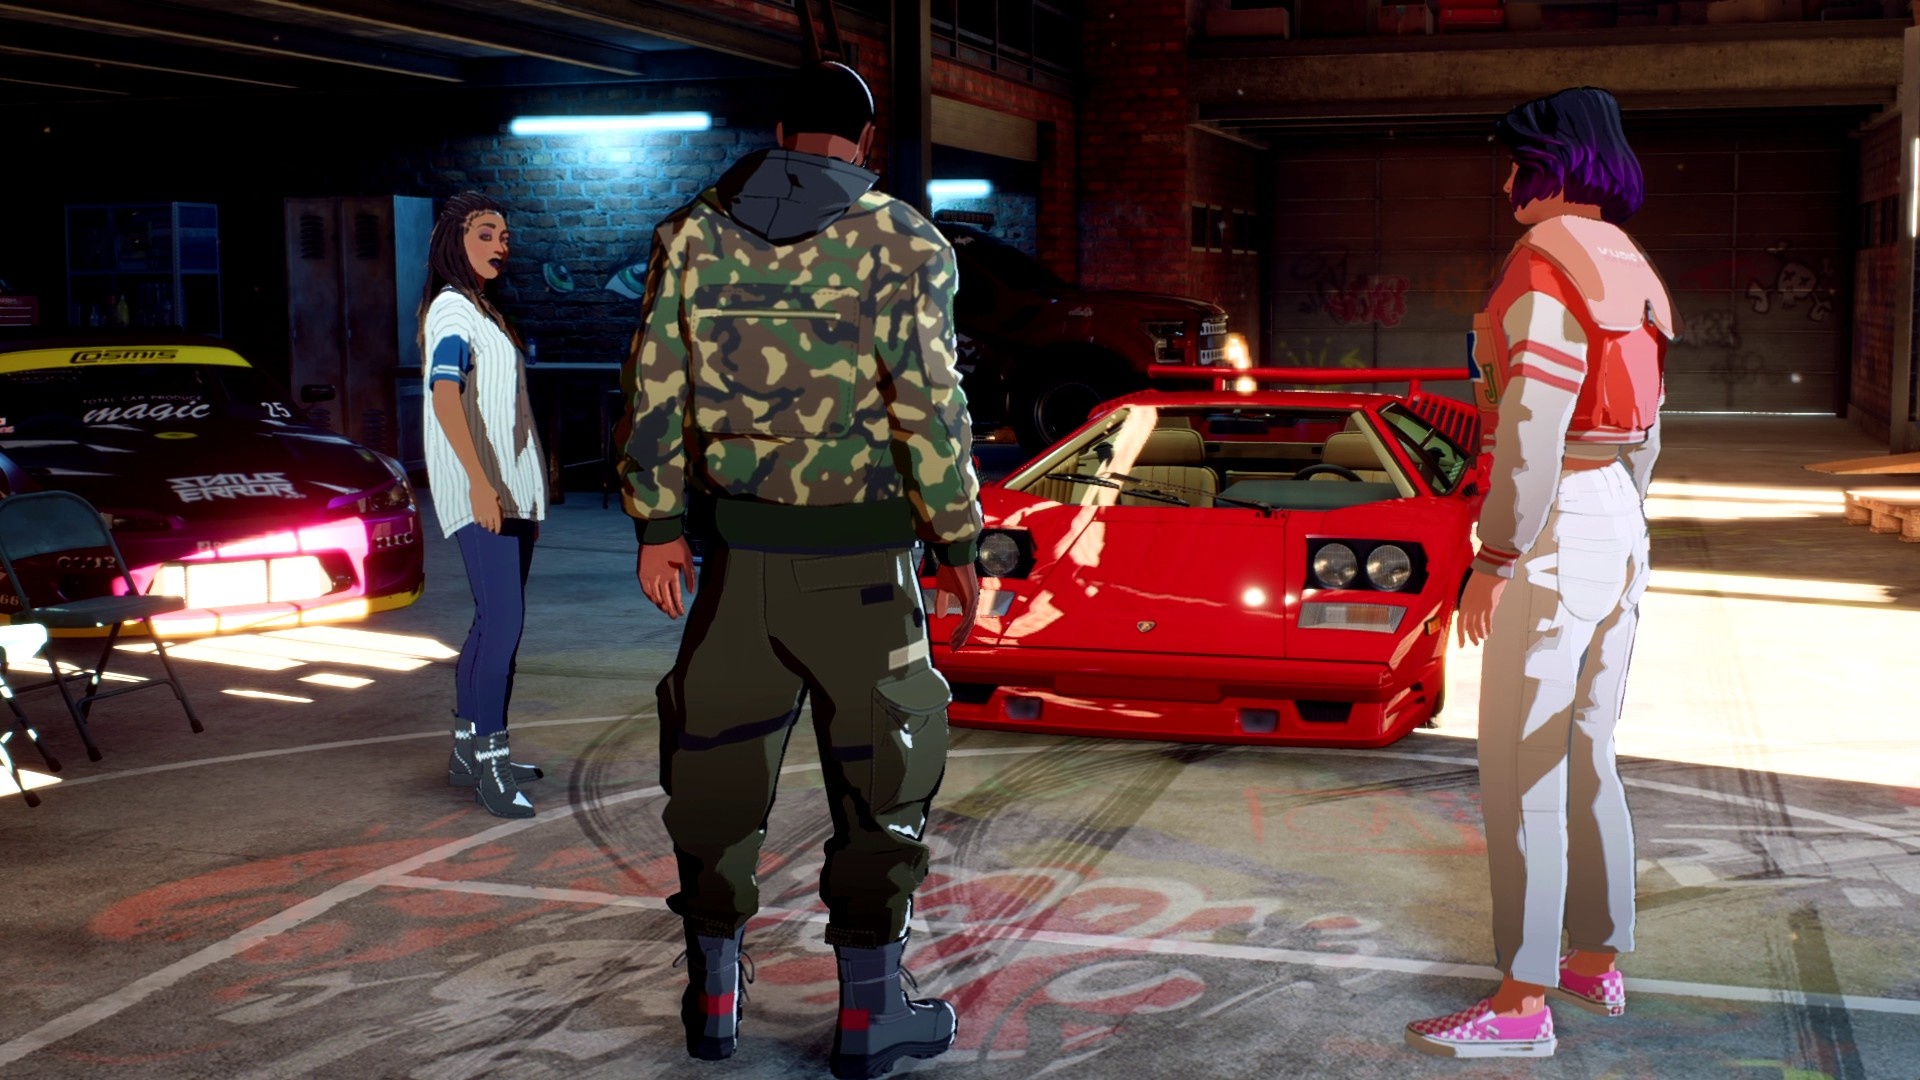
Don”t take the races too seriously in this initial phase and don”t worry if you don”t finish in first place. It won”t do you any good anyway! Also, the challenges are not unlocked in the prologue, there are no collectibles in the Open World and you can”t buy new cars or tuning parts.
However, not everything is for free: All cosmetic upgrades that you buy in the prologue remain with you even after the end of the first mission phase. Therefore, my tip: Buy clothes for your character and put the money into sprucing up your character. Later, when the real game begins, you”ll need the money more to work on your car.
Tip 2: Understand the nitro system
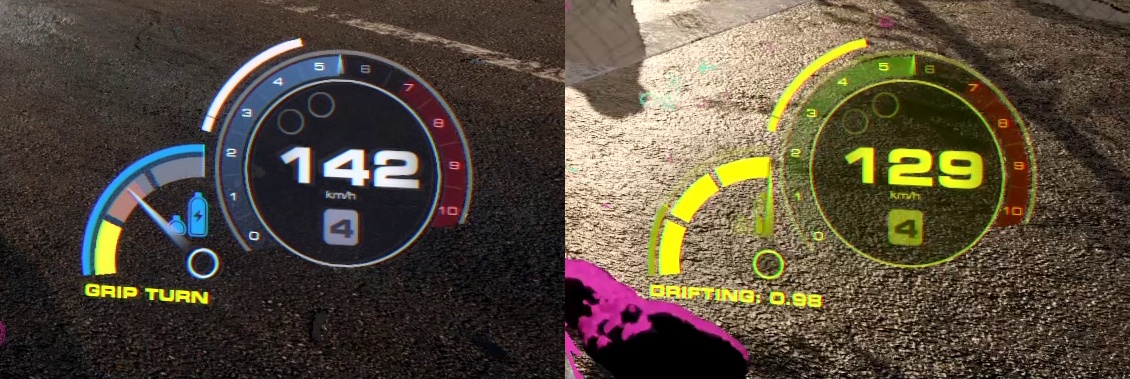
Compared to other Need for Speed parts developer Criterion Games has made some changes to Unbound”s handling of the familiar nitrous injection. There are now two separate bars. At the bottom right of the screen, to the left of the speedometer, you will see three fields, first grey, later yellow, and next to them a blue column.
- The blue boost is activated by continuously holding down the corresponding button (on the Xbox gamepad A).
- The yellow nitro rockets are ignited by tapping the same button individually.
Caution: The two nitro displays refill with different actions, this is indicated by small blue or yellow texts nearby. How it works:
- Blue boost
- In Counter Traffic Driving
- Automatic with time
- Yellow Boost
- In Windshadow drive
- Collisions only just avoided
- Drifting around curves
- Take grip curves (without drifting swiftly through the curve)
- Jumps execute
- Execute burnout (apply full throttle at the start of the race or with the brake held at a standstill)
- Execute a Donut (with a rear wheel drive, accelerate and brake at the same time until the rear wheels turn, then steer left or right and release the brake)
The most important difference: Yellow boost expires after a short timeif you don”t use it or perform other actions that pay into the nitro supply. This is then indicated with a red indicator and a cross.
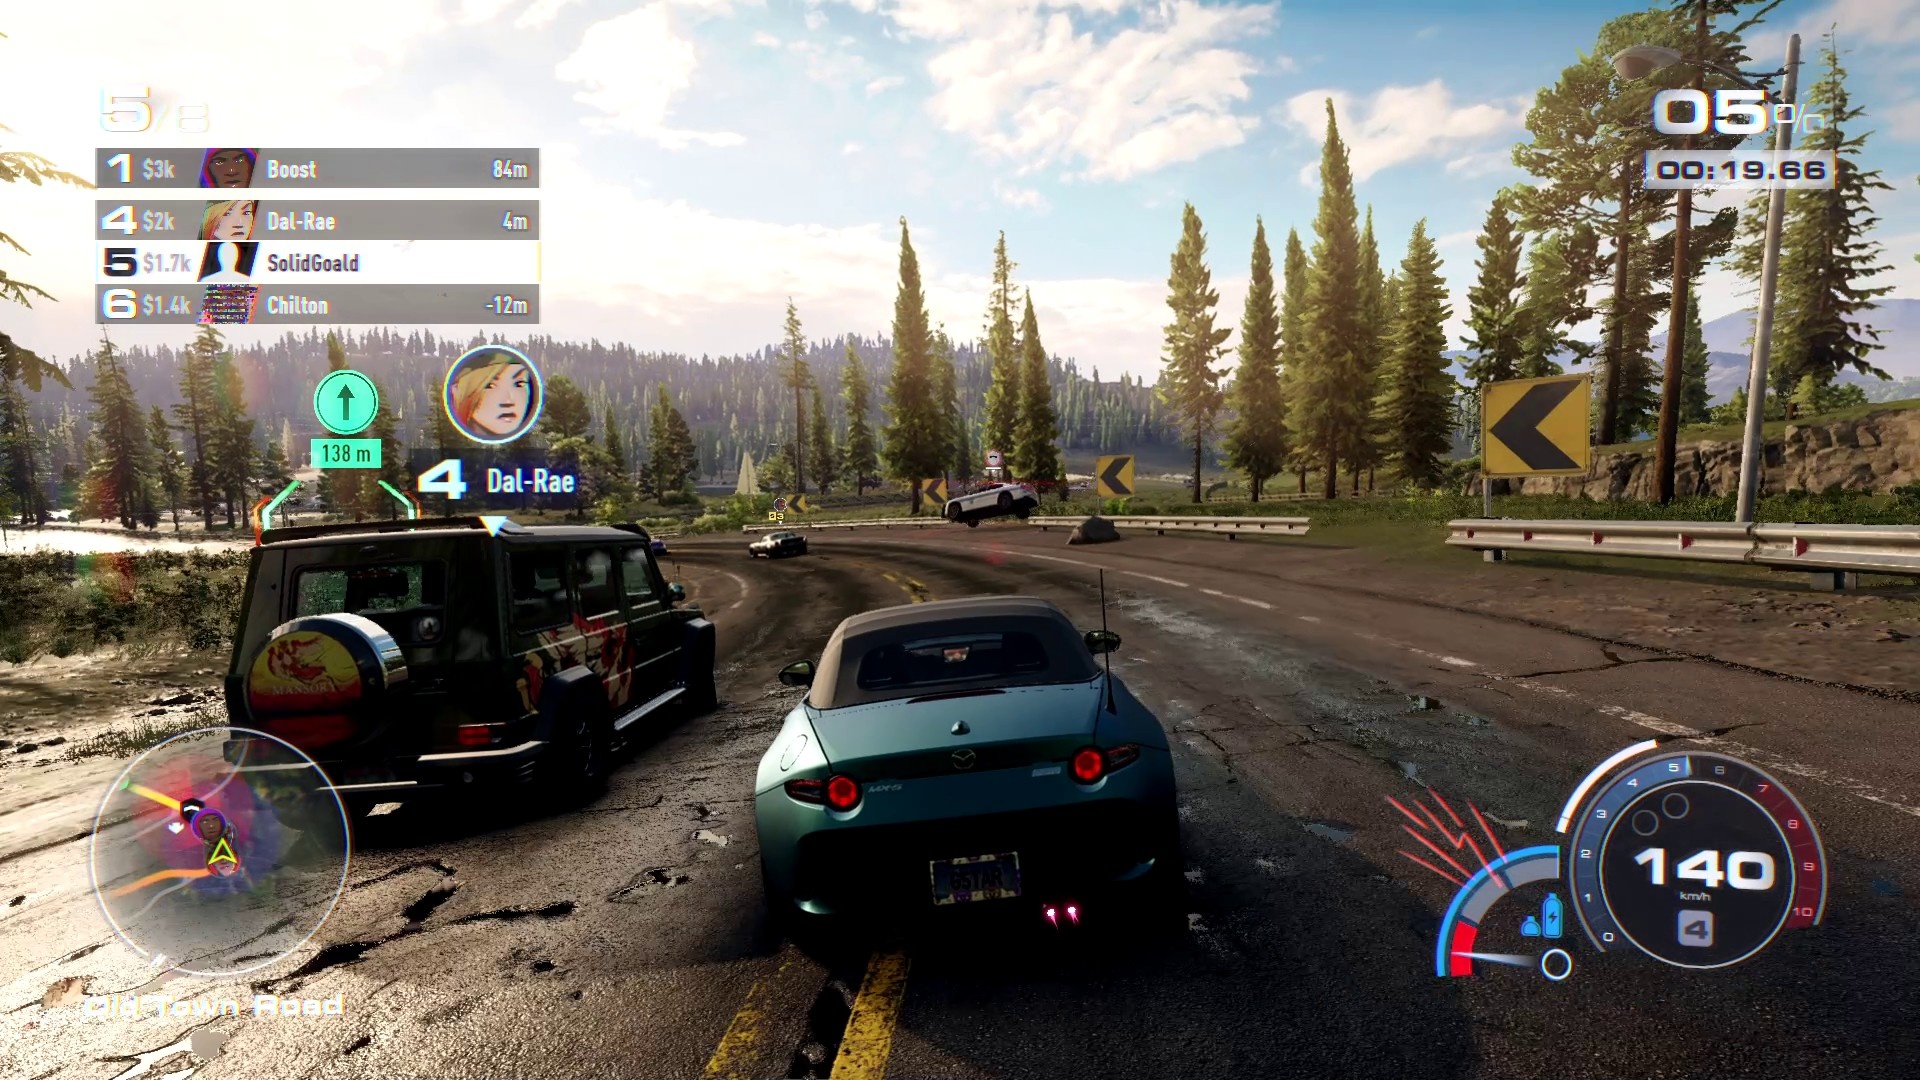
The system can be used tactically because you can boost blue at the start of the race while you are in the slipstream behind a car and farm yellow boost. This is important because the yellow boost increases the speed considerably at once, the car literally leaps forward – very practical for overtaking.
If possible, you should try to fill up the yellow boost bar to the maximum, i.e. have three yellow fields before you tap the A button. On long straight stretches, you can sprint past several competitors at the same time.
Depending on how a race starts, you can farm yellow boost at the beginning either by consistently slipstreaming, or by braking later than the competition in the first corner and drifting past on the inside. Now your yellow boost should have at least one field and you can immediately convert it into higher speed.
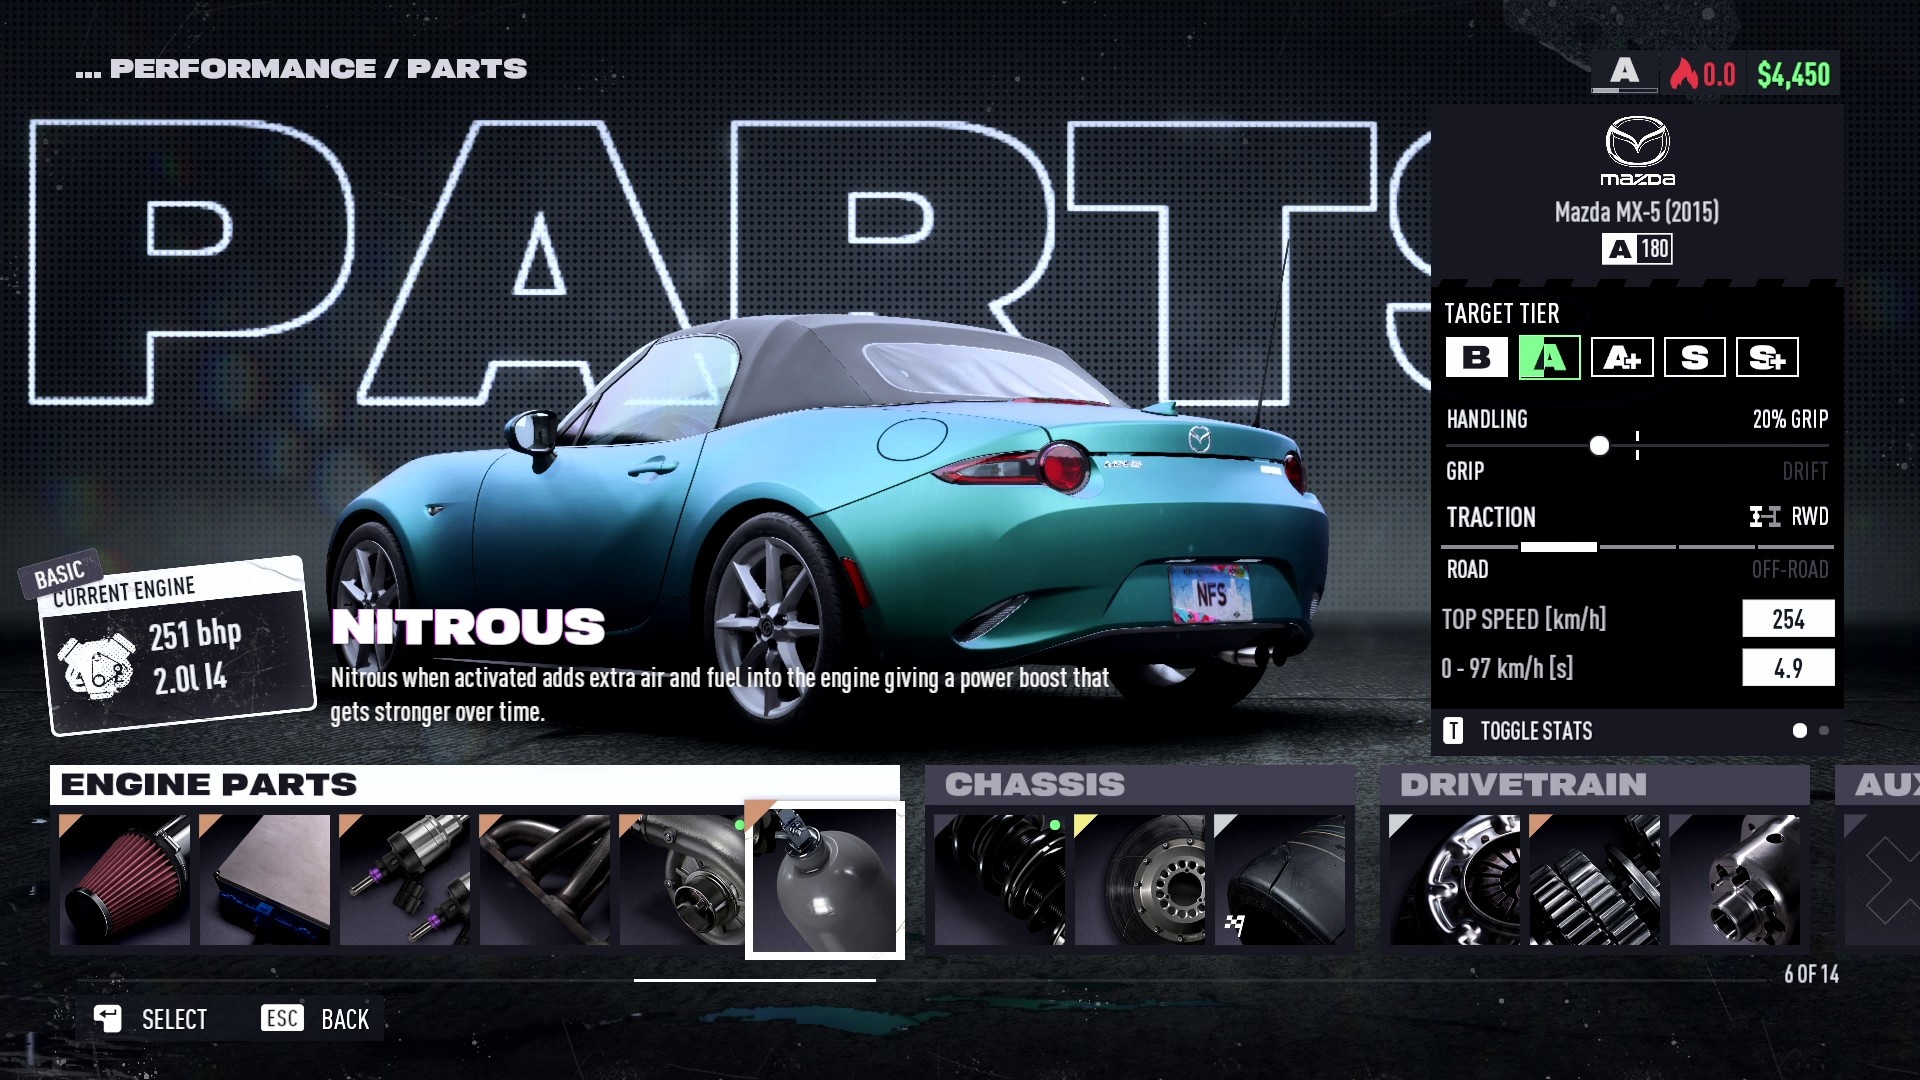
Tip: A nitro converter increases the rate at which you collect yellow boost, but this only works in one category at a time and costs 10,000 or 30,000 credits depending on your tuning level. You can find the nitro converter under “Auxiliary item” on the far right in the “Parts” overview of the car menu in your garage.
Tip 3: Customise your car
The driving model of Need for Speed Unbound is not perfect and every player has different demands on how a virtual car should steer. Therefore, I strongly recommend that you do not settle for the default settings, but rather make the most of Unbound”s options.
To do this, in the garage or while you are driving in the Open World (not racing, not being chased by the police), go to the menu item “Handling tuning” in the pause menu. Here you will see several sliders. The most important is at the top and concerns the handling, where you can choose between grip and drift.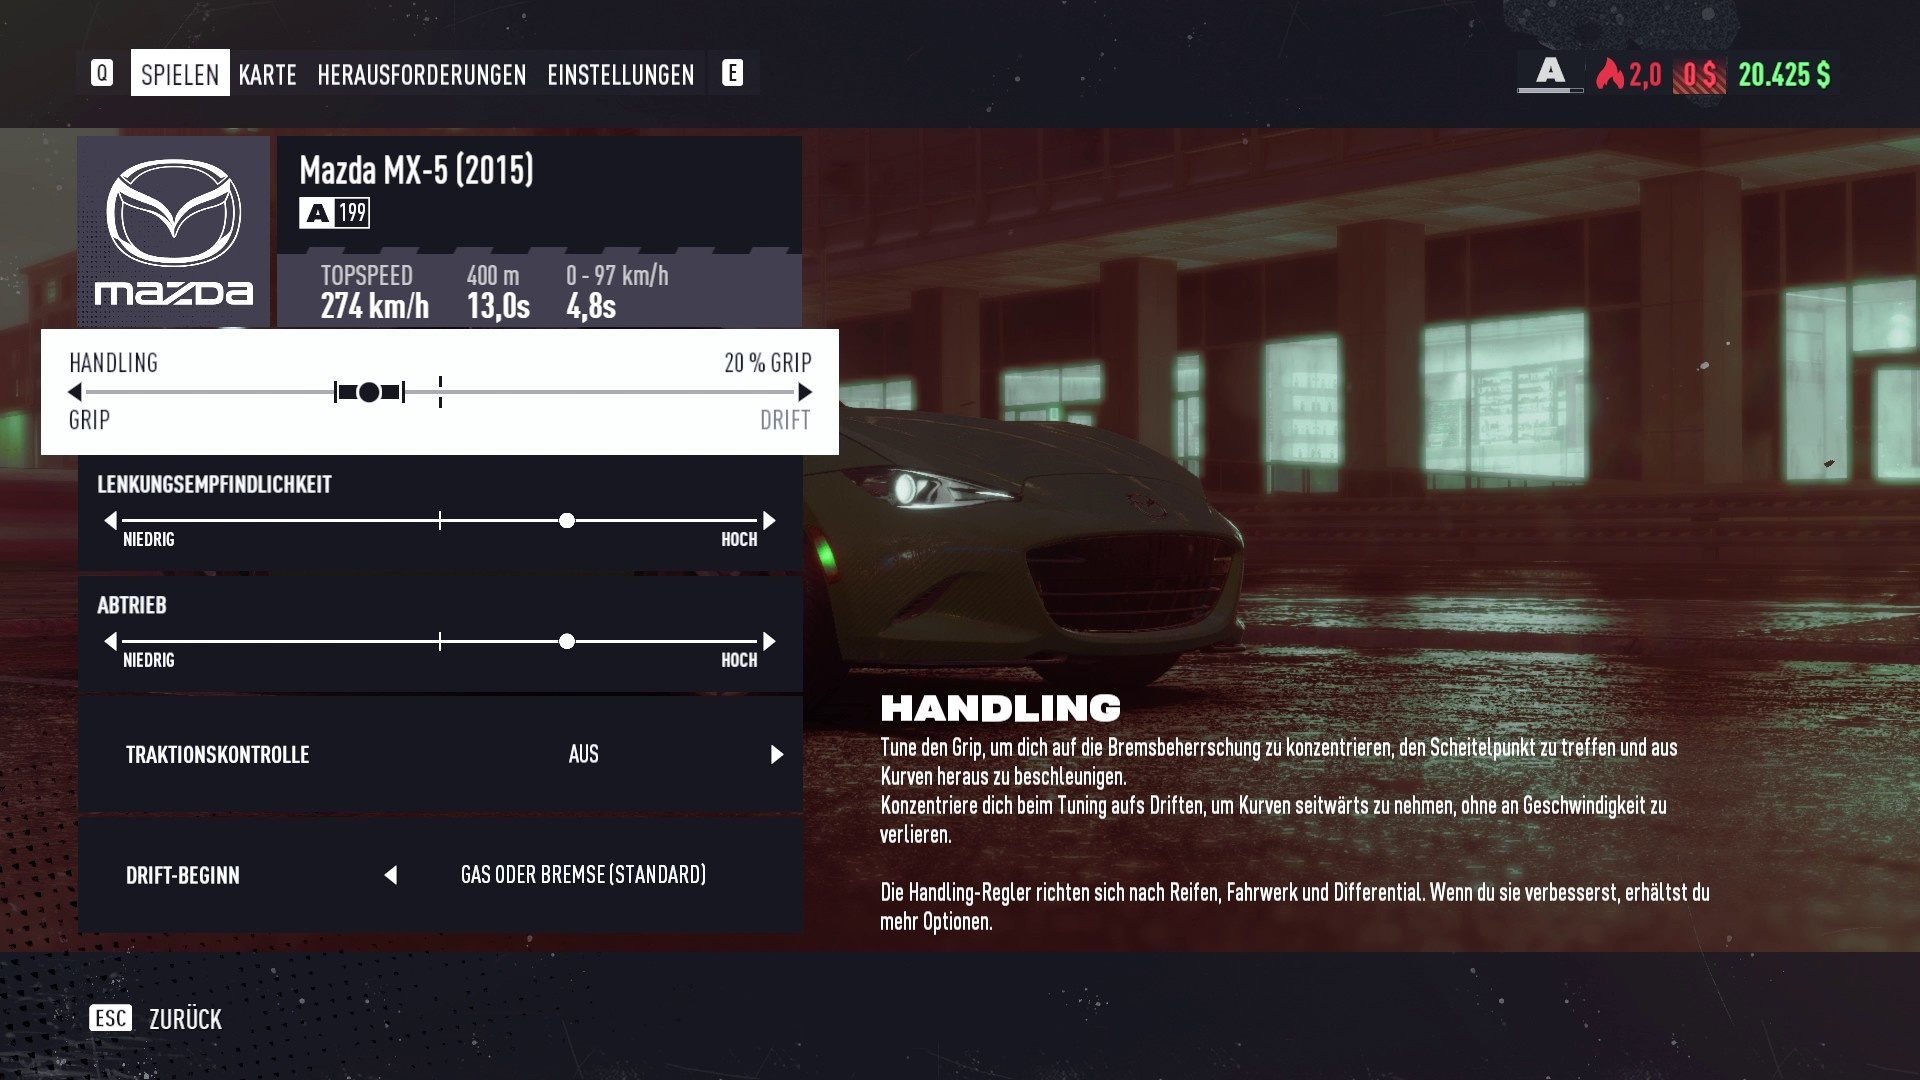
How far you can shift the setting in one direction or the other depends on the type of vehicle (watch out when buying a car!), but it can be shifted at least slightly afterwards with upgrades to tyres, suspension and differential gear.
As a rule of thumb: If you want to be fast, Grip is the right choice. On the other hand, if you have to complete a drift or takedown event or want to tackle the corresponding challenges, move the slider to the right. For better grip, you must also move the other two settings to the left.
My advice: Experiment a bit here until you have found the ideal combination . To check the settings, approach a bend at high speed, then take your foot off the accelerator, brake briefly and steer into the bend. Important: You can also set how you initiate drifts in the menu. In drift-exclusive events, the “brake” setting has proven to be a stumbling block because you often don”t have enough speed for high scores.
Of course you should upgrade your car diligently. Why else would you earn so much money? Pay attention to the performance increase of the installed parts, which always has an effect on the overall rating of the car and thus its class (B, A, A+, S, S+).
Incidentally, the game prevents you from upgrading your only car too far if no events are yet available for the newly achieved car class. At the same time, you can upgrade tuning parts again if you want to participate in lower racing classes. To do this, however, you always have to return to the garage, which results in a time-of-day change.
In the end, however, you will need several cars anyway. Note: You”ll get an extra B-car early in the campaign as a reward for winning.
Tip 4: Enjoy the Open World the way it was meant to be
The freely drivable game world of Need for Speed Unbound has one big feature: There is no fast travel. Only when you drive out of the garage can you select another safehouse on the world map as a spawn point.
Otherwise you always have to drive to each event, there is no comfortable teleport. You can curse this, but I personally decided to make a virtue out of necessity, and you should too. Don”t just drive stubbornly to the next race, explore the world and familiarise yourself with road layouts and shortcuts!
Tip: Normally the music is very timid in Free Driving, when exploring the game is almost silent. However, this can be changed in the options. Under “Audio”, navigate to “Overall music volume” and there to the sub-item “Free driving music”. Set this to “Always” if you also want to listen to the soundtrack outside of events. Cruising through the city is much more fun for me that way.
In the fictional city of Lakeshore there are all kinds of collectibles hidden that you don”t see on the map from the start. As you drive around, green dashed diamonds will pop up on the minimap when you pass one of these hiding places. Approach the inside of the diamond and it will turn into a symbol that tells you the location of the following objects:
- Bear Statue (destroy for credits)
- Billboard (destroy for credits)
- Graffiti (collect for new wrap designs)
There are also various challenges attached to the collectibles. You will receive a stream of new emotes and designs for your car if you collect items diligently. I recommend you do the same, because the quest is motivating and the rewards are useful.
In addition, you will come across activities that are also not marked on the map :
- Speed-Runs (beat a certain average speed on a marked course).
- Speed-Traps (beat a certain speed at one point)
- Driftzonen (drift on a marked course as long as possible within the time limit)
- Long jumps (exceed a certain flying distance on a ramp)
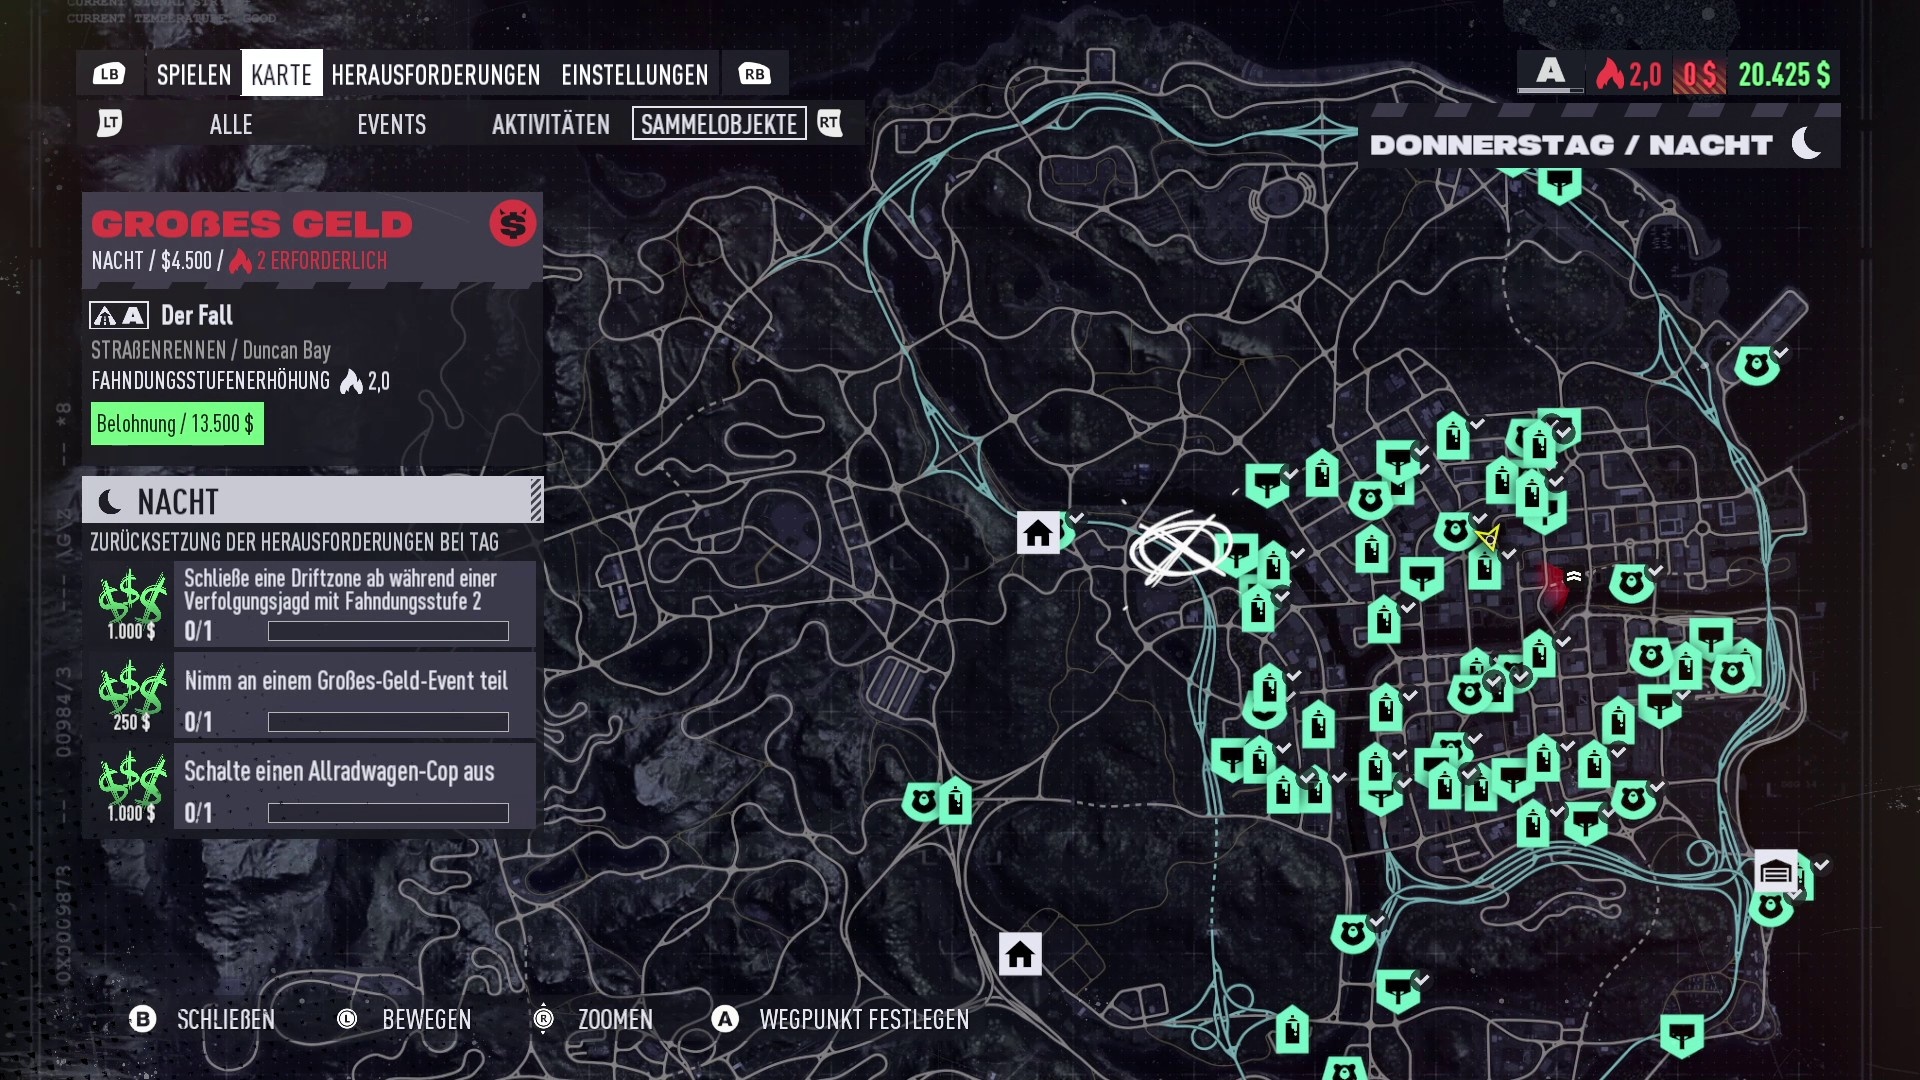
You get credits and challenge rewards for this too. Play around with them a bit instead of always racing straight to the next event. On the world map, you can use the filter function to get an overview of all the collectibles and activities you have discovered so far. In addition, the game displays the special challenges that change every day, which will further increase your account balance if you complete them.
Tip 5: Think before you start an event
I have already written something about racingtactics in the Nitro Boost above, now let”s take a look at the racingstrategy . What do I mean by that? Well, in Need for Speed Unbound you have to think minimally more when choosing events than in many other arcade racing games and especially than in previous parts of the series.
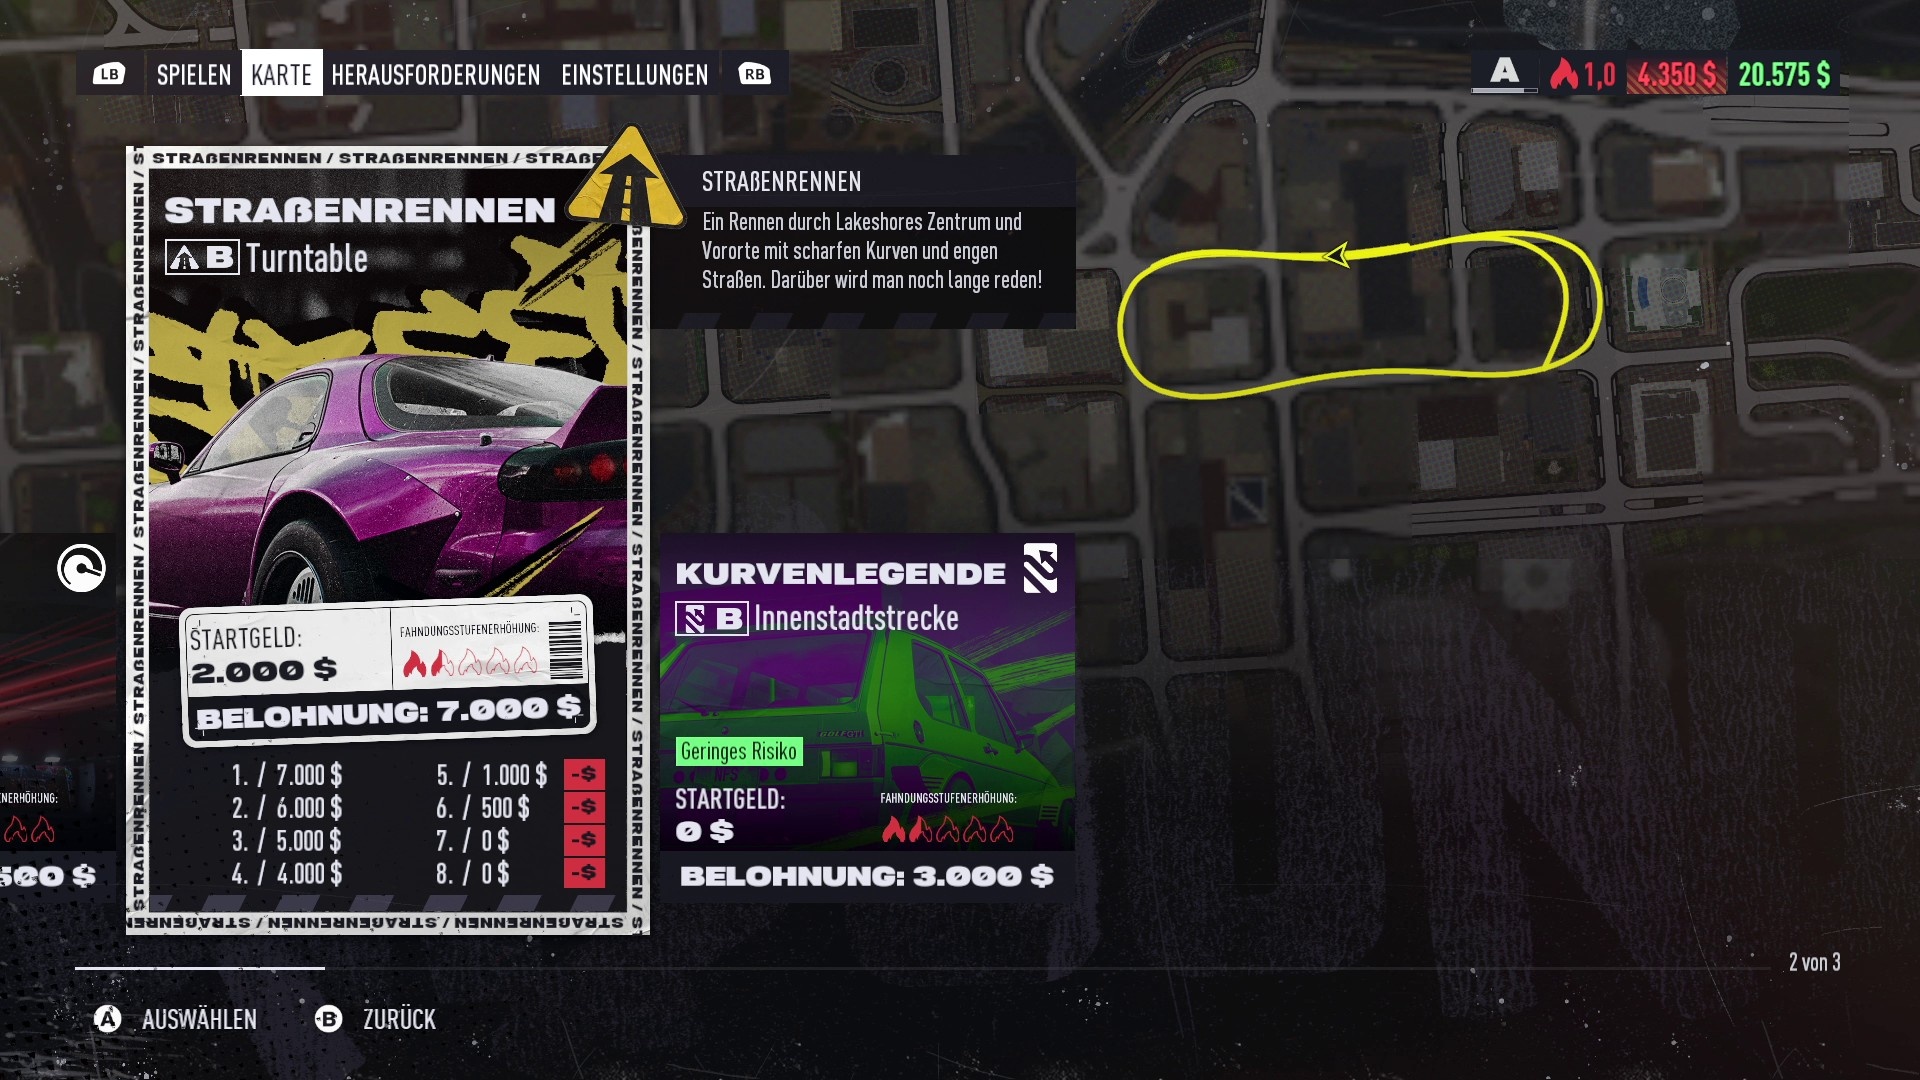
The map will show you which car class an event requires. Then read the description of the offered events carefully, especially the expected increase of the search level/heat is interesting. If you are smart, structure your race days in such a way that the low-risk events are lined up first, which increase your Wanted level with the police (Heat) only slightly or not at all.
Since the buy-in in many events opens up a large pot, which is then distributed proportionally to the winner and the next-place finishers, it is not absolutely necessary to win every race. Instead, a second or third place can also be worthwhile.
This is especially interesting because you only have a limited number of restarts per day or night (four on “Normal”, ten on “Easy”). So you can”t restart a race at will every time you make a driving mistake. Better save the replays for the high buy-in races where a bad finish would hurt.
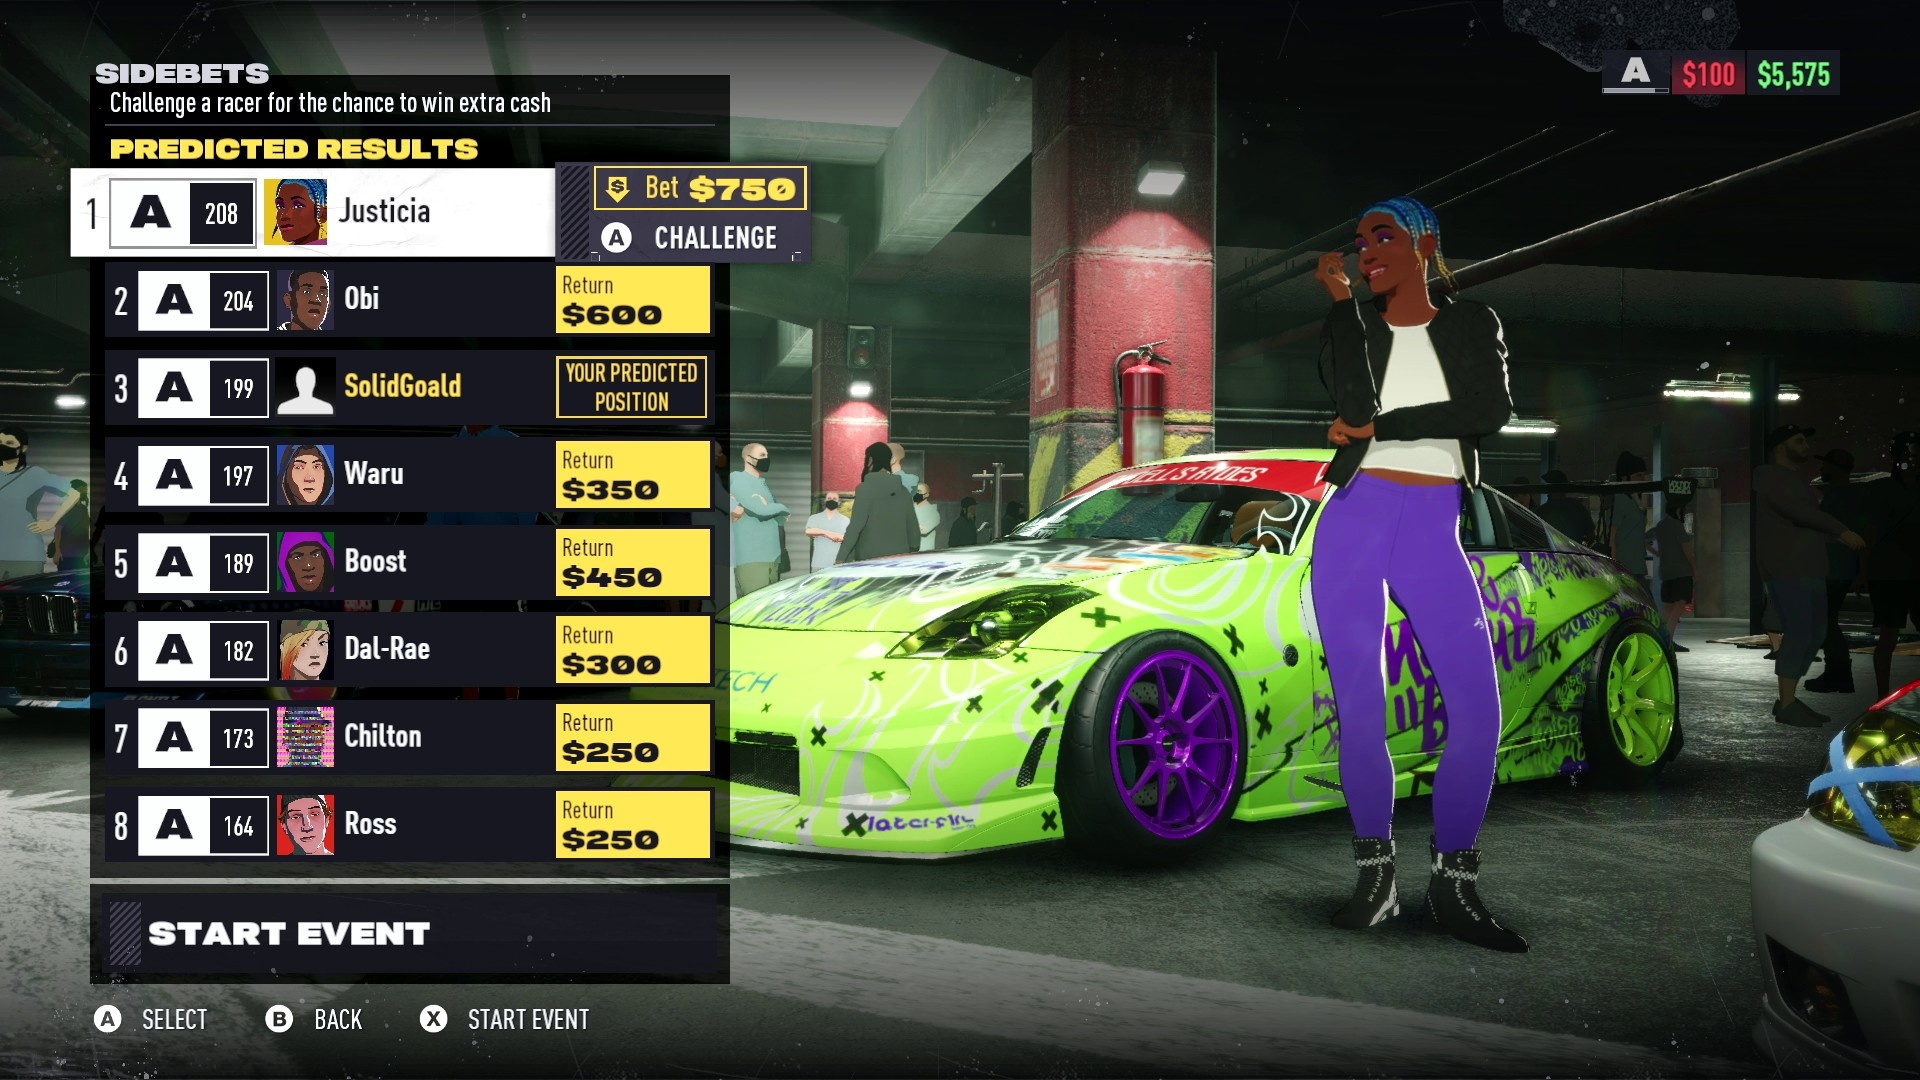
In Unbound you can also place side bets for the first time. My tip: Don”t do this at first! If you”re just starting out with a new car class without many upgrades, the AI opponents are far too fast, at least on the normal difficulty level, for you to expect big leaps here and to be able to overtake competitors ahead of you in the ranking with any certainty.
The easiest way to earn money with the side bets is to bet that you will end up one place higher than the game calculated. Note: Often the betting costs are the same for several competitors, so in this case choose the opponent with the lowest vehicle ranking.
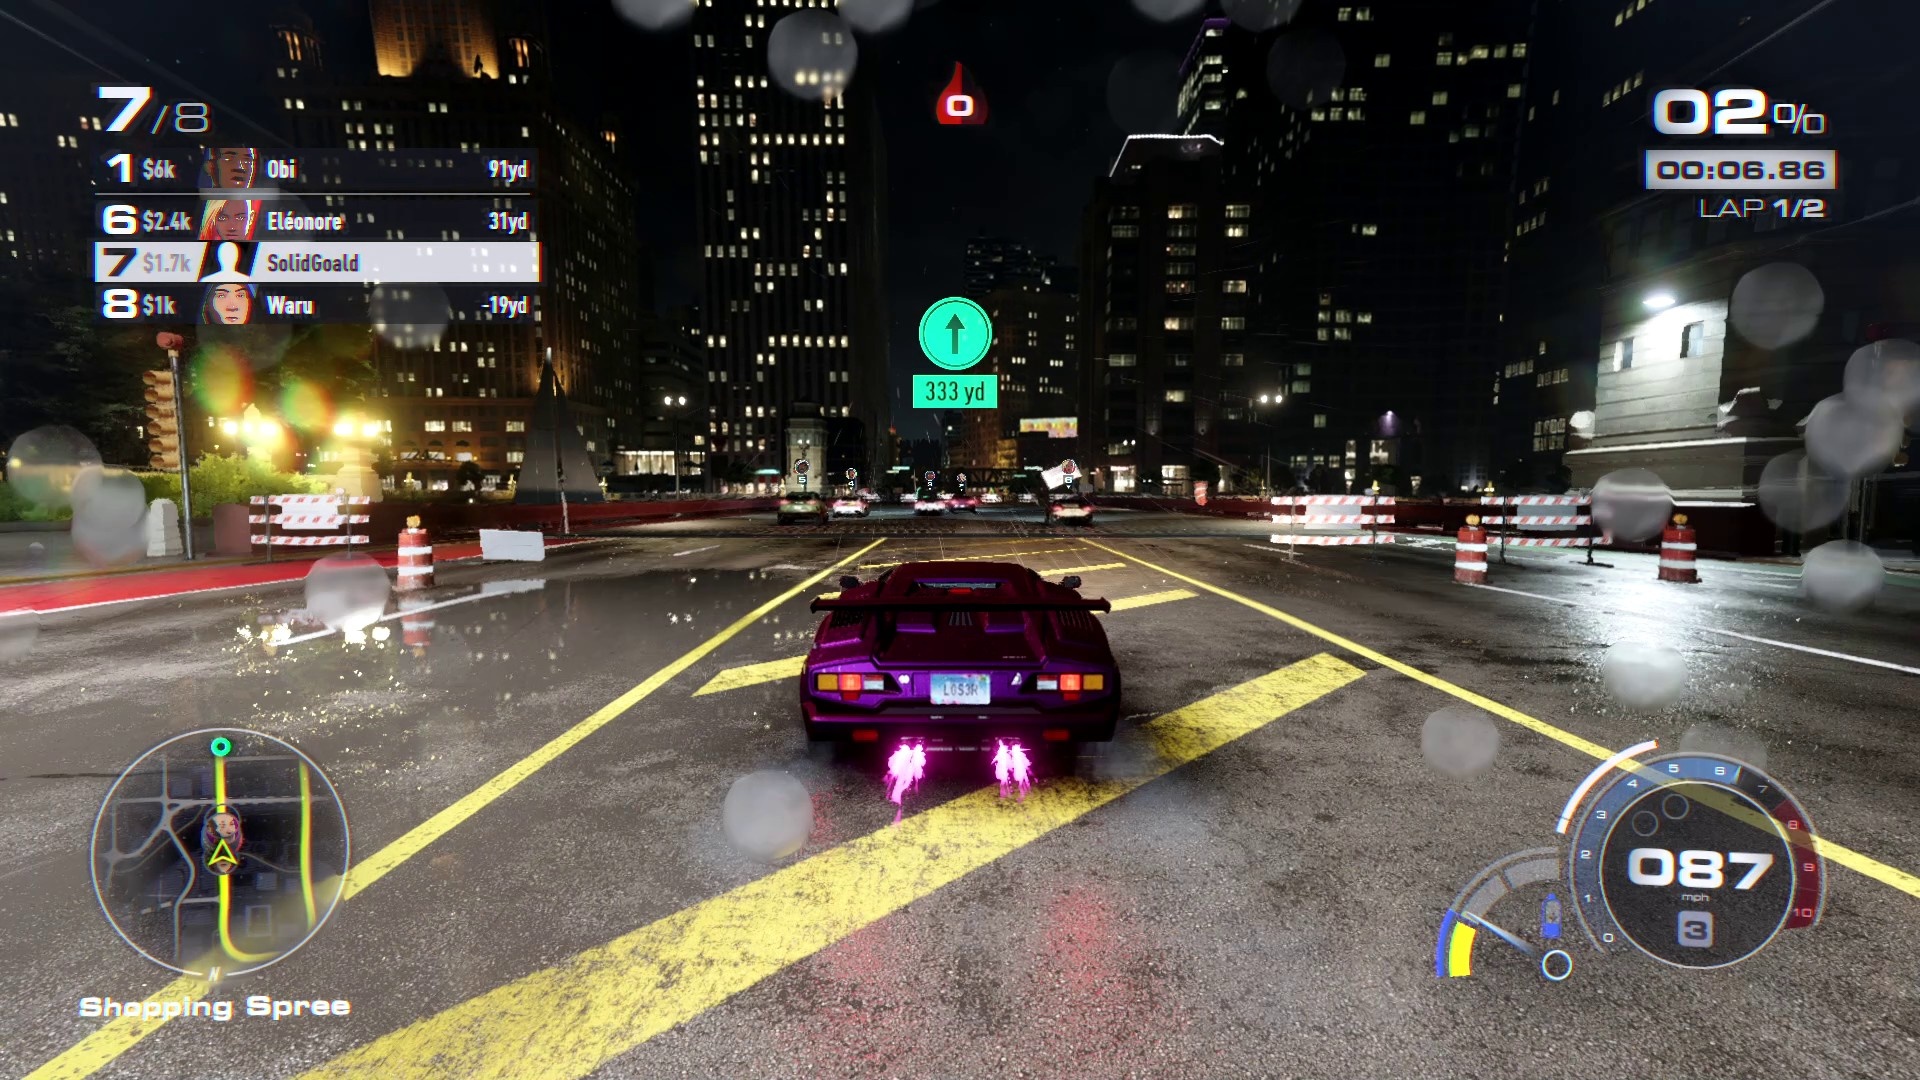
Tip 6: Avoid the police
Unbound will deliberately bash you in the pan: The more events you complete in a day/night before you drive back to the garage, the more your search level will increase and the more difficult it will be to literally drive home the credits you”ve earned. Because the police are absurdly aggressive in the new Need for Speed
Everything below level 4 shouldn”t cause you too many problems, but after that it gets hairy. So my tip: Don”t be too shy to avoid a chase If on level 5 the helicopter flies around above you or you spot the red cones of roaming police cars on the minimap, it makes sense to park next to the road behind a building or in the thicket. Switch off the engine (B button on the gamepad) and wait until the cops have passed.

A useful upgrade that makes you harder to spot for cops is unfortunately only available towards the end of the upgrade path. Before that, you have to be content with increasing the collision damage, for which there is a body reinforcement under “Auxiliary item”. This allows you to take out law enforcement officers a little faster, but it almost only works in a head-on collision. Otherwise, you are limited to tricking the opponents:
- To shake off the clinging cops, it is generally advisable to turn off as quickly and surprisingly as possible, even several times in a row.
- Drive in tunnels or stay under subways (in the city, the tram rattling above your heads is perfect) to confuse helicopters.
- Fast police cars from level 2 onwards that are driving next to you or in front of you can be easily lost on the freeway if you speed towards the centre of the concrete pillar of the next exit and then take the turn that is furthest away from the police officer.
- Jumps and freeways built on top of each other are great for jumping through barriers by surprise and changing lanes over several floors. Most cops can”t handle that.
You can easily avoid - nail bars and roadblocks on the sides (watch for flashing lights). With a bit of luck, even one of your pursuers will rush into the blockade.
If the HUD flashes red after several total losses, your car is about to give up the ghost. This will immediately result in an arrest and you will lose all your money. Repair the car by driving through the petrol stations scattered across the game world. Note that you will not be able to use this quick fix for several minutes afterwards.
Once you have reached level 5, you will not have a moment”s peace. Return to a safehouse as soon as possible, even if you have unfinished events on your list. The heat indicator will only go down again when the time of day changes. Another way to take on the pesky cops is described in my last tip
Tip 7: Don”t be too proud to play on “Easy “
Need for Speed Unbound is one of the most challenging arcade racers in a long time. That”s mostly because of the police, see point 6. What I”m about to advise you to do at the end of this guide may offend your honour. But after many hours in Lakeshore, this is my conviction: Don”t be afraid to turn down the difficulty if you”re not having fun with Unbound.
Personally, when switching from day to night I have switched to the easiest of the three difficulty levels. Especially at night, the police are extremely aggressive and spoil the fun of the game when I just want to drive to an event instead of having a gigantic chase through half the city every two minutes.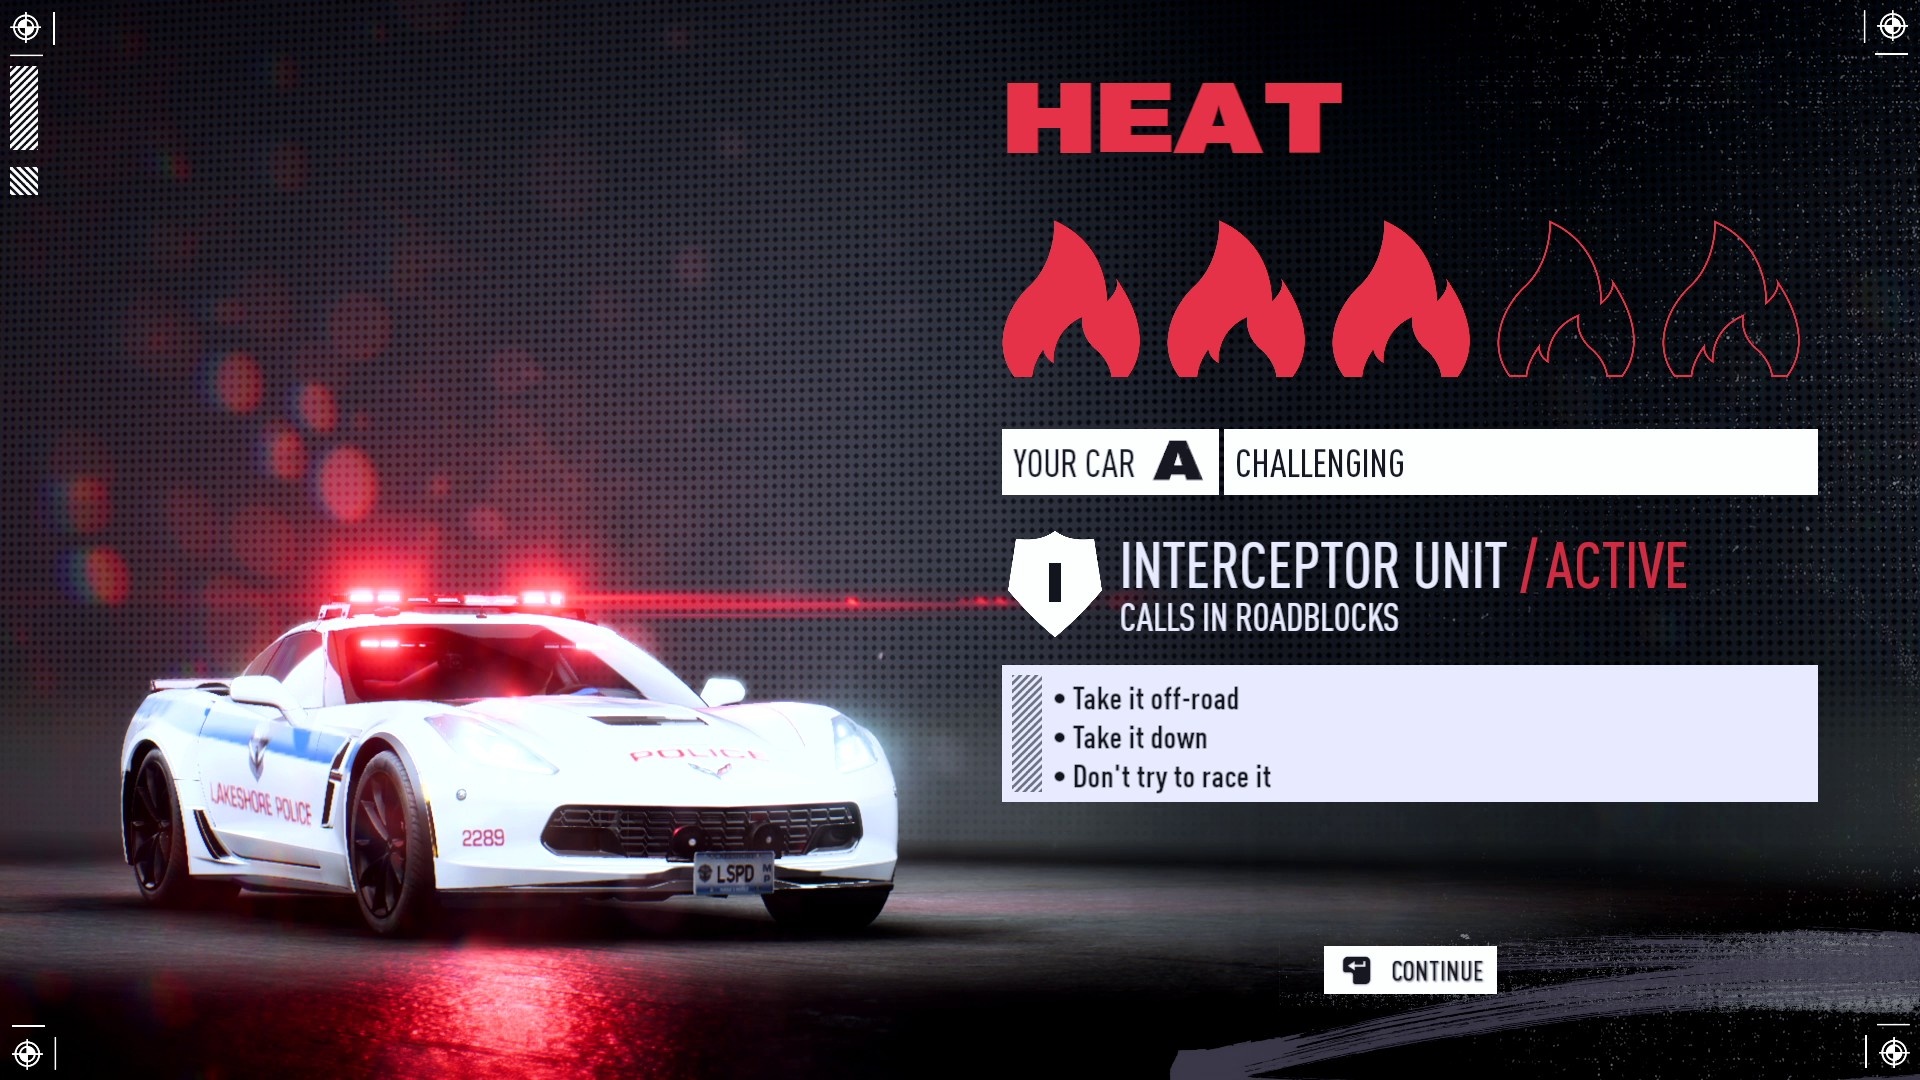
During the day, on the other hand, the normal difficulty level suits me very well; unfortunately, the difficulty for events and police cannot be set separately in NfS Unbound. Until Criterion Games possibly improves this with a patch, I use the garage visit between night and day to manually change the difficulty – because only then is this possible at all in the main menu under “Game”.
If this is too extreme for you or you have other tips for Unbound, feel free to write it in the comments!
