

Dying Light 2 can eat hardware for breakfast. Our tuning tips tell you the best way to increase the FPS without the graphics suffering too much.
Dying Light 2 offers fast gameplay with its parkour elements, which also comes off well in our test. It is therefore all the more important that the performance is right. Who wants to become zombie fodder just because the FPS was once again too low?
The comparatively high demands on the hardware make things even more difficult. As our check of the system requirements shows, the official specifications are very accurate, but also very demanding, especially in combination with ray tracing.
This is where our tuning guide comes into play. We have carried out numerous measurements and taken screenshots to be able to tell you exactly which options you can best turn down for more FPS without the graphics suffering too much.
In addition to manual tuning, we also look at the effects of the five presets and how much upscaling techniques like DLSS and FSR bring to the game and how good they look.
What should be the minimum FPS and how do I measure the FPS?
For a smooth gaming experience, you should reliably achieve values above 60 frames per second. If you have a monitor with a particularly high refresh rate such as 144 hertz, even triple-digit FPS values are desirable. However, not everyone feels the difference to values in the double-digit range to the same extent.
If you play via Steam, it is possible to display the FPS in the game directly via the settings. Select the In-game entry in the options and choose one of the four positions in the FPS display in game drop-down menu. Alternative methods using tools such as the MSI Afterburner are described in the article FPS & Display PC load – Setting up the on-screen display in games.
Table of Contents
For the impatient: Our tuning tier list
Let’s get straight to the point. The table below assigns all graphic settings to one of three different categories:
- Number one (high FPS gains without much visual loss)
- Optional settings (manageable gains, some of which are situational)
- Barely worth it (brings little FPS and/or degrades the visuals too much)
We are referring to the options from the advanced graphics menu. You can access it by pressing the F key in the video settings.
In order to assess the tuning potential of the various options, we have measured the maximum performance gain between the highest and lowest setting (see also the graph below).
The highest setting is used with ray tracing and the highest setting without ray tracing. After all, not every PC has a graphics card with ray tracing support (Geforce RTX 2000/3000, Radeon RX 6000). Our measurements lead to the following classification:
https://www.global-esports.news/wp-content/uploads/2022/02/Our-measurements-lead-to-the-following-classification.png
Before we go into more detail about the reasons for the classification, an important note: The result may vary depending on the exact scene and hardware. So consider our figures as a rough guide and not as a guaranteed FPS gain in the respective percentage range mentioned.
Number one tuning centres
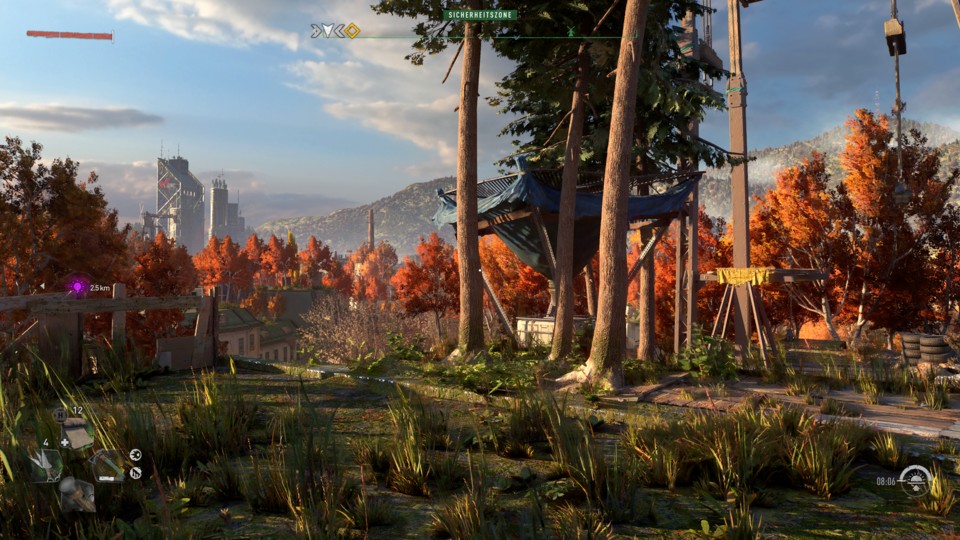
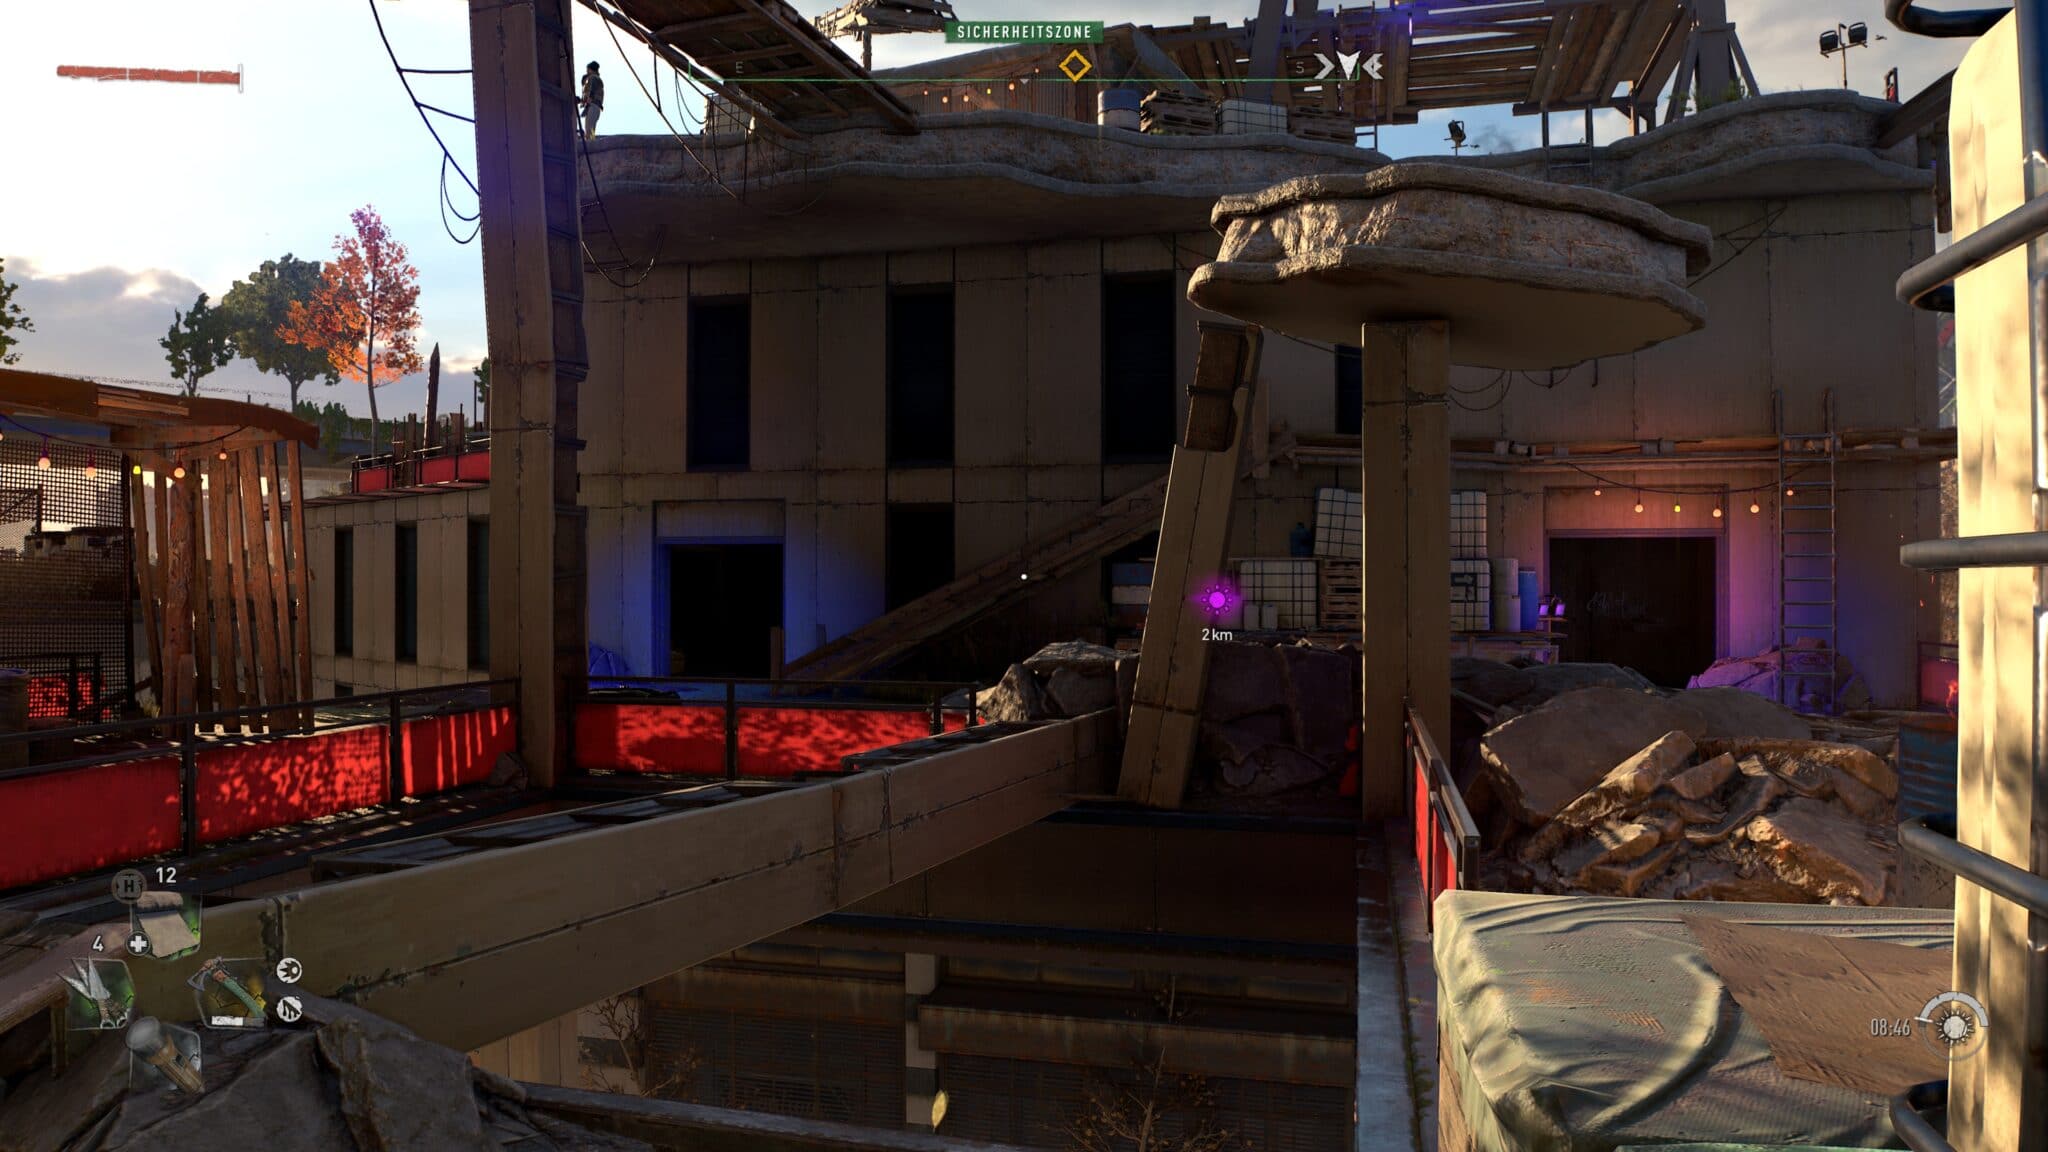
Quality of reflections
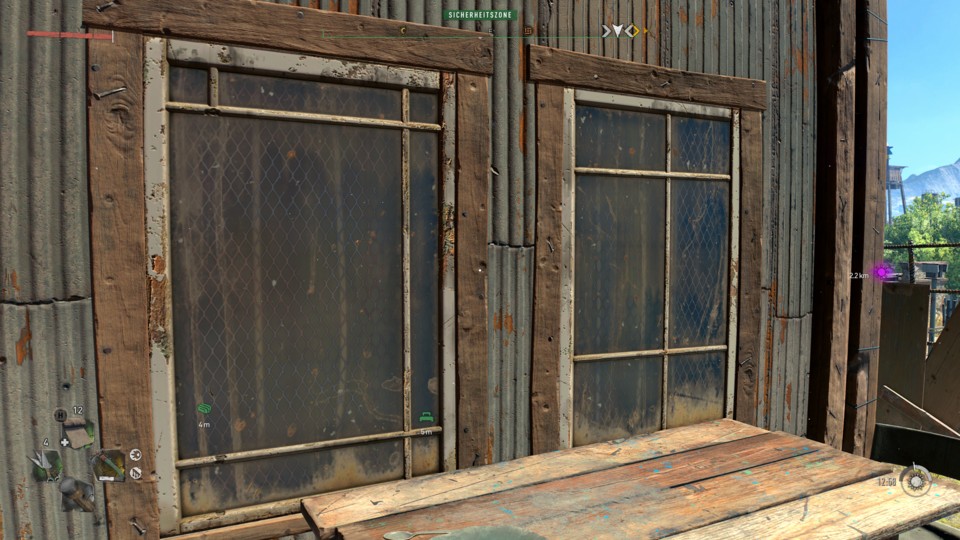
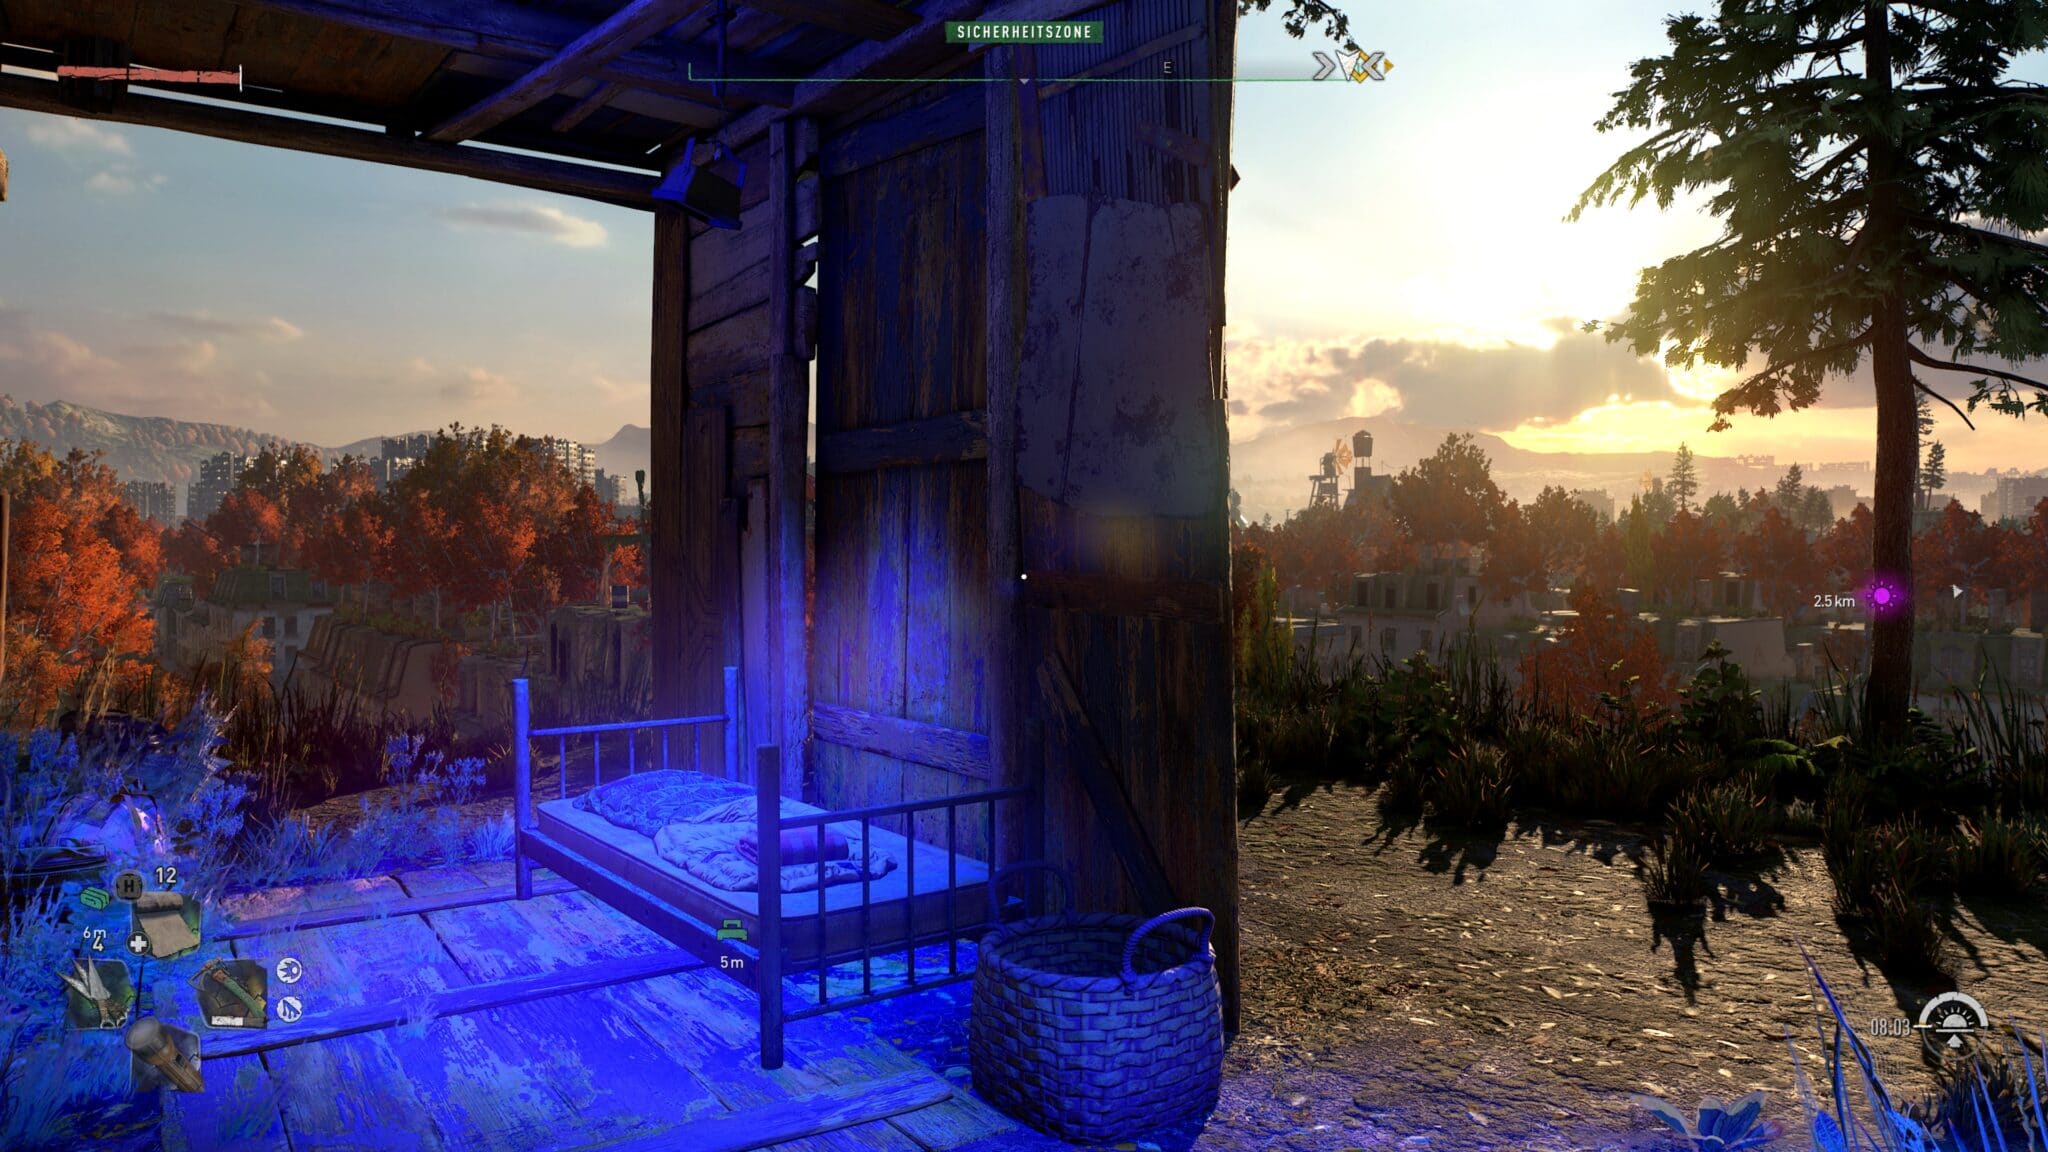
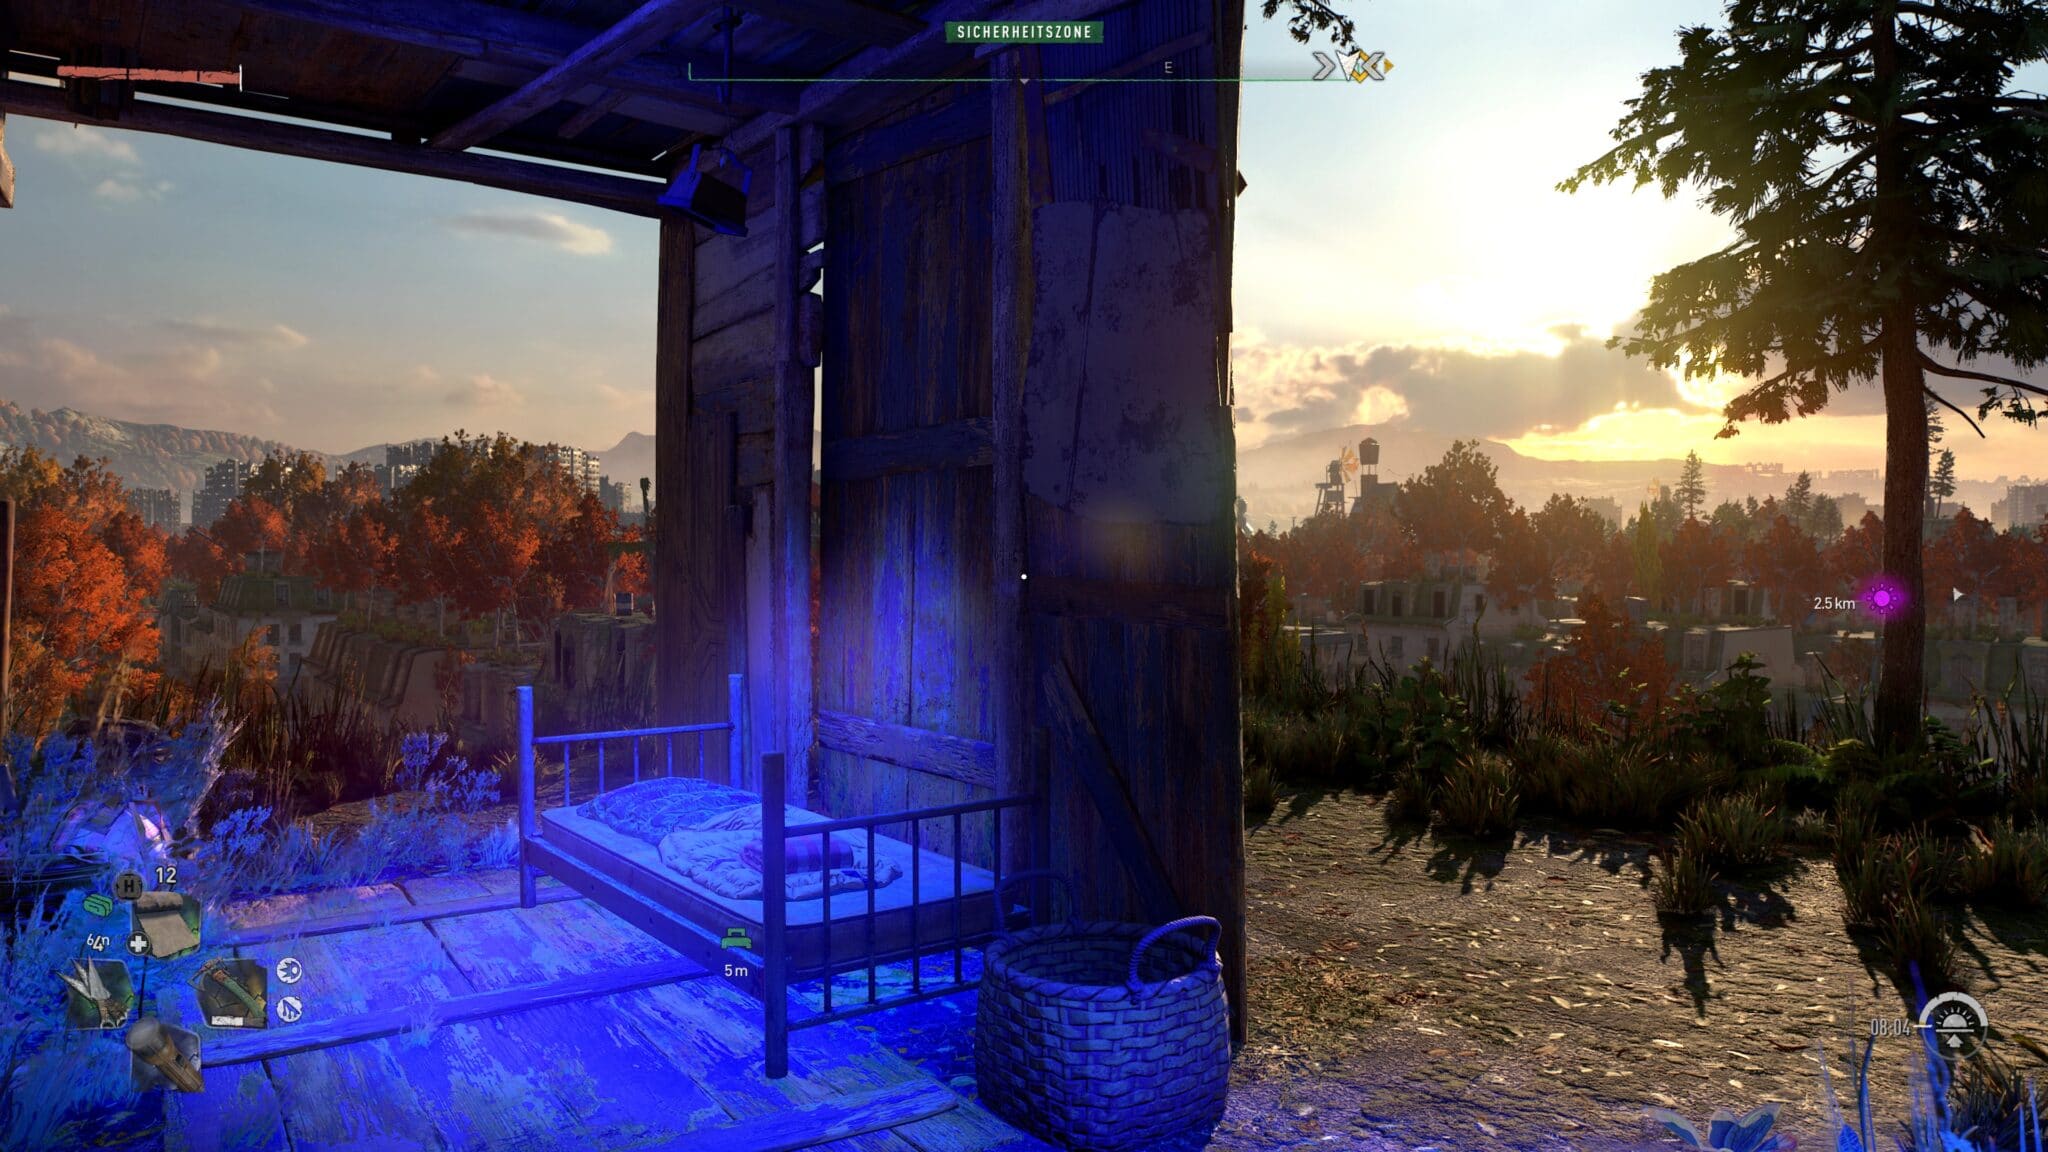
With FPS gains in the range of about six to 14 percent, reflections are the most promising tuning option. This is all the more true since the amount of reflective surfaces in Dying Light 2 is limited and, in our experience, you hardly notice the difference (see also the image below) in fast-paced gameplay anyway.
Fog quality
We measure a quite remarkable performance gain of about eight to ten percent. There may be slight image errors at the lowest level when volumetric fog is visible, but this is not equally noticeable to everyone and depends on the scene. Our recommendation: Start with Medium for tuning and lower the option to Low if you want to achieve an even greater FPS gain.

A certain special case is represented by the asynchronous calculations. They are only available with DirectX 12 and DirectX 12 Ultimate and increase the FPS by about five percent.
However, this option should be activated by default, so that additional tuning is usually not possible. A quick check to see if the asynchronous calculations are activated as desired can’t hurt.
Optional Tuning Settings
Environmental Coverage Quality
When ray tracing is generally off, we measure a quite noteworthy FPS gain of seven percent. With ray tracing, however, the gain drops to about two percent when switching to the lowest level. This option is therefore particularly suitable for PCs without ray tracing support or if you want to do without ray tracing for other reasons.
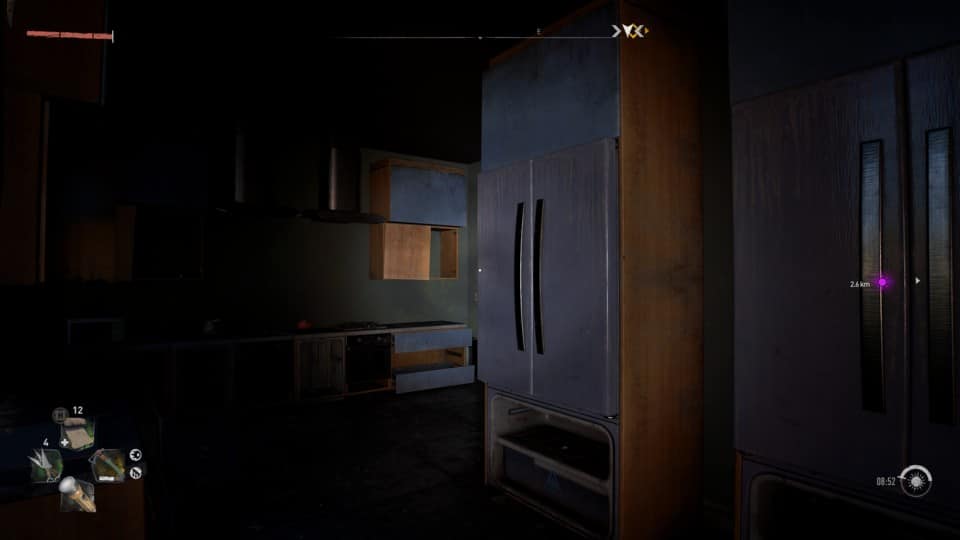
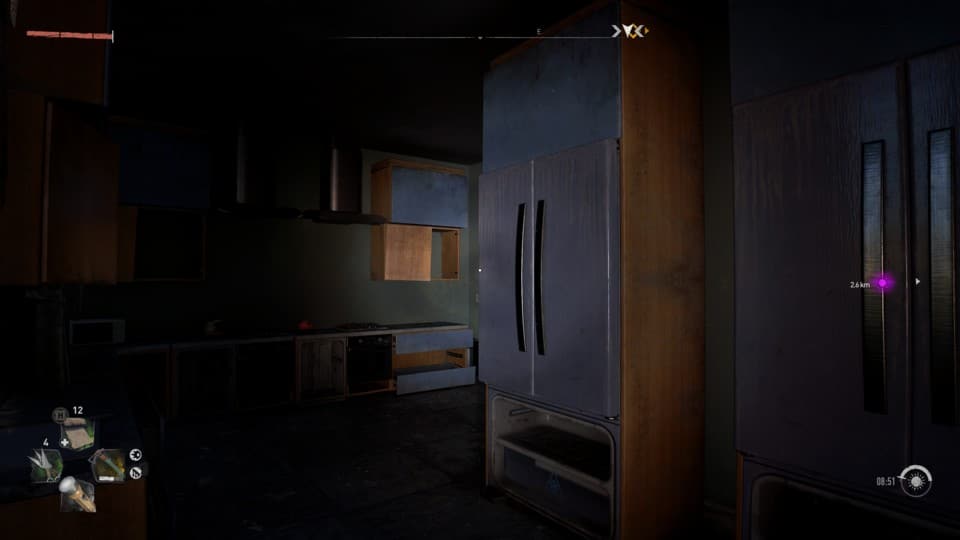
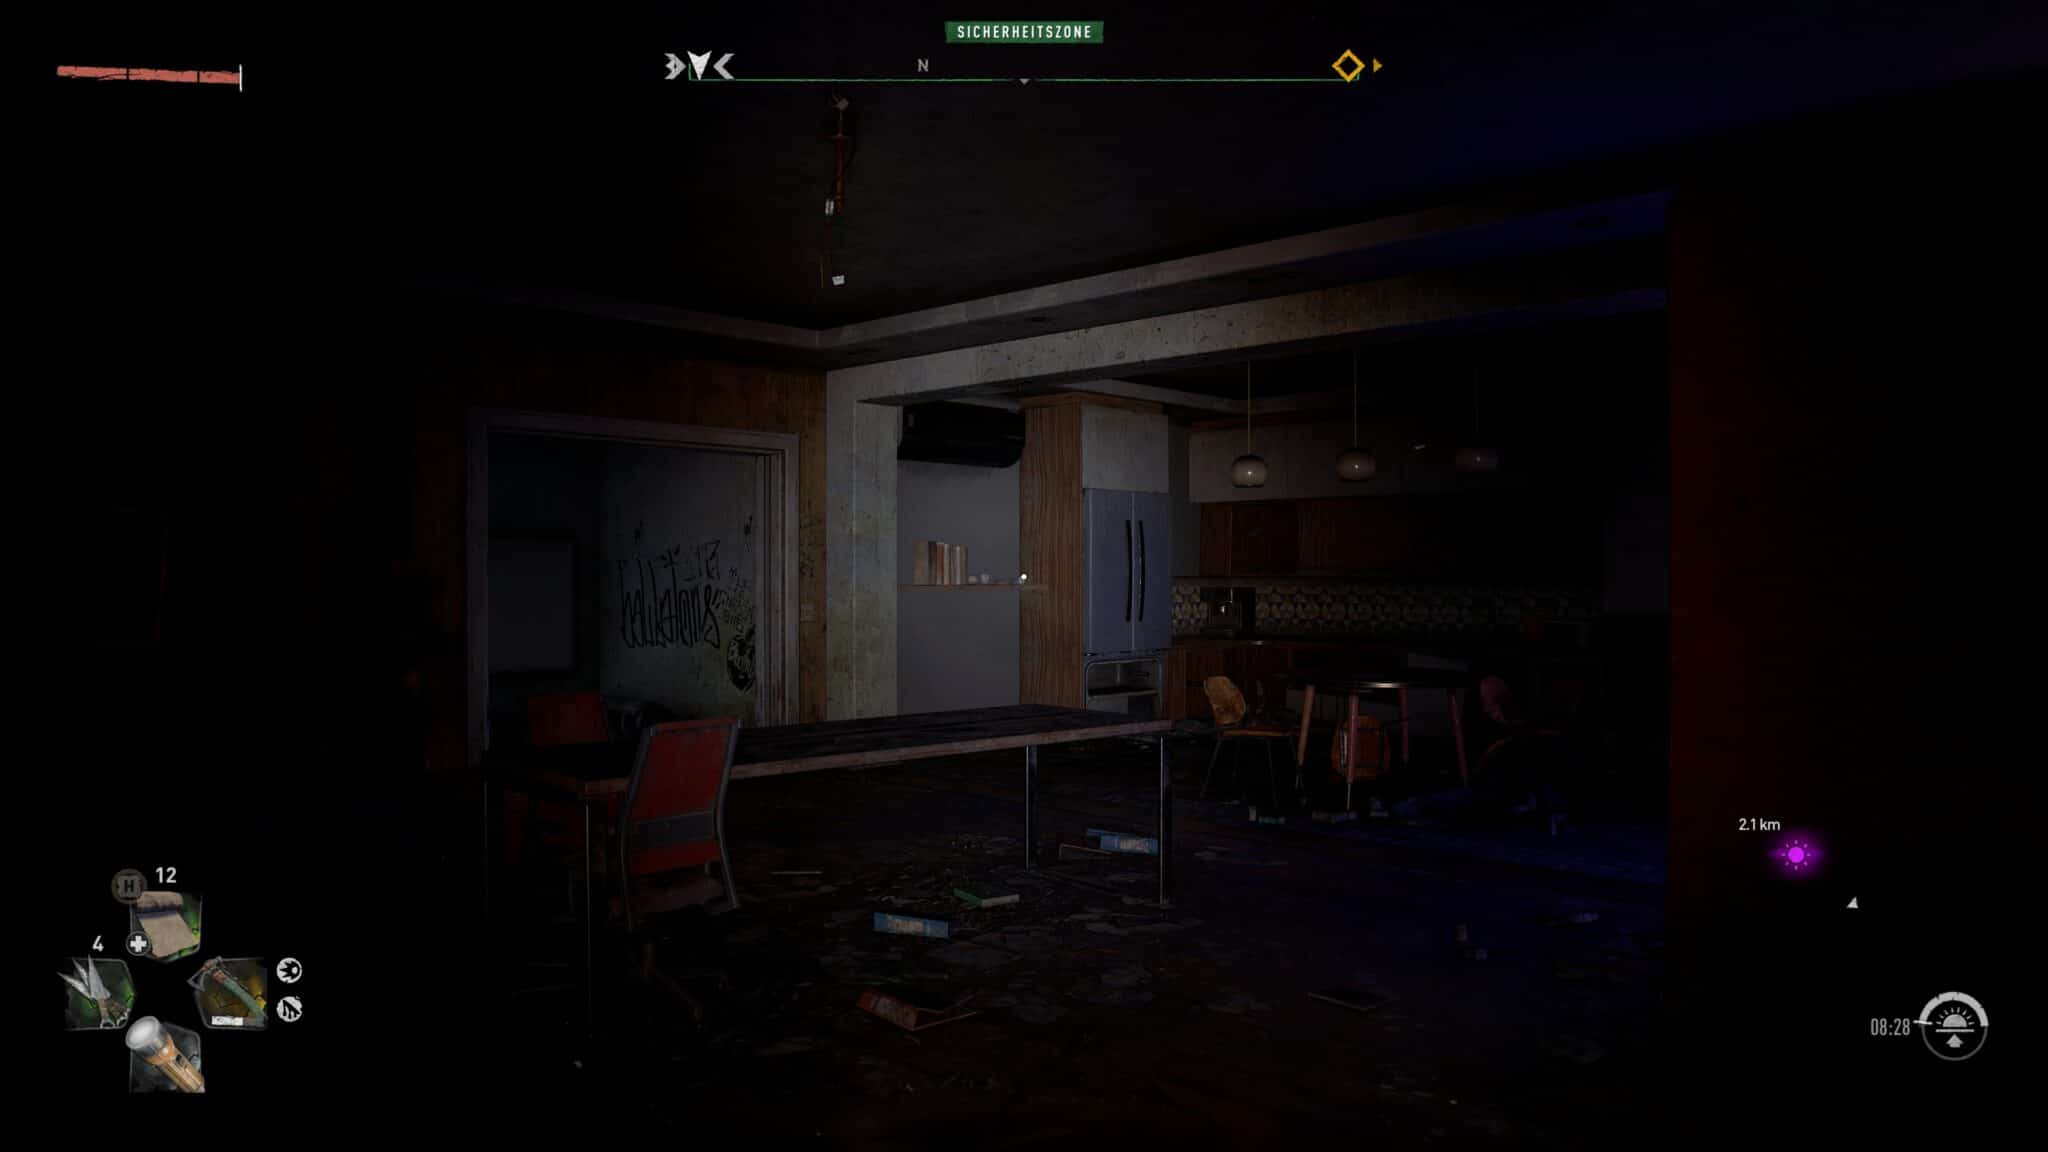
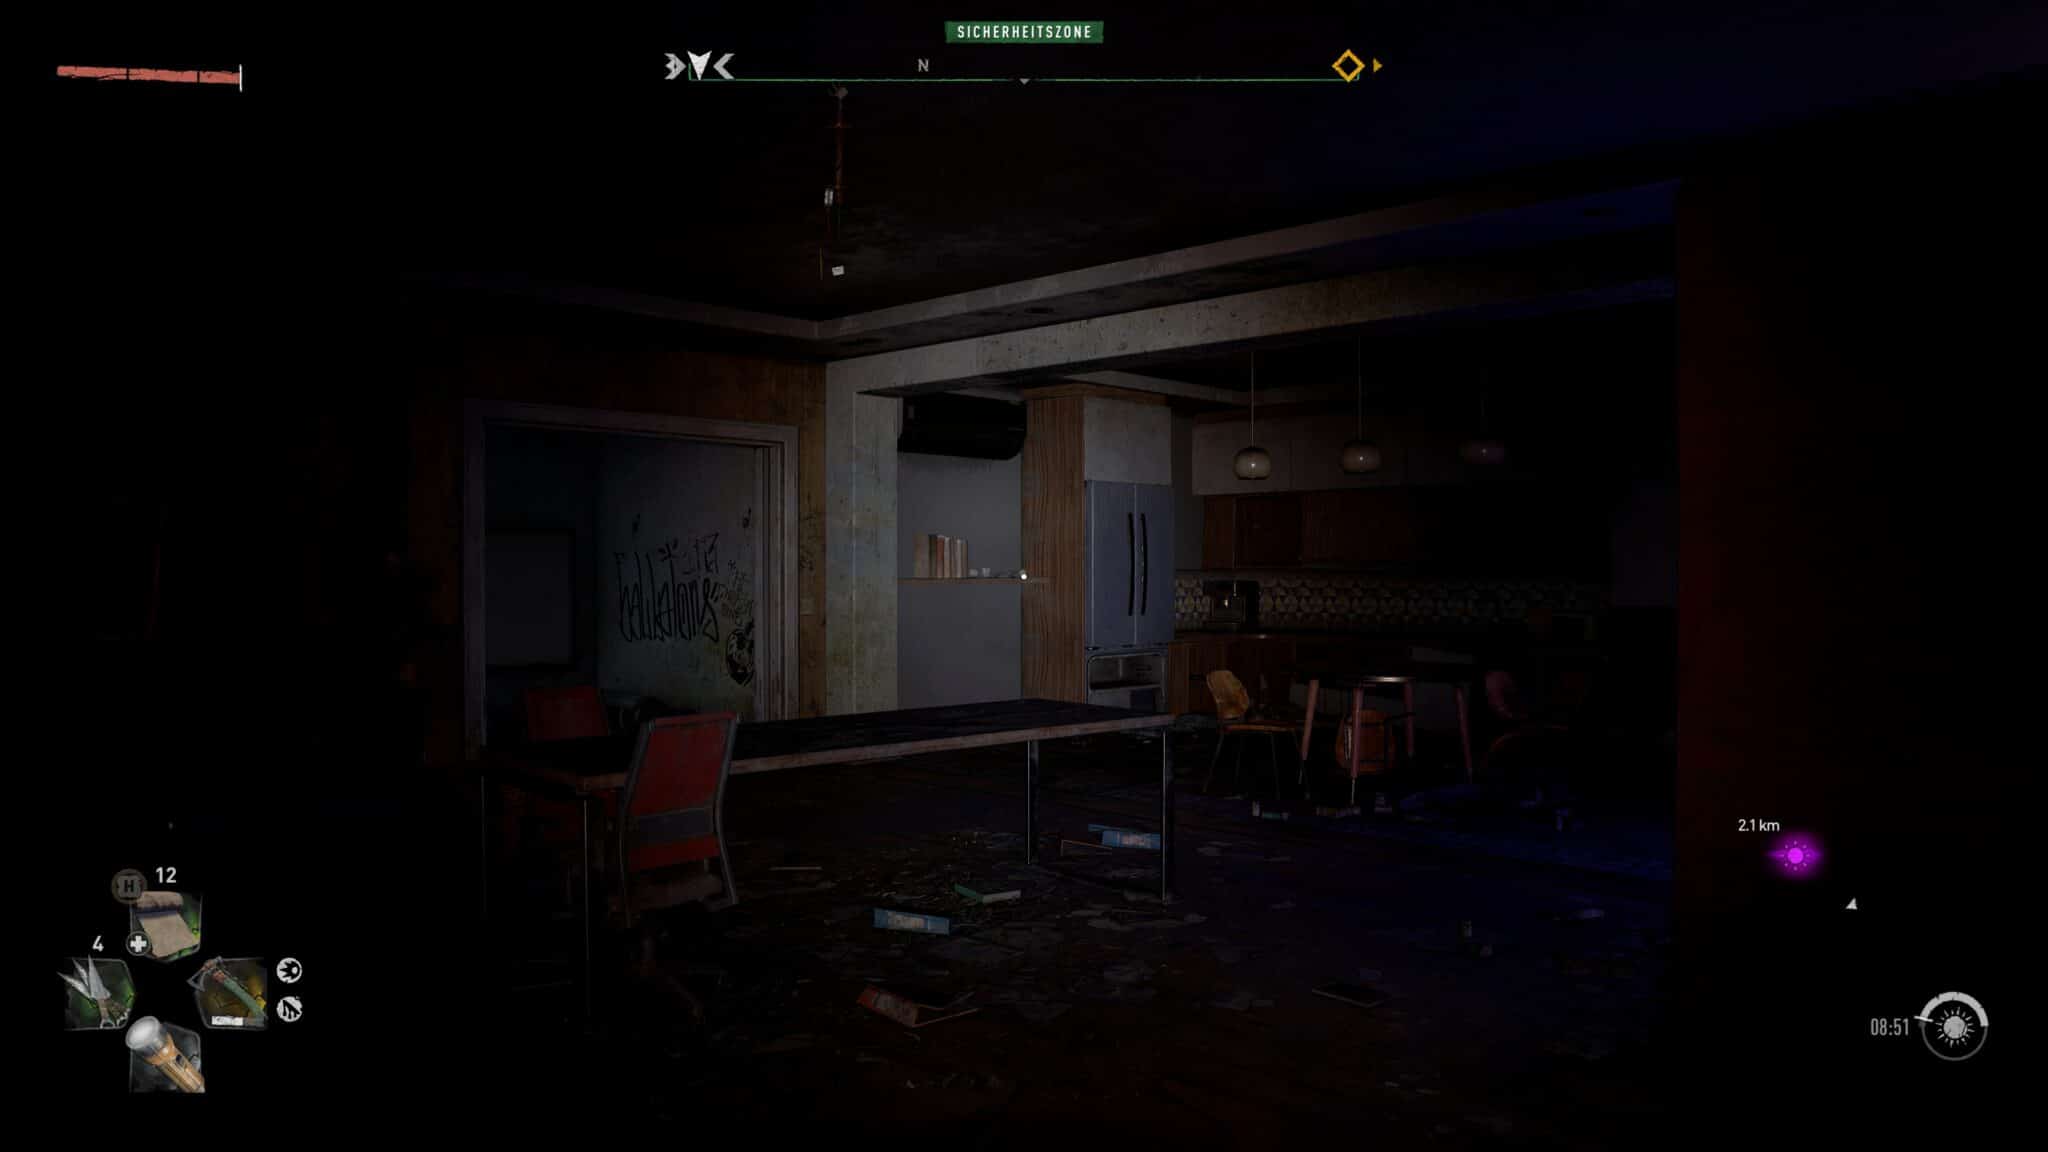
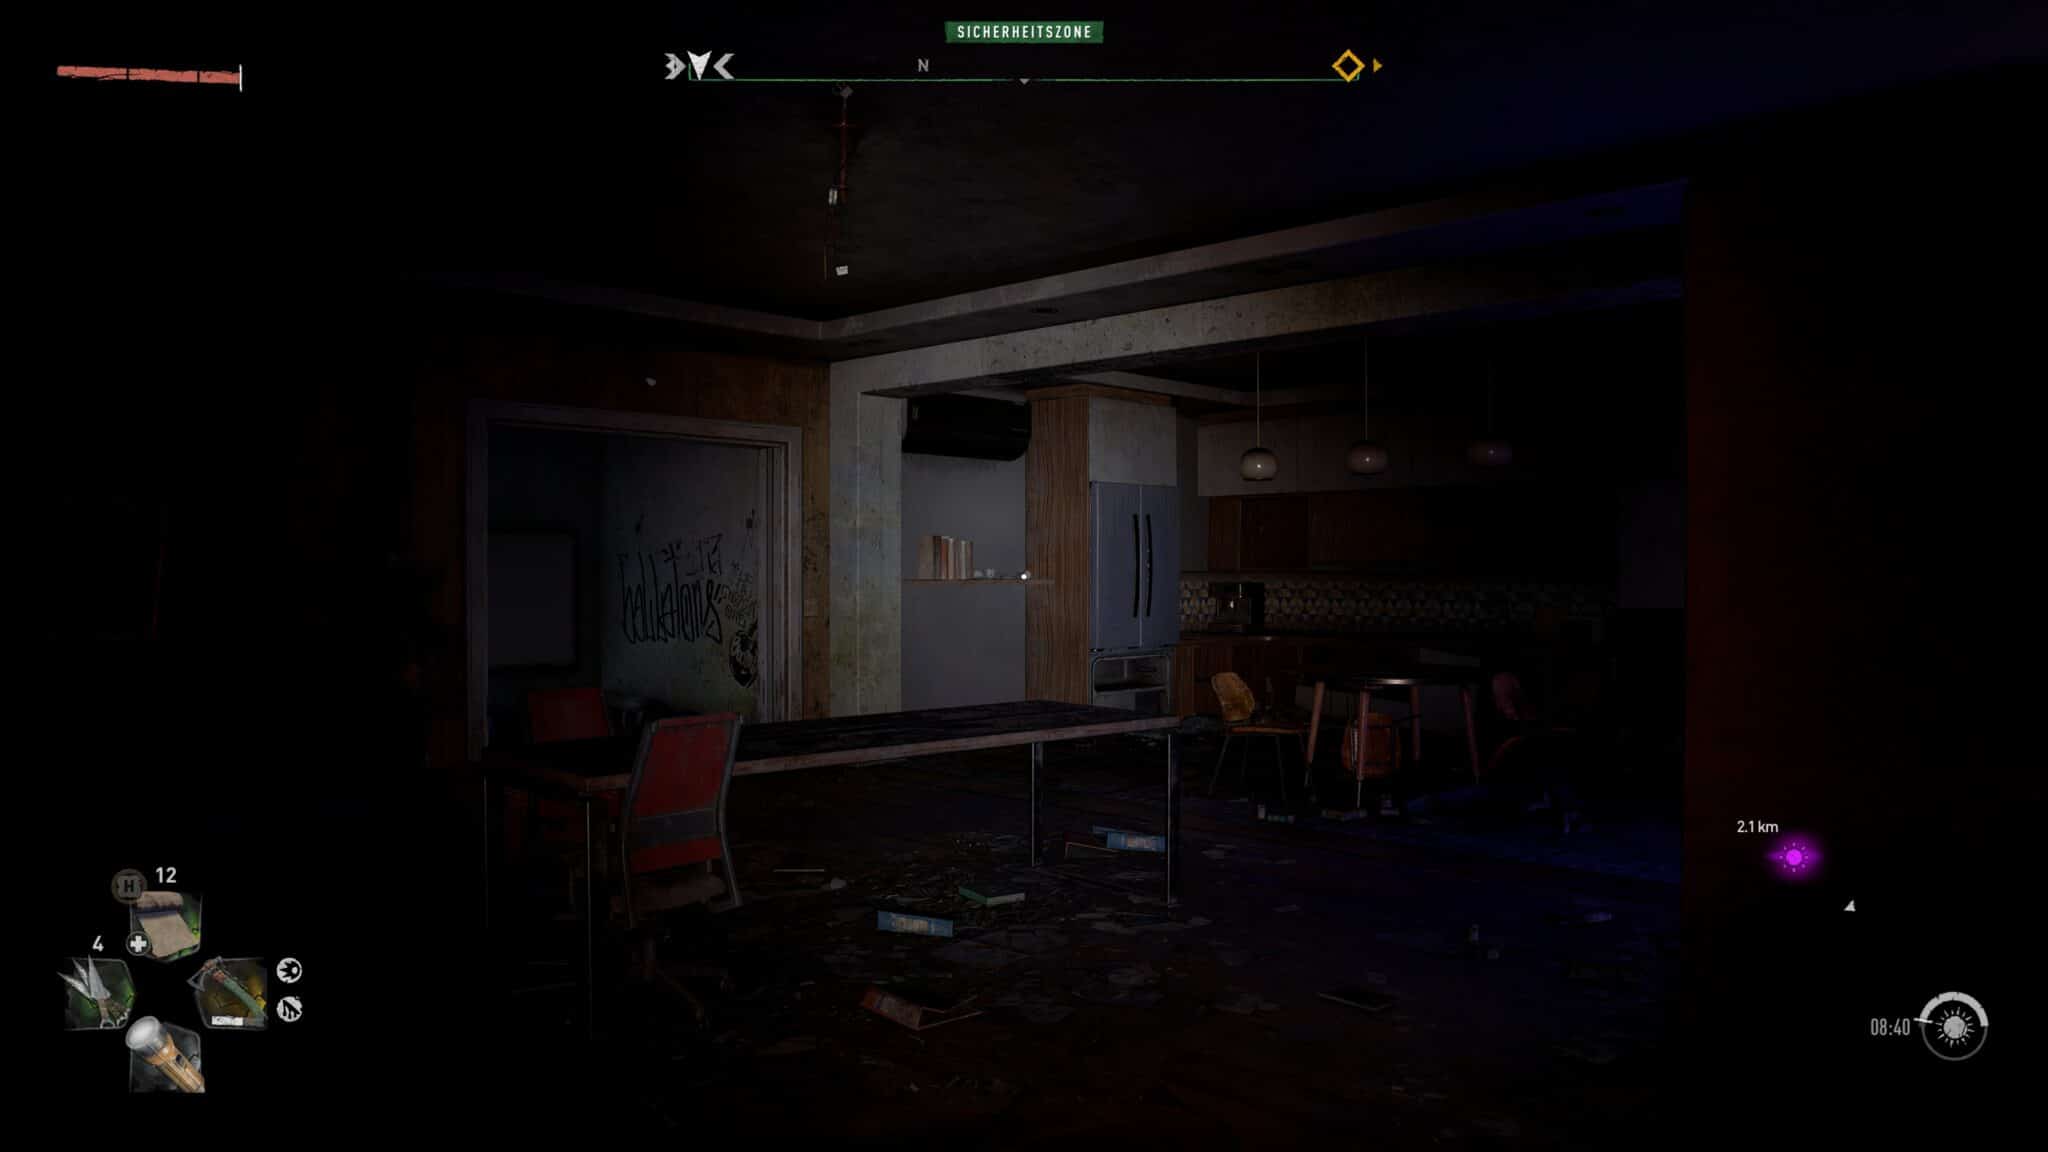
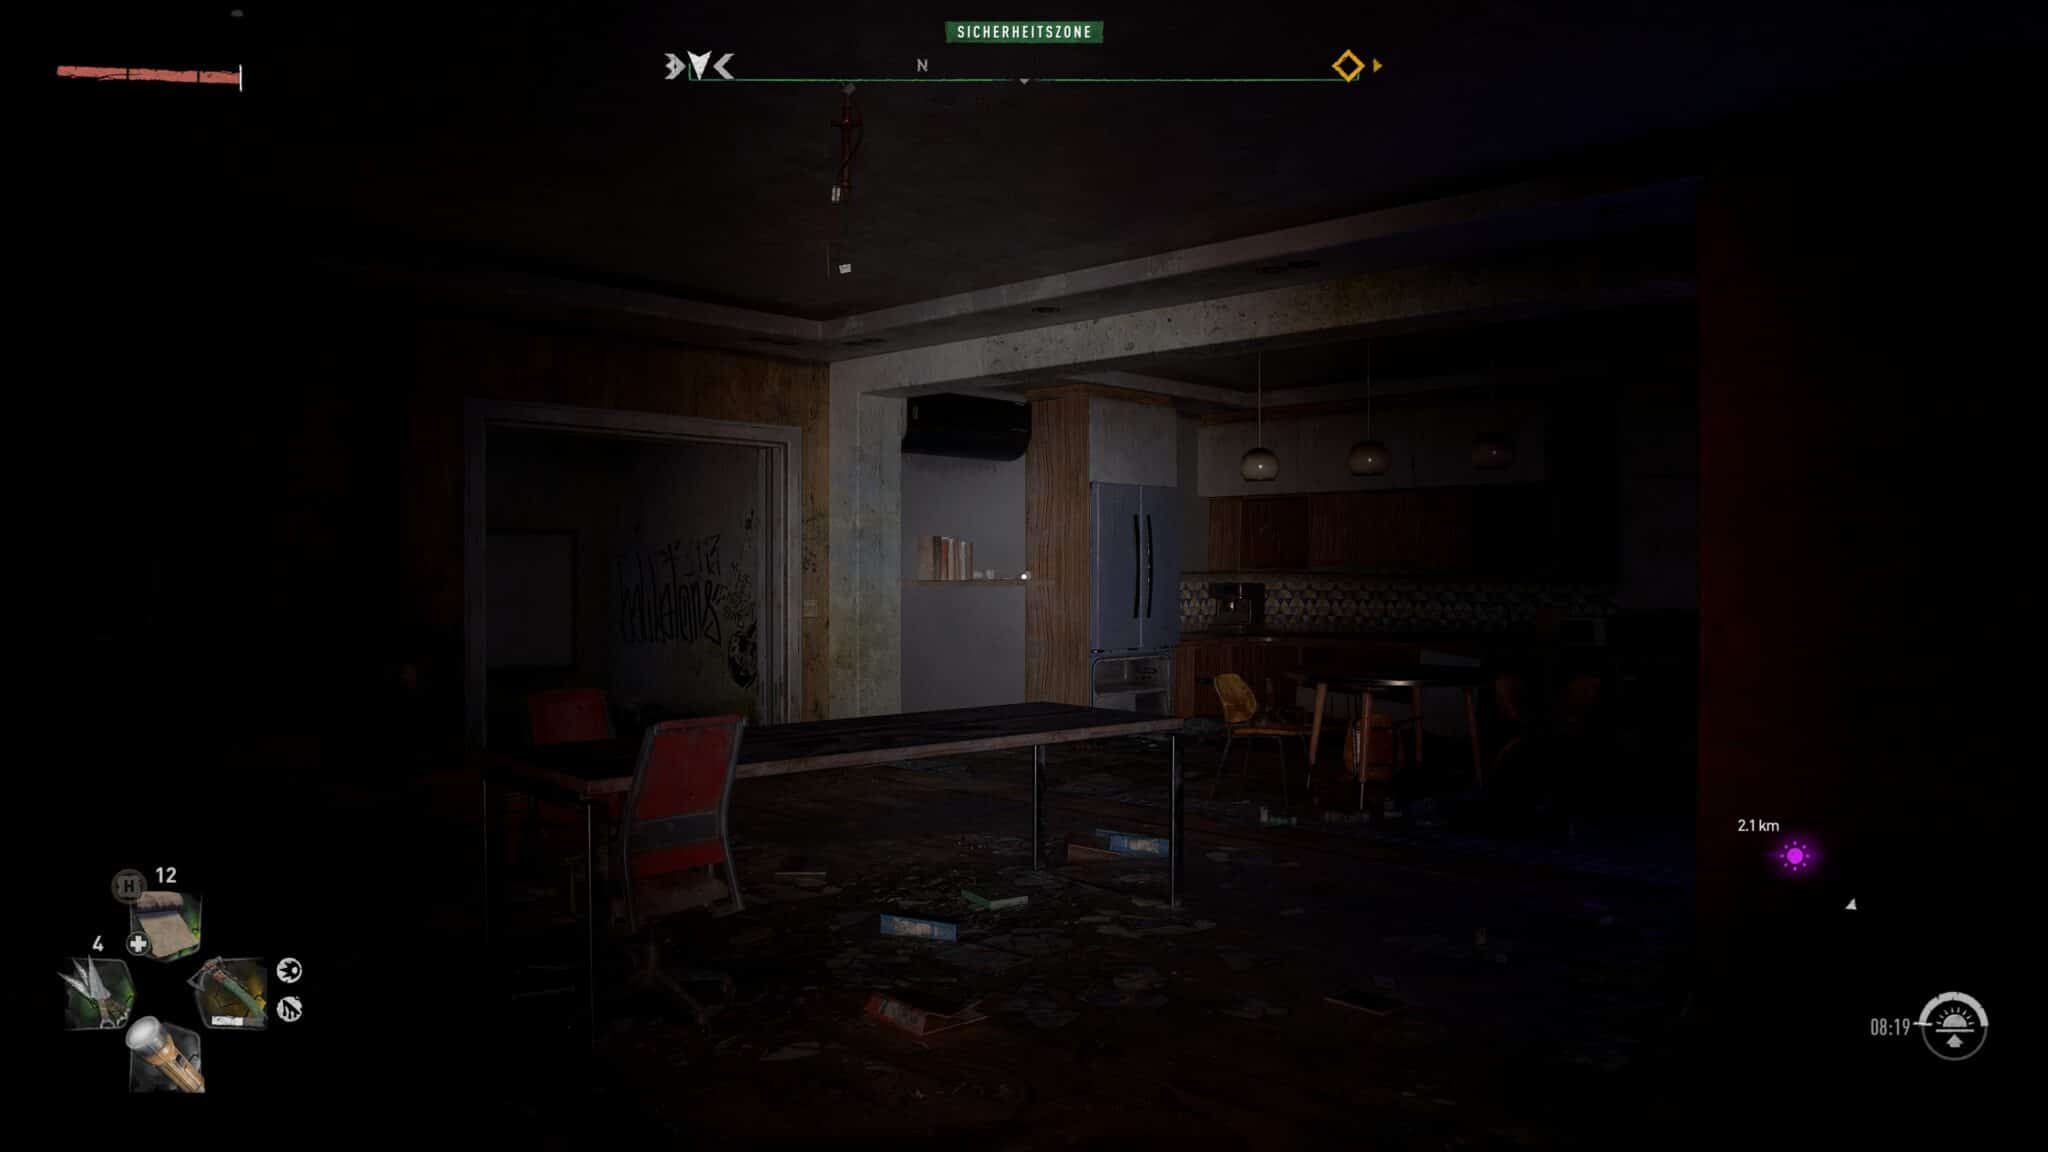
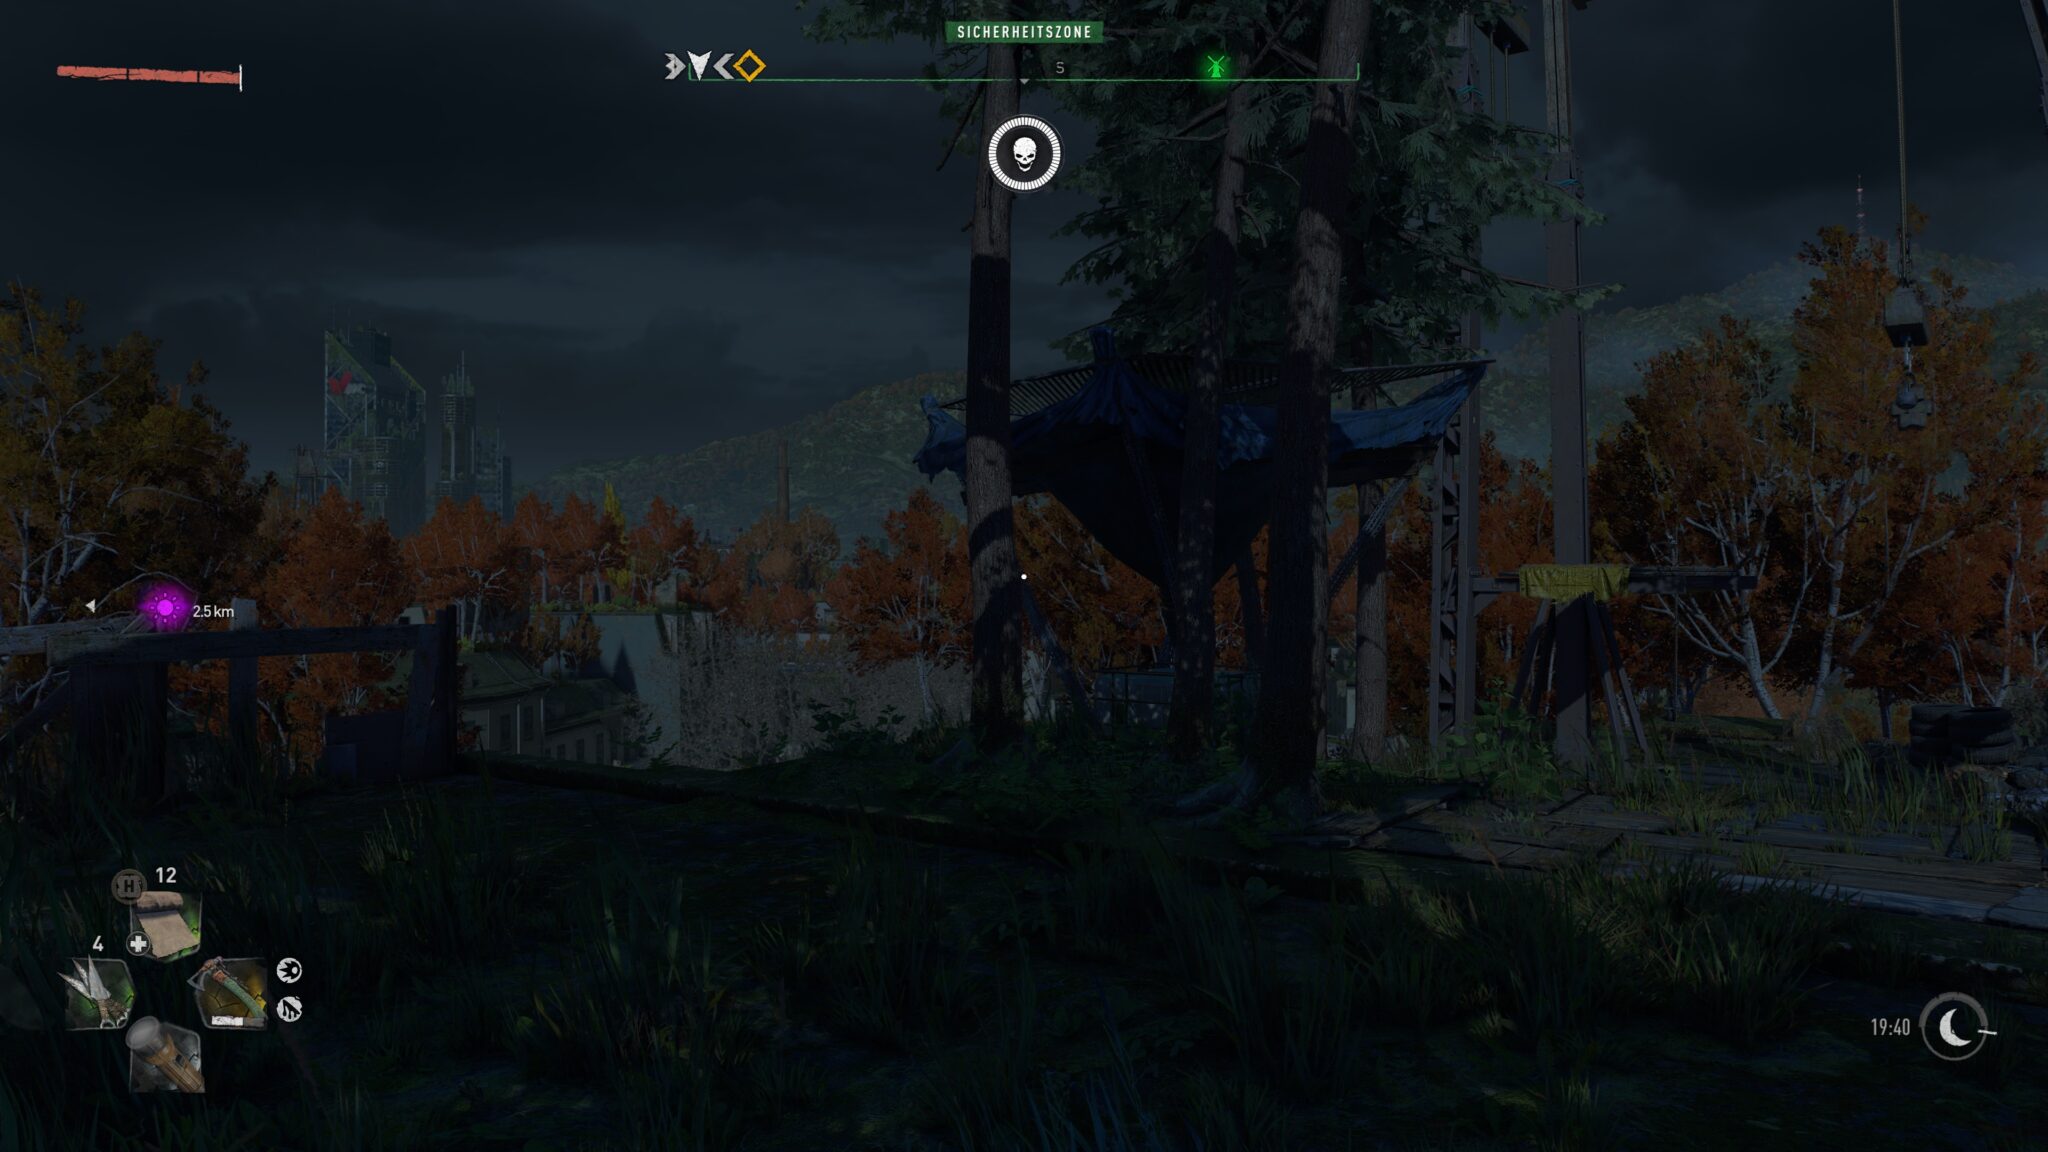
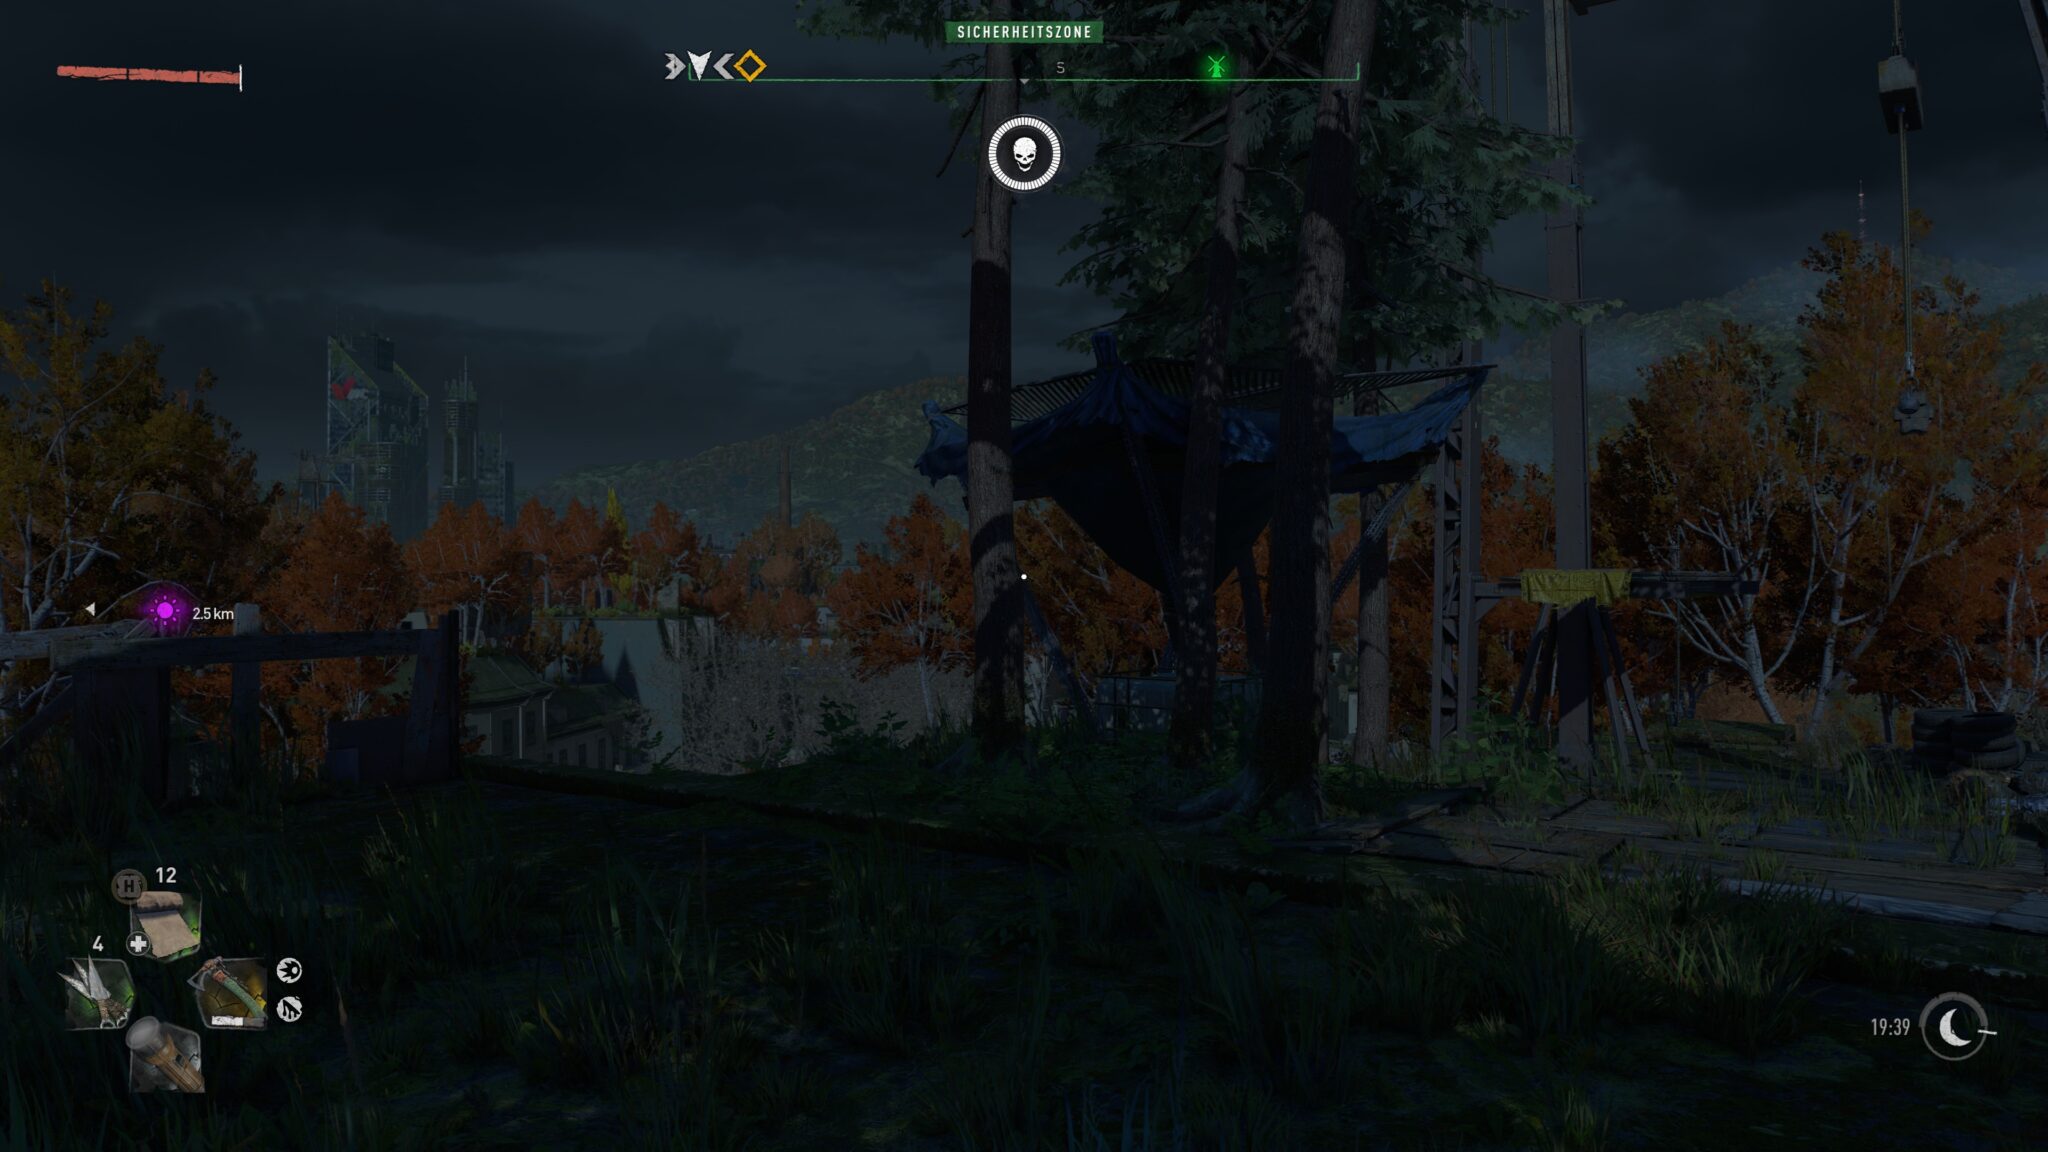
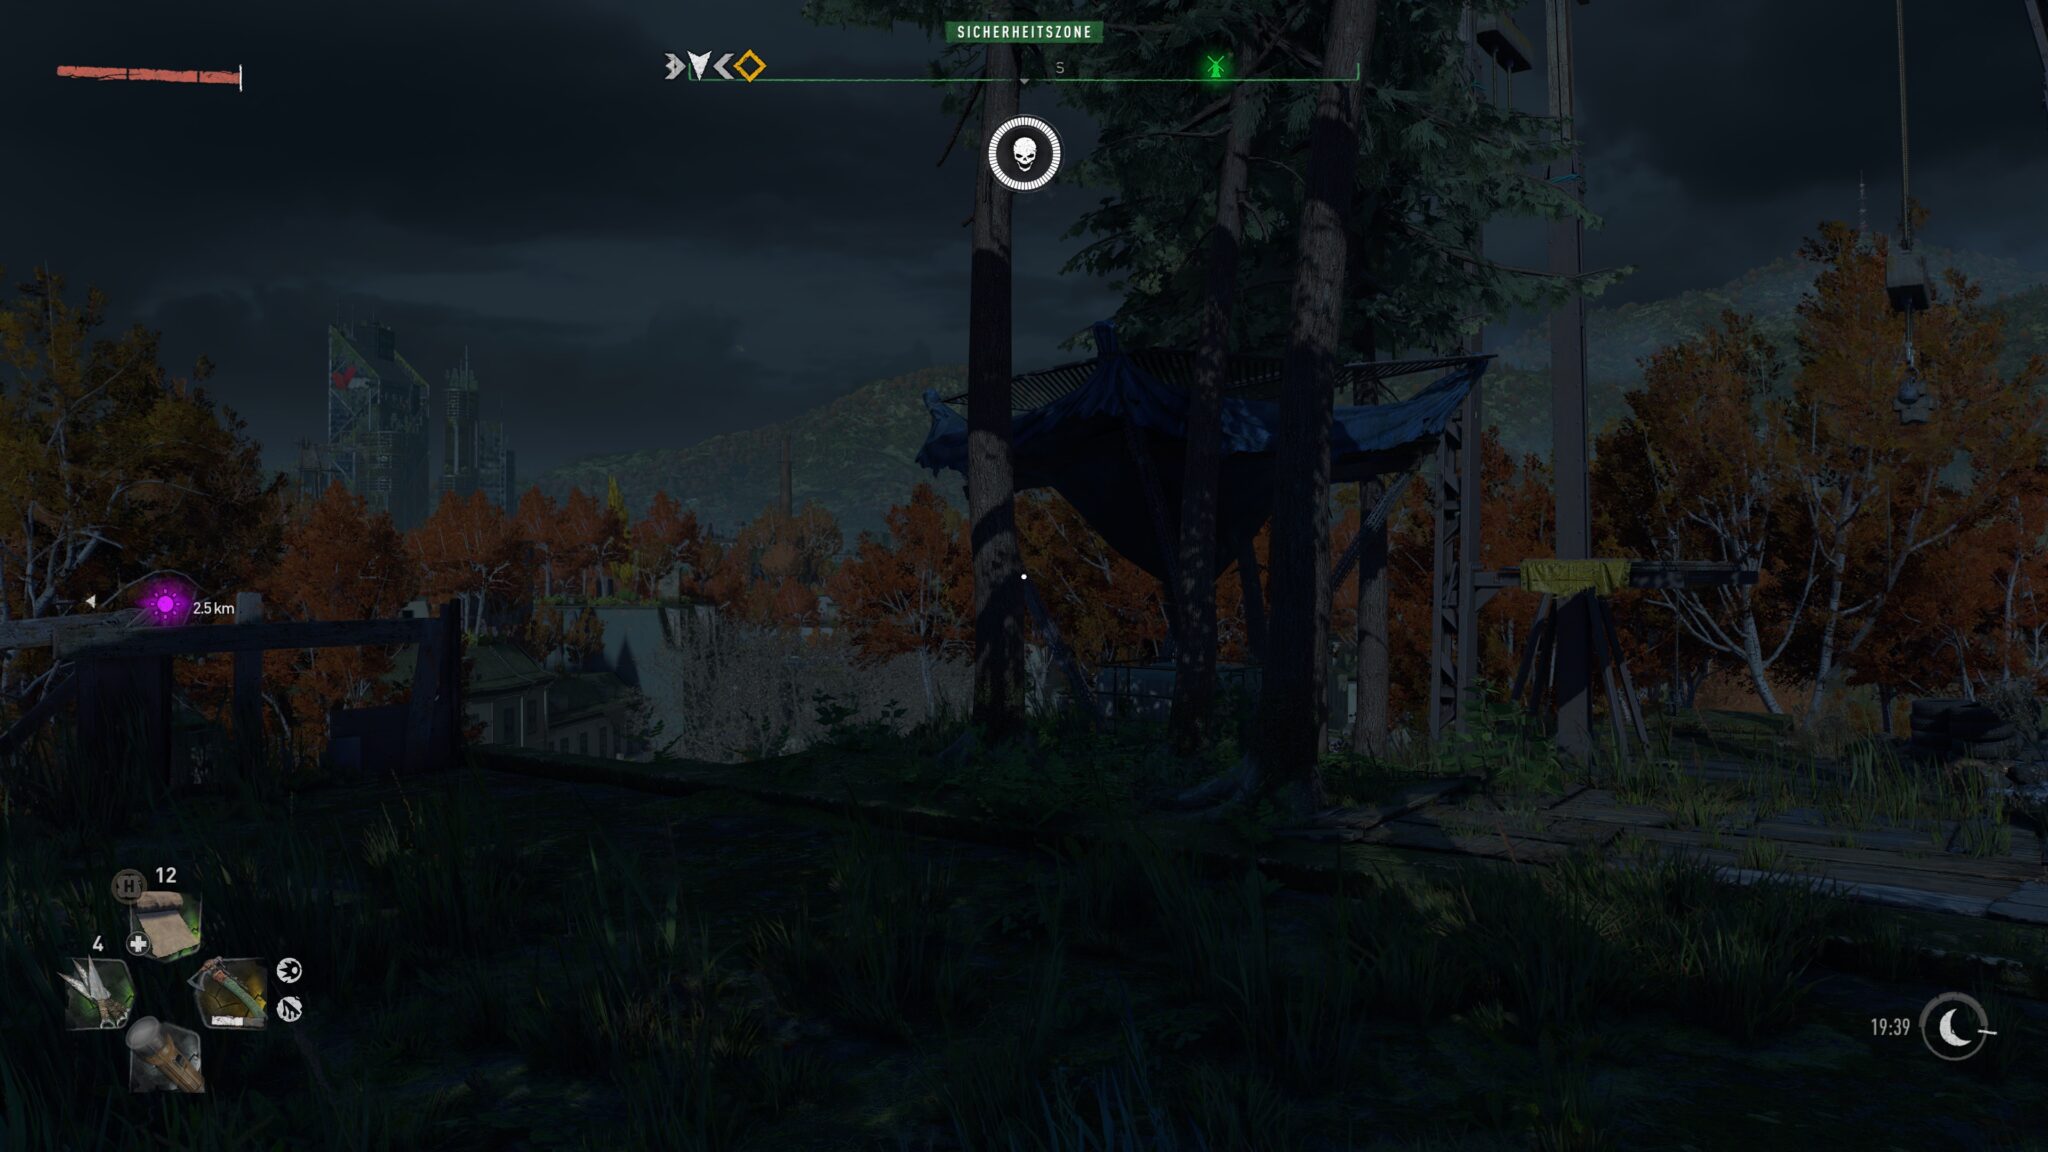
Raytracing for the torch
This setting only provides more FPS if you use the torch. But we still measure a performance plus in the range of eight percent. Since the optical differences are limited at the same time (see the picture below), we recommend deactivating this option. It also does not change the lack of shadows cast by the torch.
motion blur quality
Motion Blur is one of those options that many people generally turn off in games because they don’t like the effect. Disabling it can increase the FPS in Dying Light 2 in the range of six to eight percent, but this only comes into play during very fast changes of the viewing direction and in cutscenes.
Barely worth it
The following settings only result in small FPS gains in the range of one percent, so they are of little importance for FPS tuning or are only relevant with very slow hardware:
- Antialiasing quality
- Particle quality
- contact shade quality
Last but not least, these two ray tracing options take a special position in this category:
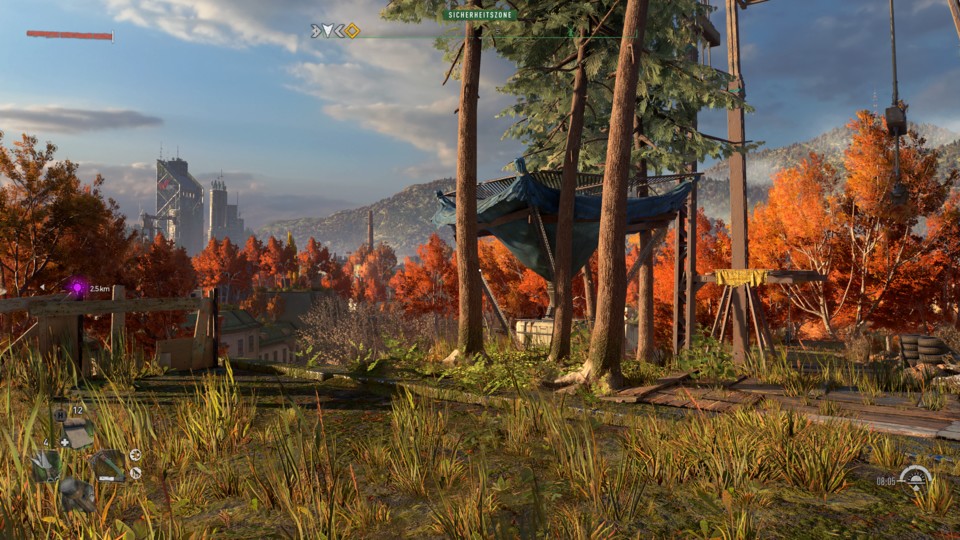
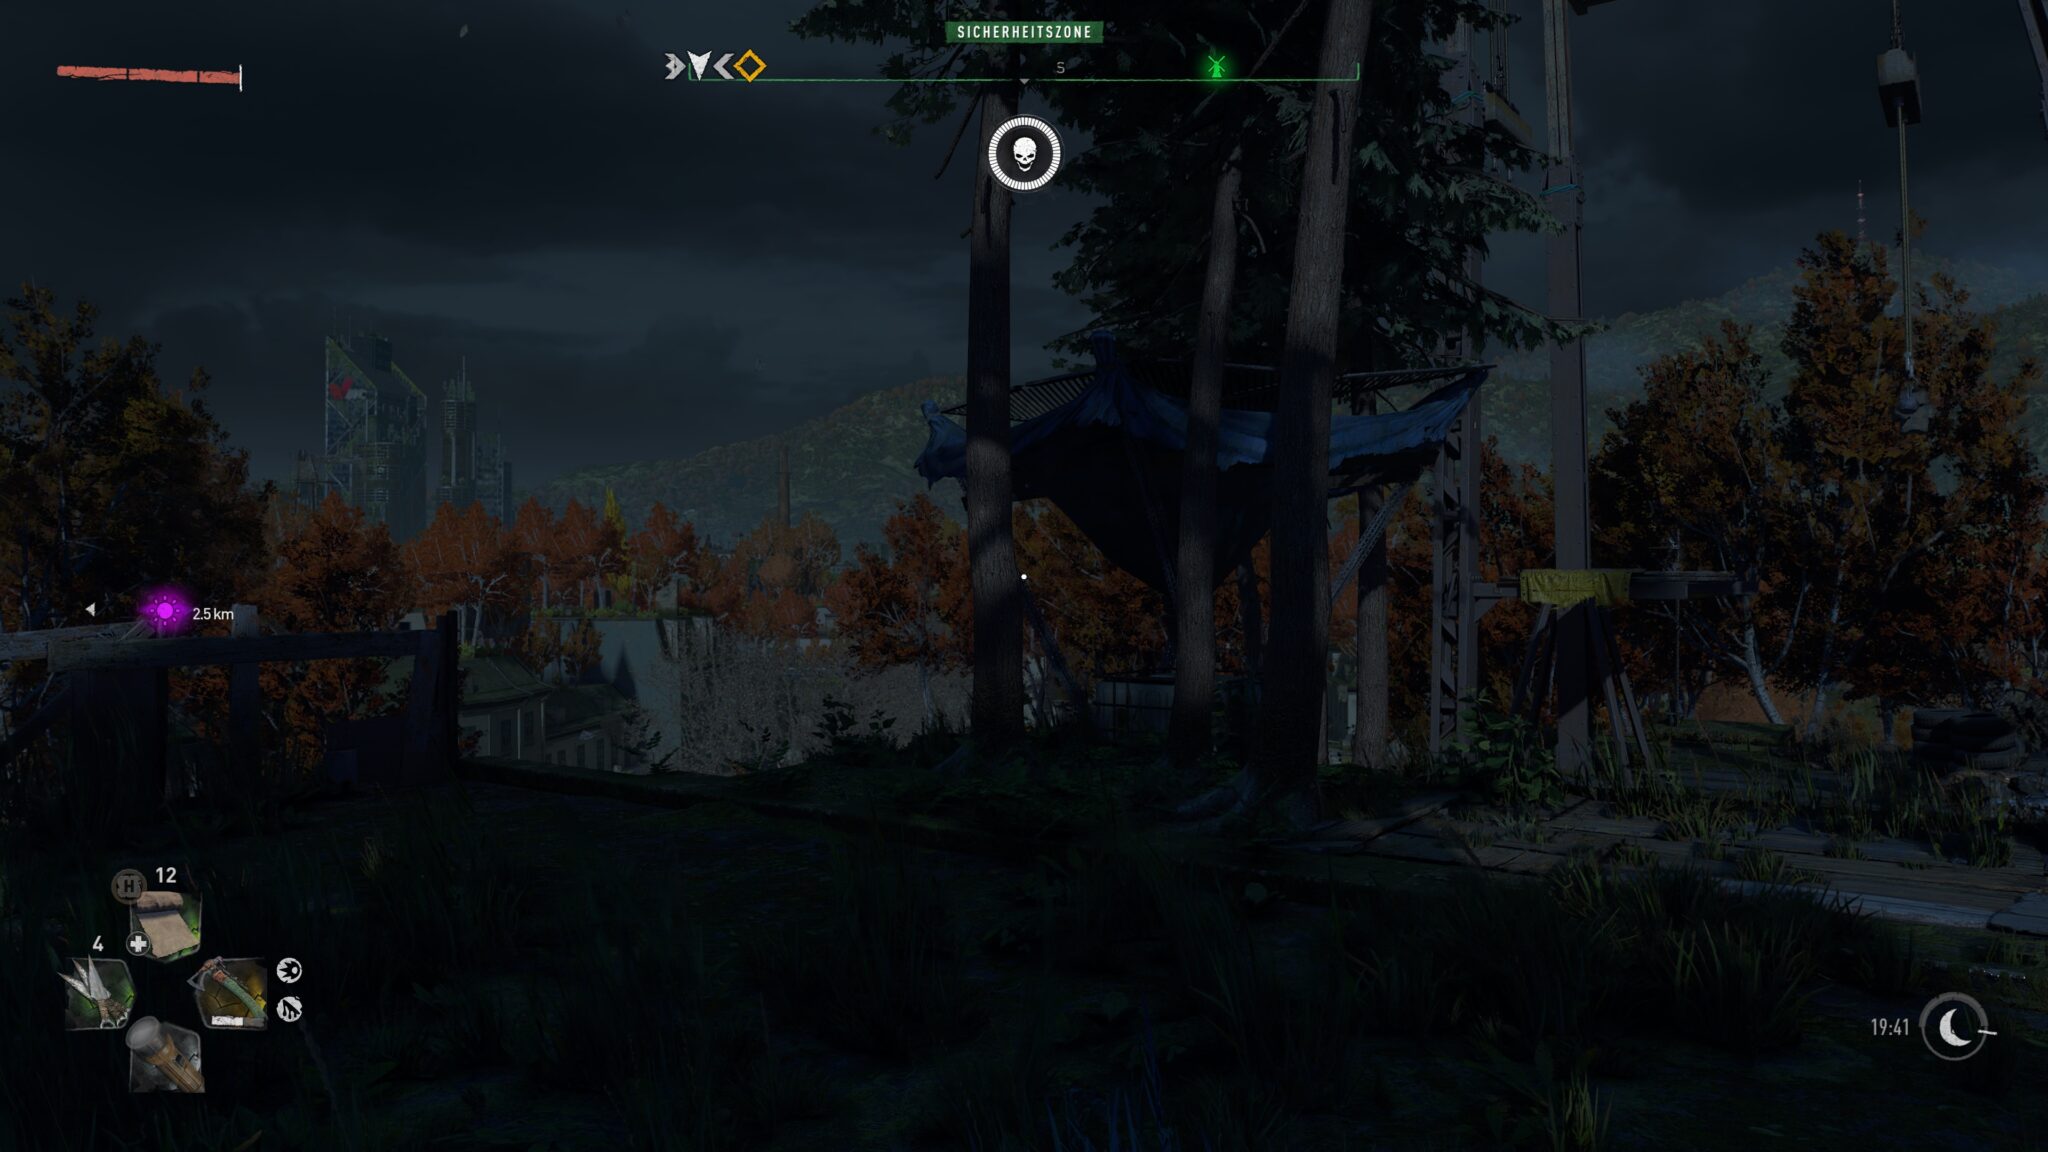
Sunshade Quality
Without raytracing hardware you have no choice here, only the PCF setting is available. With ray tracing hardware, you can also select PCF instead of ray tracing, which increases the FPS by almost a double-digit percentage. However, so many shadows are lost (especially in the vegetation, see the image below) that we cannot recommend tuning this way for visual reasons
Global illumination quality
Graphically, this setting has one of the biggest impacts in the game if you have ray tracing hardware and can select the appropriate option. Interestingly, the impact on the FPS is very small, less than two percent, both with and without ray tracing. We therefore recommend leaving this option at the highest selectable level.
Performance gains graphically illustrated
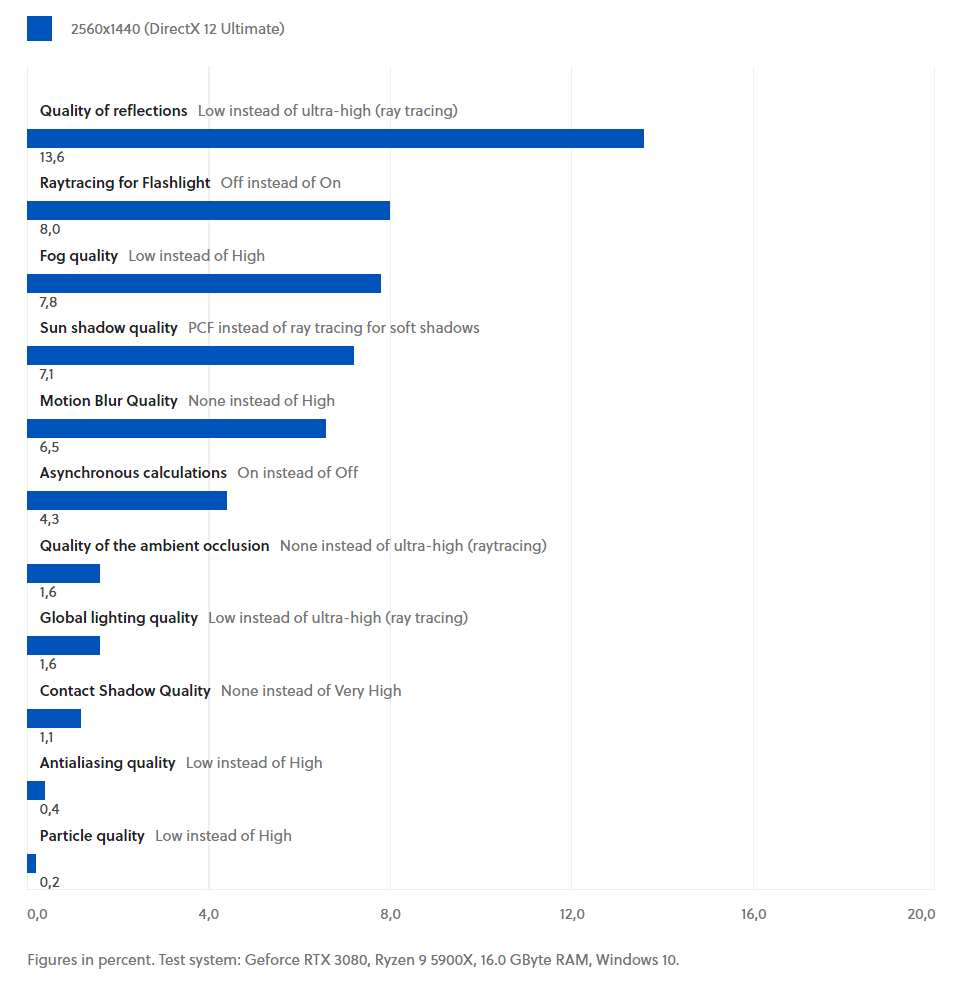
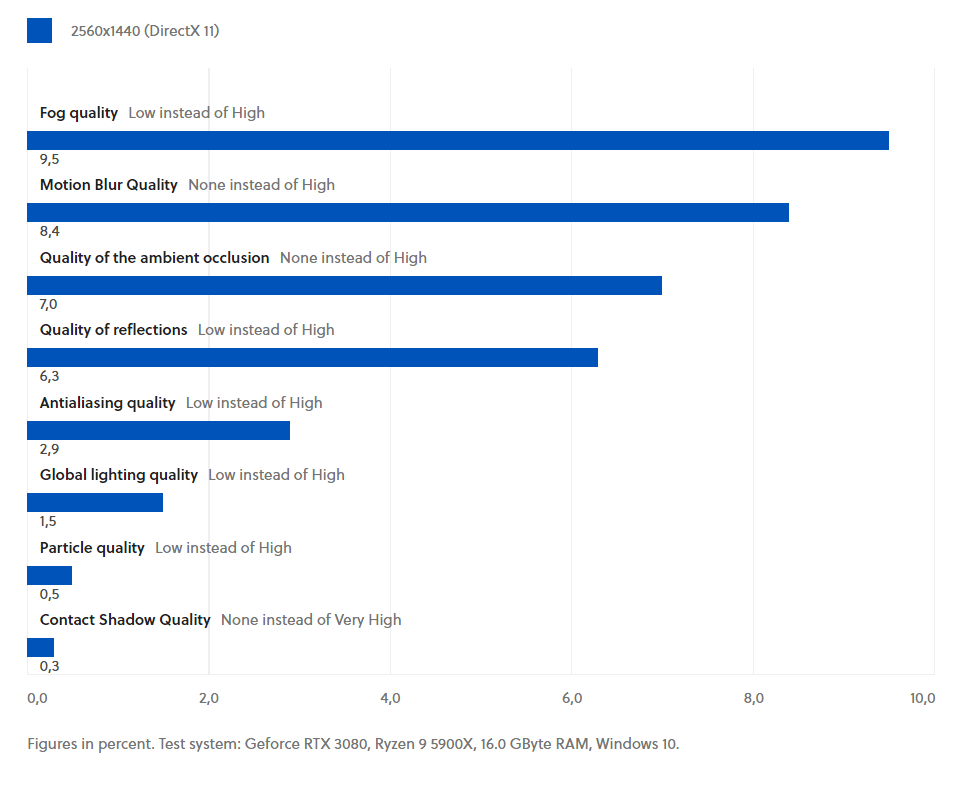
The following diagram shows the performance gains we measured for the different options with and without ray tracing.
If ray tracing is deactivated, the options asynchronous calculations, sun shadow quality and ray tracing for the torch are omitted because they are not selectable without the technique or only one level is available for selection.
Performance gains: Ray tracing on
FPS increase when switching from the highest to the lowest quality level.
Ray tracing off
FPS increase when switching from the highest to the lowest quality level
Tuning in fast mode by preset
If you don’t want to fiddle with individual options in Dying Light 2, you can instead use one of a total of five different graphics presets for quick tuning:
- Low
- Medium
- High
- Raytracing
- Raytracing High
You can change the preset by pressing the number key 1 (previous preset) or 3 (next preset) in one of the graphics menus.
Not surprisingly, the performance gains are greatest when you switch from one of the presets with ray tracing to the three levels without ray tracing. However, you can only play with ray tracing if you have an RTX graphics card from Nvidia or an RX 6000 card from AMD with DirectX 12 Ultimate support.
Presets in comparison
Geforce RTX 3080, Ryzen 9 5900X, 16.0 GB RAM, Windows 10.
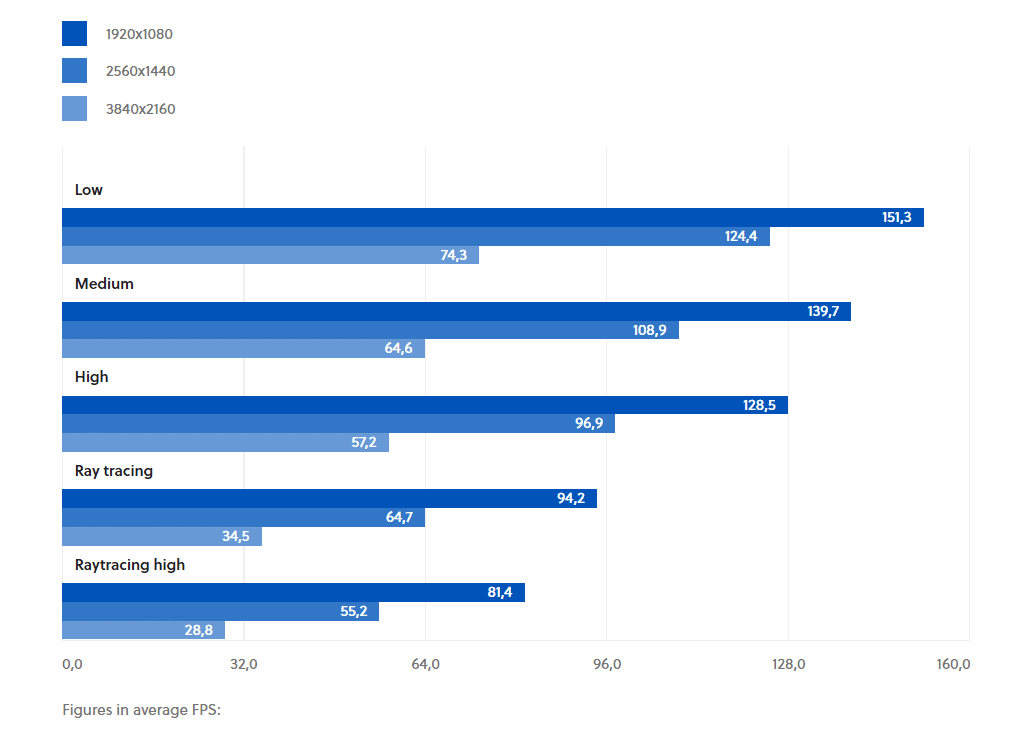
As the benchmarks above show, the FPS gain increases when switching to a lower preset with higher resolution. This is due to the fact that most options tend to load the graphics card rather than the CPU – and the higher the resolution, the higher the load on the GPU.
Presets in graphics comparison
Visually, the effects are also by far the greatest when you switch from the ray tracing presets to the other presets. Between High, Medium and Low, on the other hand, there are only minor graphical differences, such as less sharp surfaces in some cases.
The best way to compare the scenes is to download the 4K images in their original size. To do so, click on the image and select the corresponding option in the bottom left-hand corner.
In contrast to many other titles, the lowest preset is a reasonable option in Dying Light 2 to get more FPS out of the game. More comparison pictures of the presets can be found at the end of the article.
FPS boost with DLSS and Co
In addition to reducing graphics settings by hand or preset, there is another way to increase the FPS in Dying Light 2. More specifically, there are the following three upscalig methods:
- DLSS (Deep Learning Super Sampling)
- FSR (Fidelity FX Super Resolution)
- Linear
DLSS is only available with RTX graphics cards from Nvidia, but the basic idea is the same for all three methods: the game is rendered internally in a lower resolution and then scaled up as losslessly as possible to the actual set resolution.
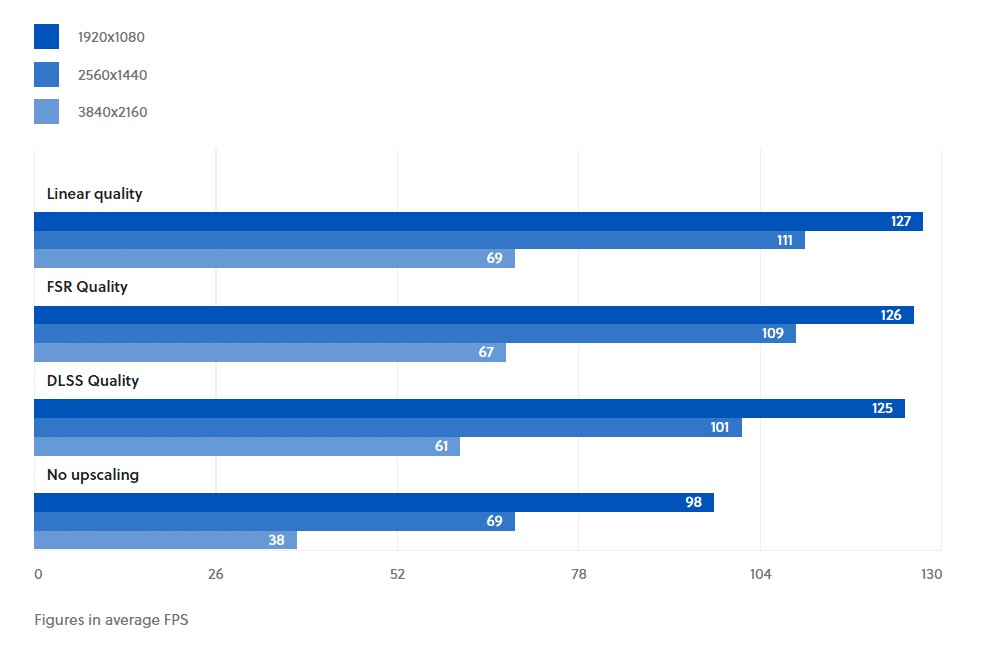
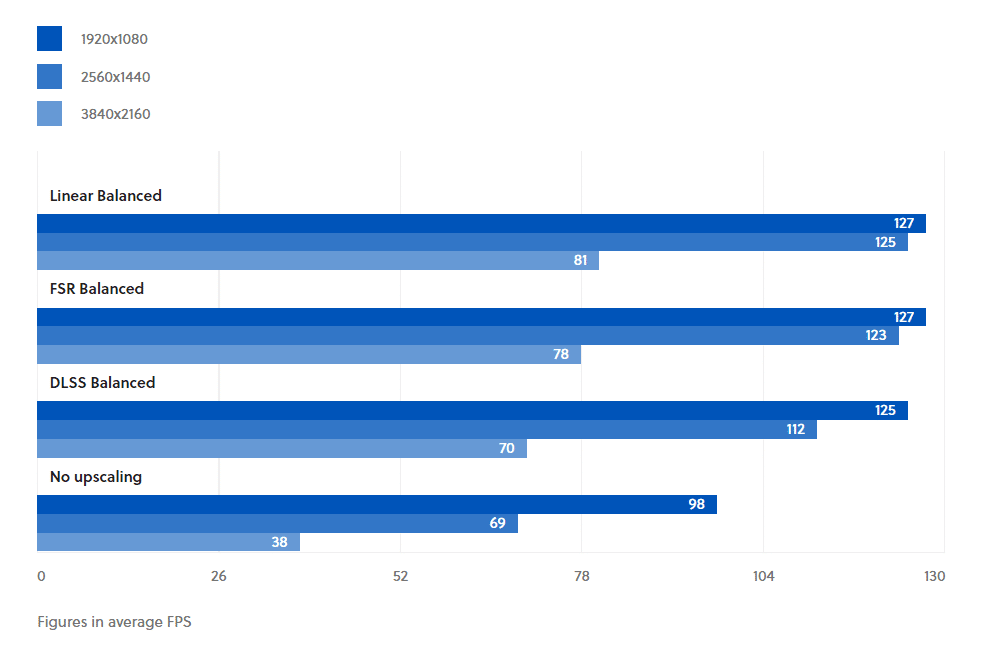
Depending on the upscaling level, the render resolution decreases from Quality to Balanced to Performance. How much the FPS increases also depends on the selected resolution. In Dying Light 2, as in other games, the higher the resolution, the greater the performance increase through upscaling.
Upscaling techniques: Mode Quality
Balanced mode
Power mode
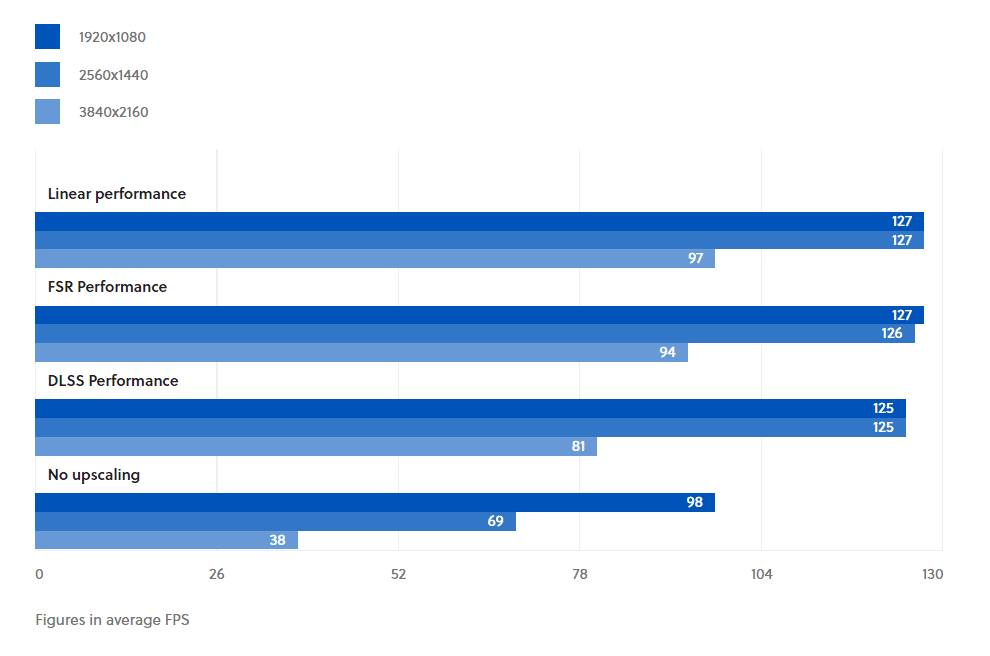
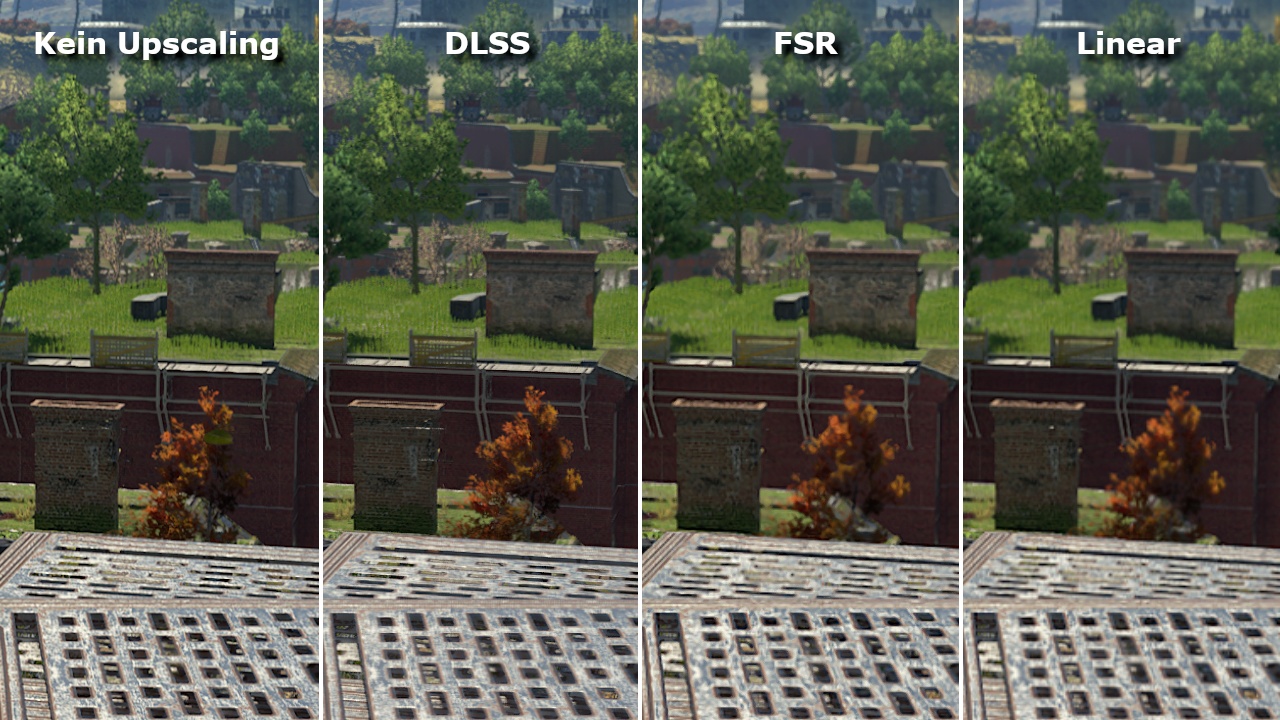
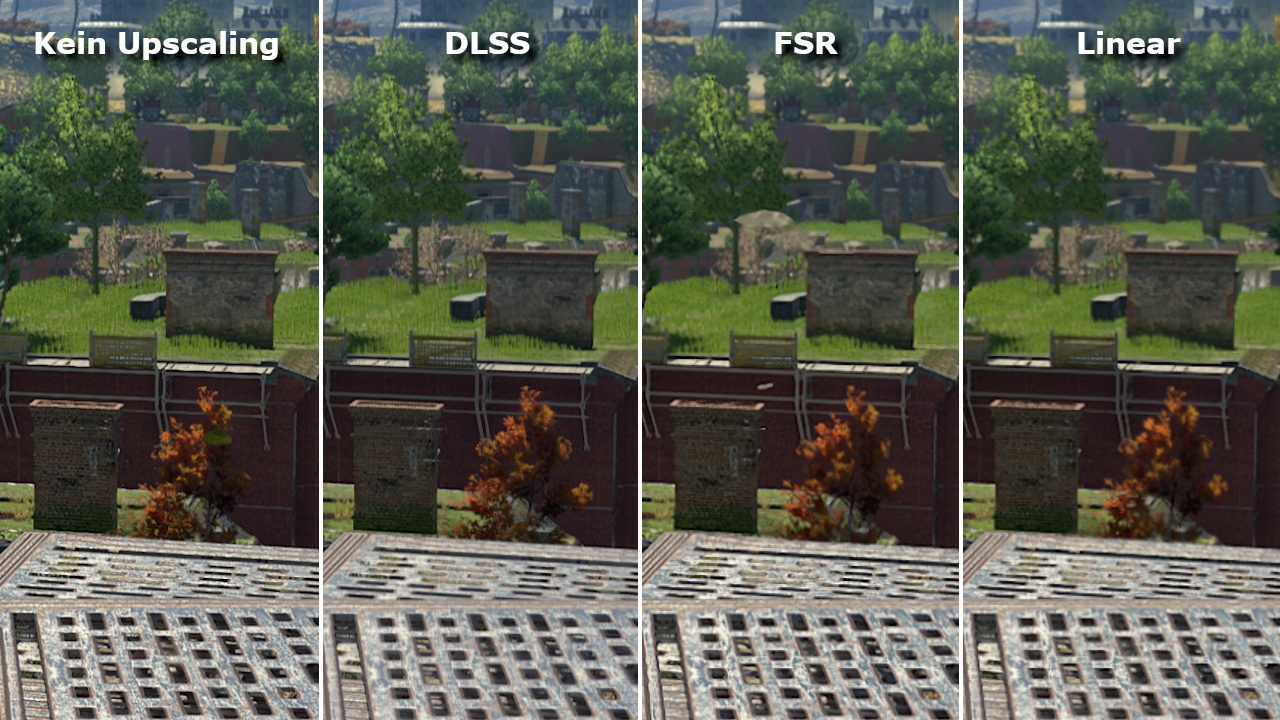
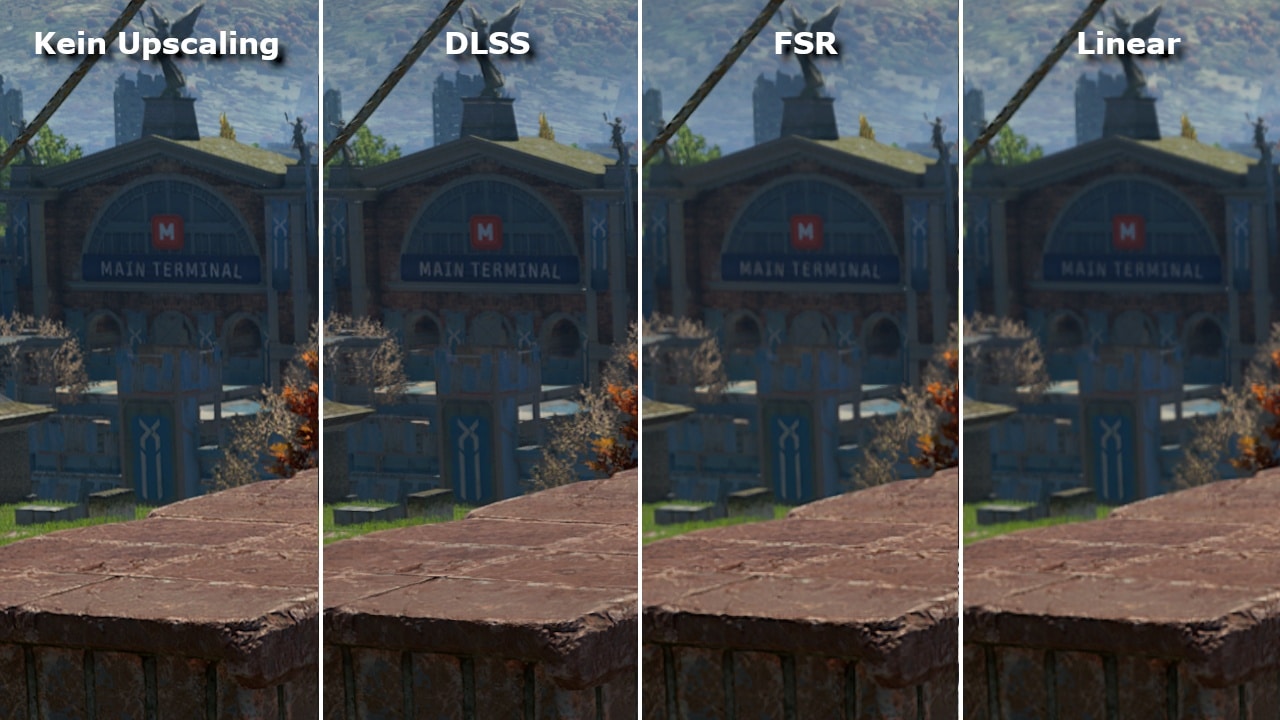
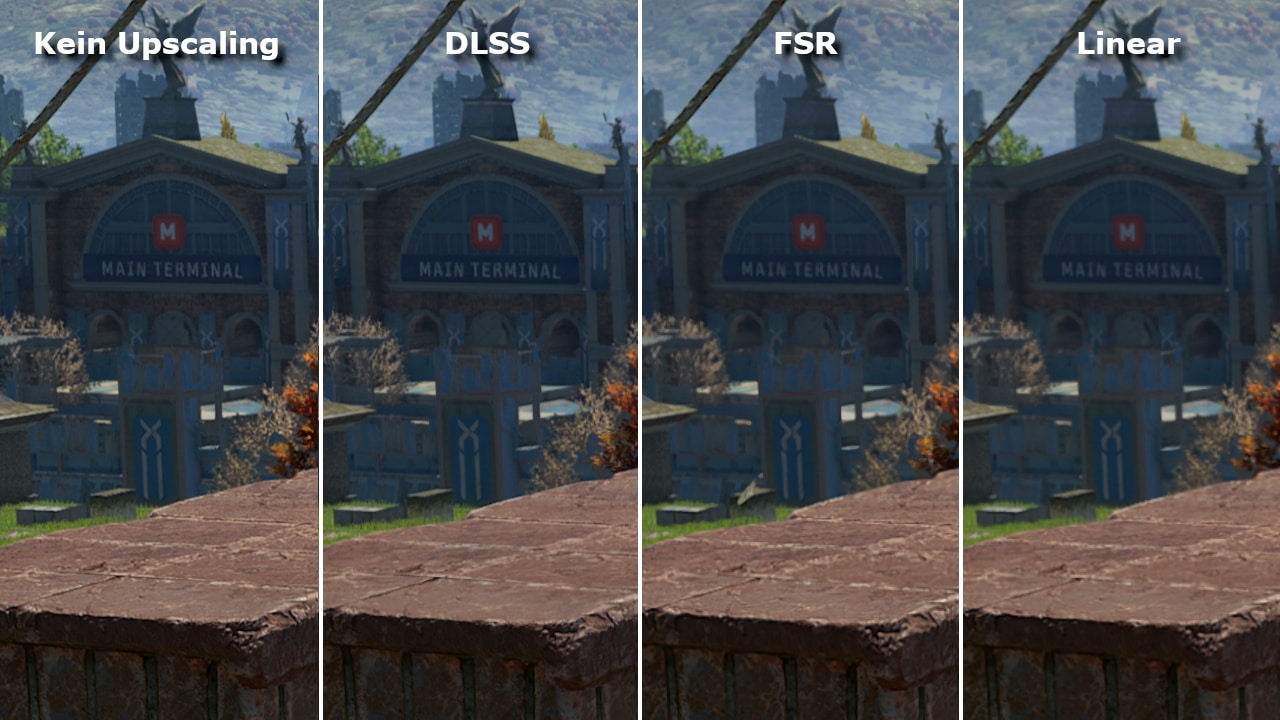
DLSS offers the best image quality overall (more on this below), but the FPS increases slightly less than with the other two methods. FSR and the linear variant, on the other hand, are largely on par in terms of performance.
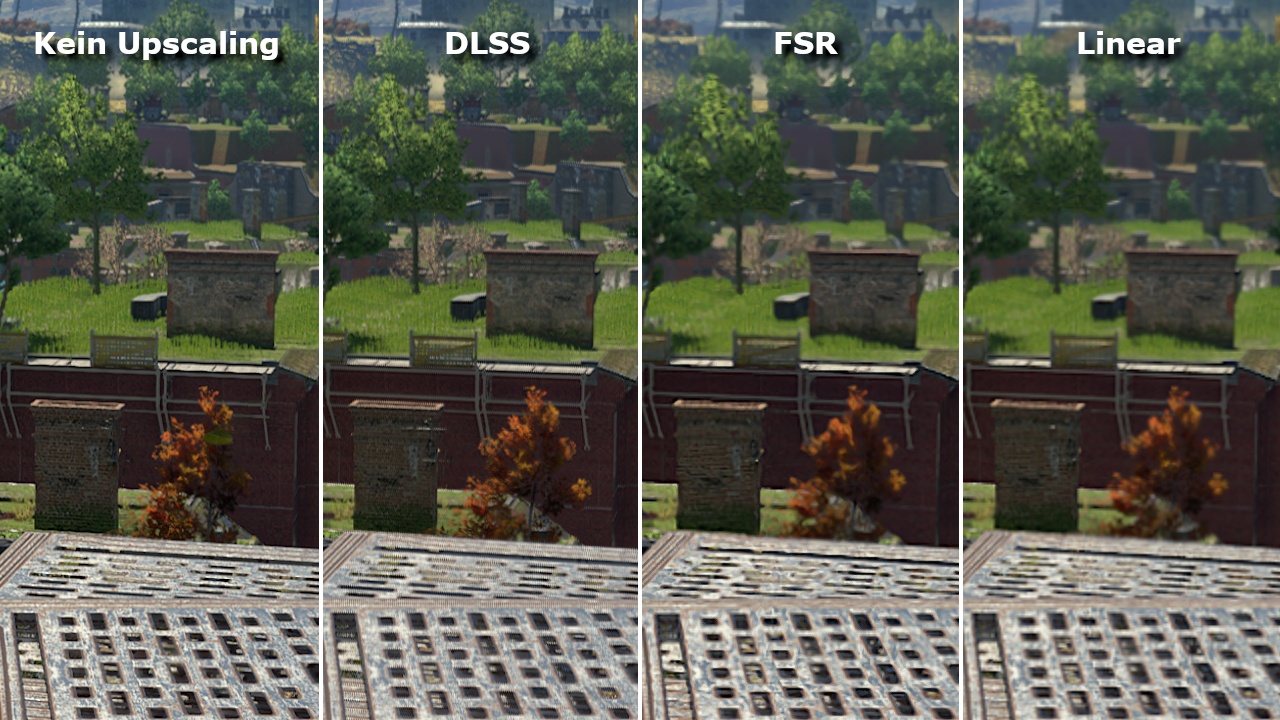
Upscaling method in graphics comparison
Upscaling has its price, even with DLSS and the additional use of AI-supported calculations via the tensor computing cores of the RTX graphics cards. This affects image sharpness in particular, as the following comparison images with the quality level show. Further comparison images with other upscaling levels and an additional scene can be found at the end of this article.
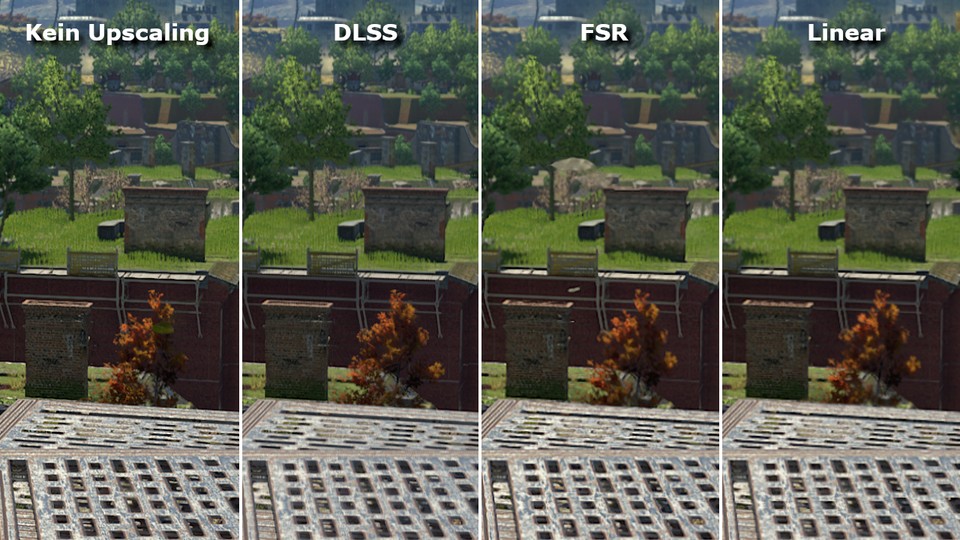
As expected, DLSS succeeds best in upscaling the image, which can be seen well in the example of the small fence in the centre of the image. Only with DLSS are the individual gaps still perceptible, whereas with FSR and the linear method the transitions are almost completely smudged.
Since FSR can also cause slight image errors at the Quality level and the linear scaling is generally too blurred for our taste, we recommend DLSS in the Quality or Balanced modes. If your hardware does not support DLSS, FSR in Quality mode is also an acceptable tuning measure.
DirectX: Which version should it be?
If ray tracing is to be used, you have no choice. The corresponding options are only supported with DirectX 12 Ultimate. Without ray tracing, it depends on your hardware.
So far, we have measured slight advantages with Radeon graphics cards under DirectX 11, with Geforce models it is exactly the opposite, so here DirectX 12 is just ahead. In addition, DirectX 12, as is so often the case, reacts more sensitively to rather little VRAM (6.0 GByte or less). If your GPU does not have that much video memory, DirectX 11 is also the better choice.
However, since the choice of interface is influenced by many factors such as the graphics card, the CPU and the amount of VRAM, it is generally advisable to test for yourself which interface runs better on your PC.
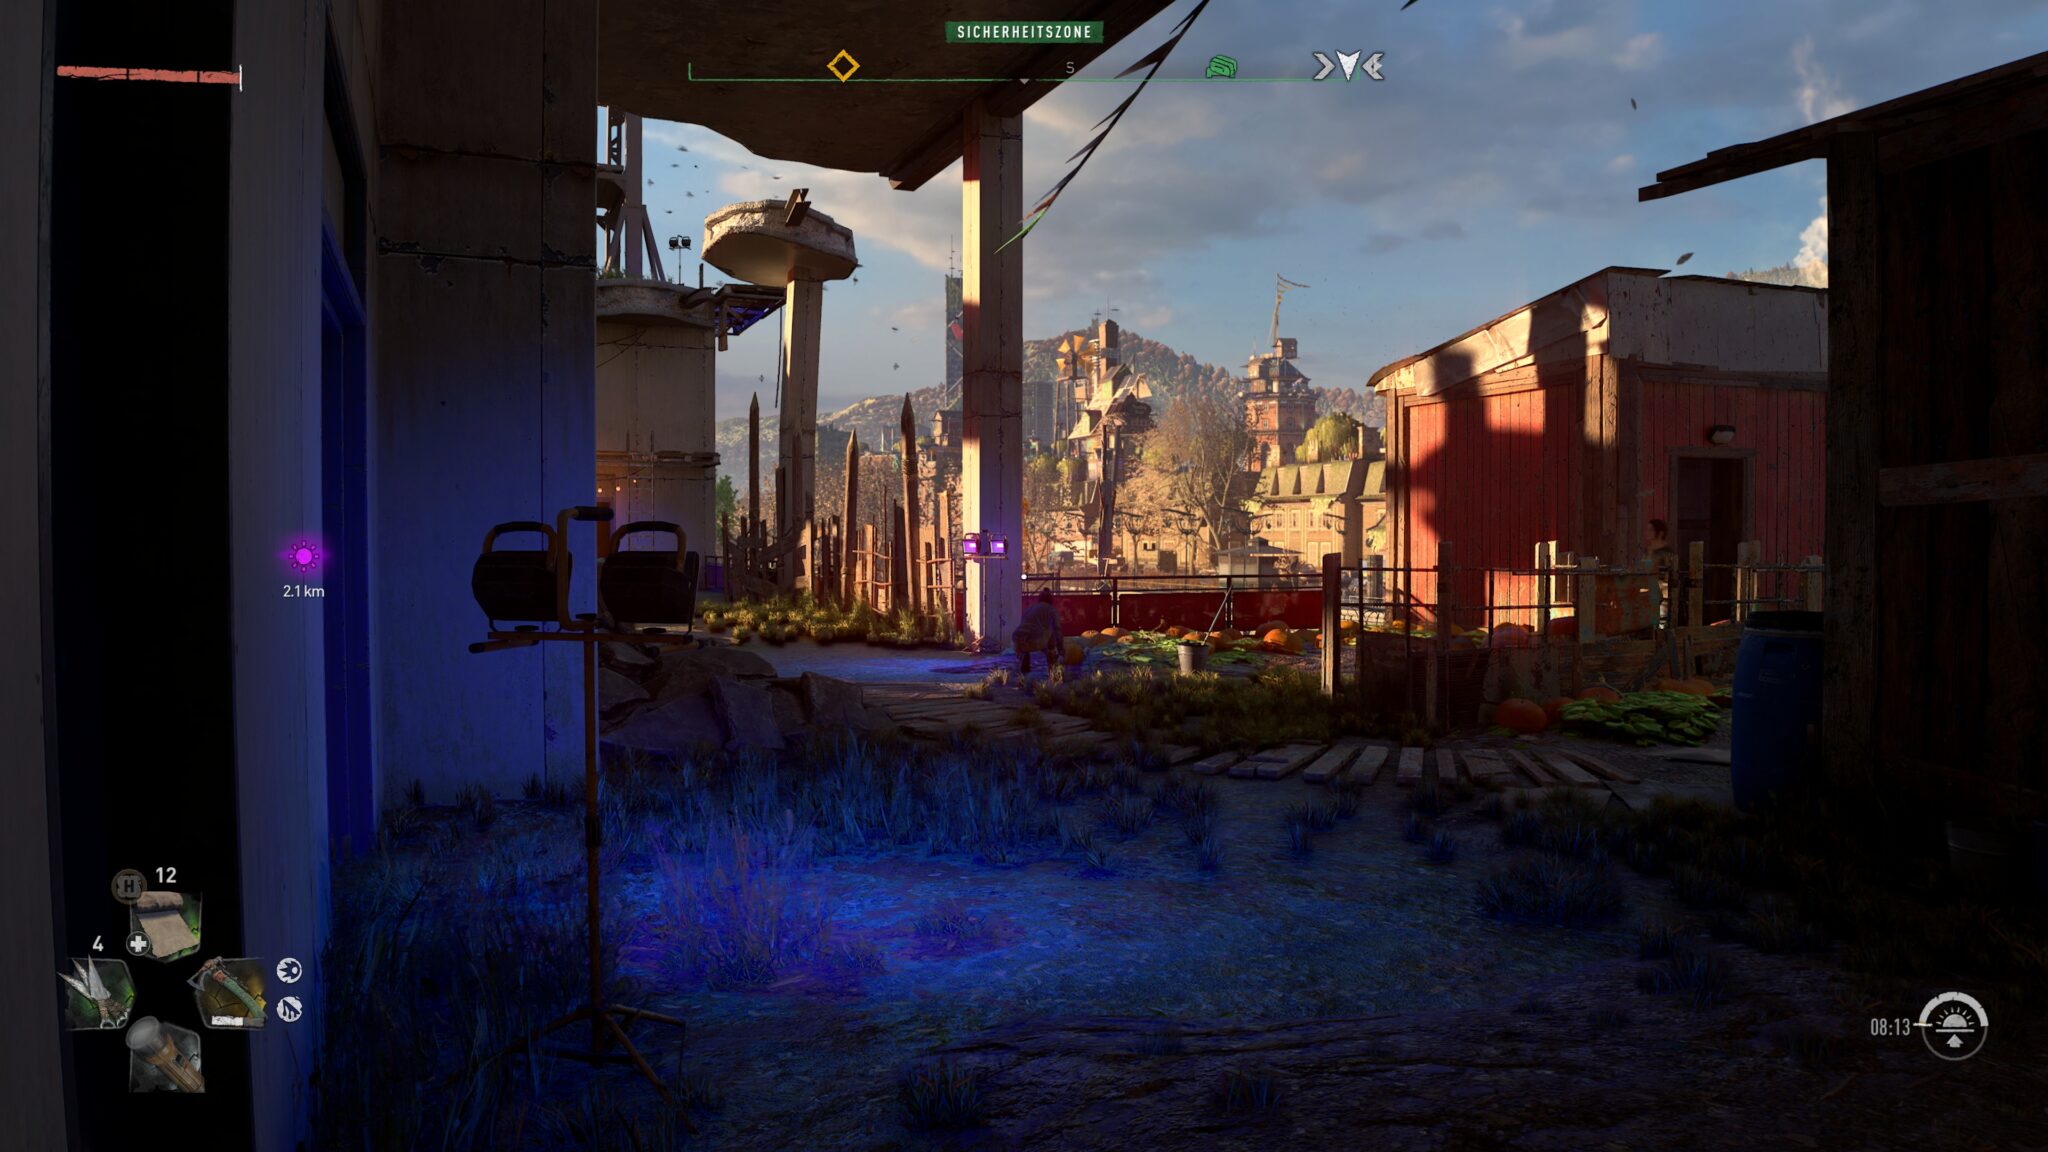
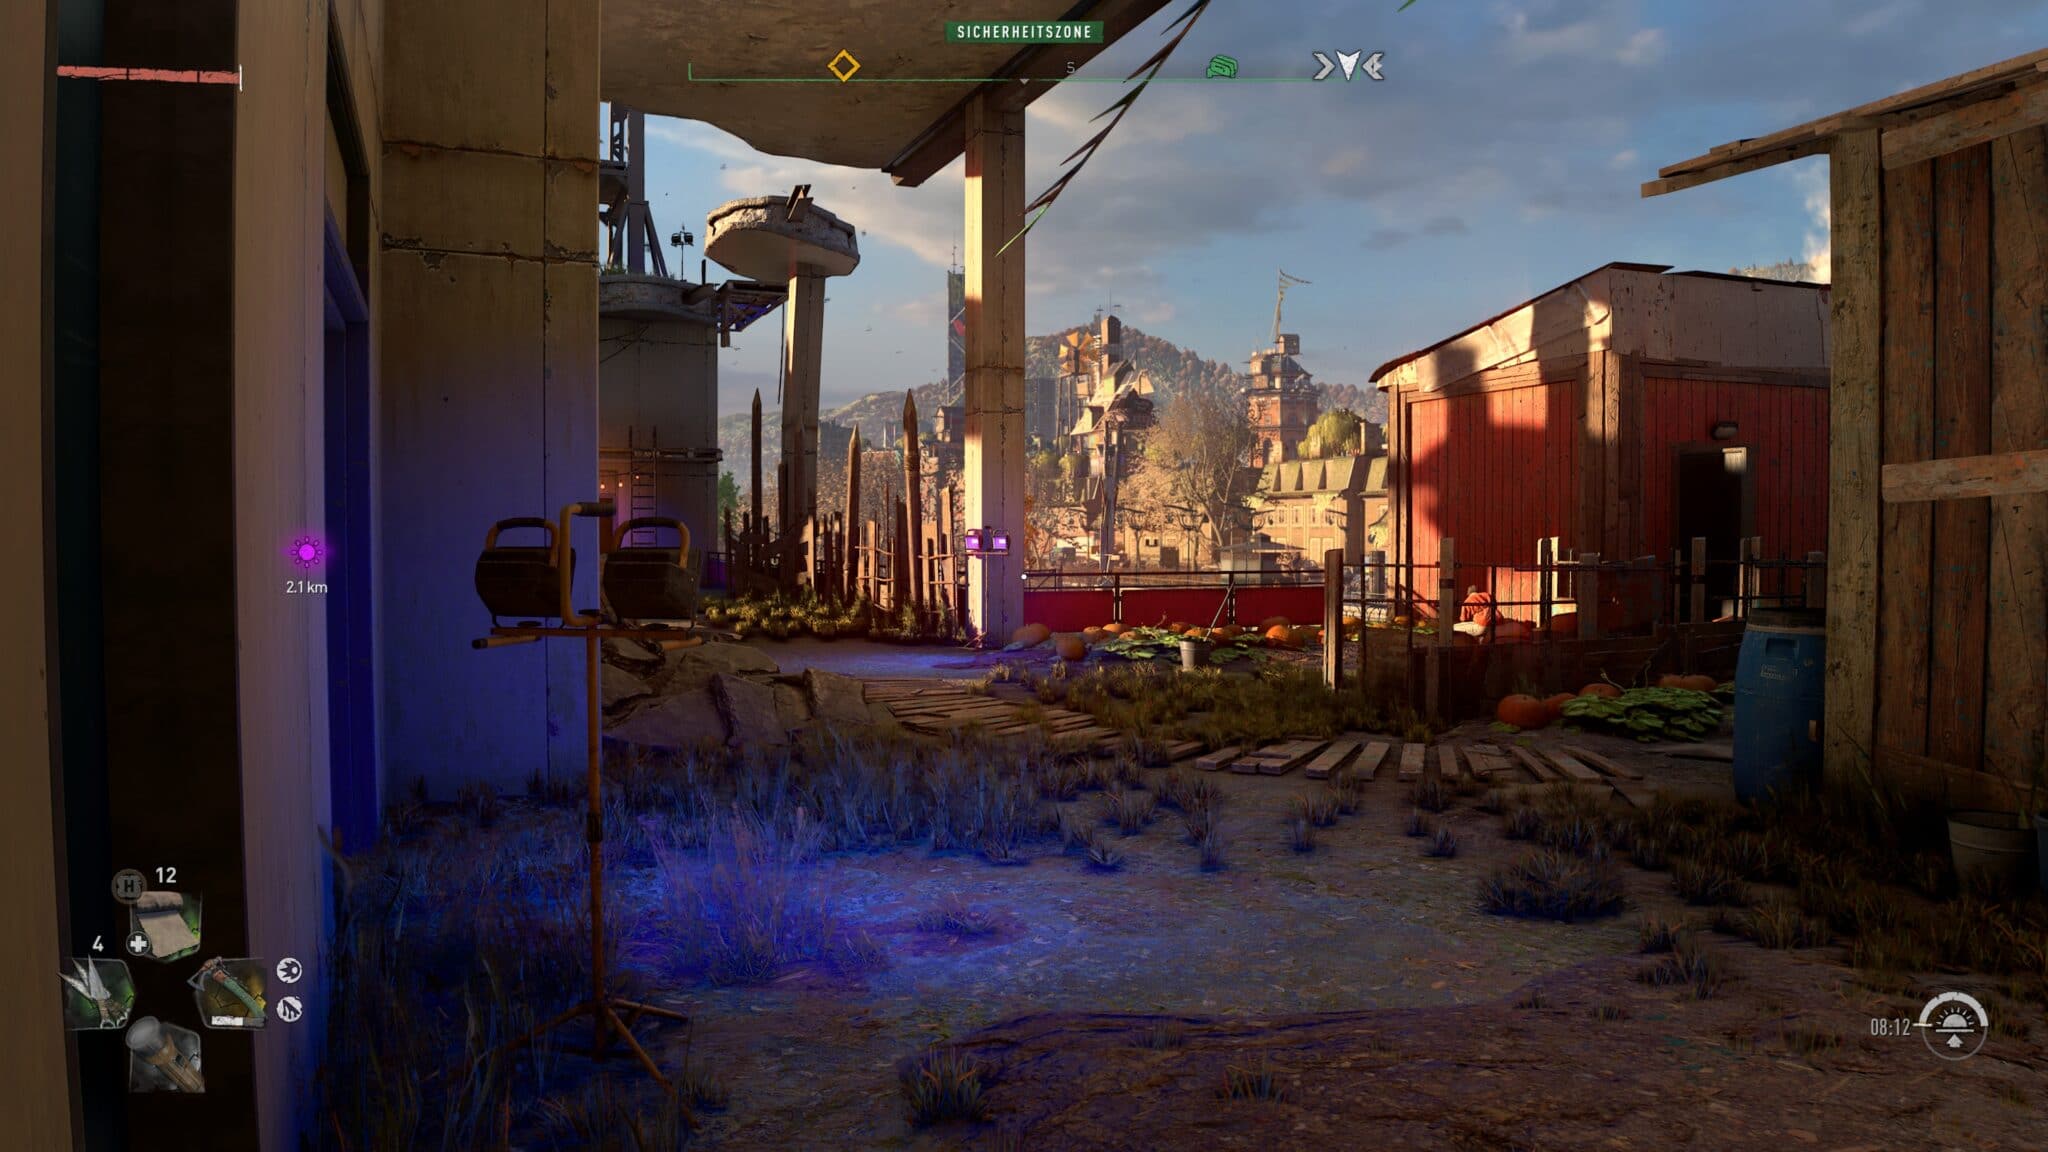
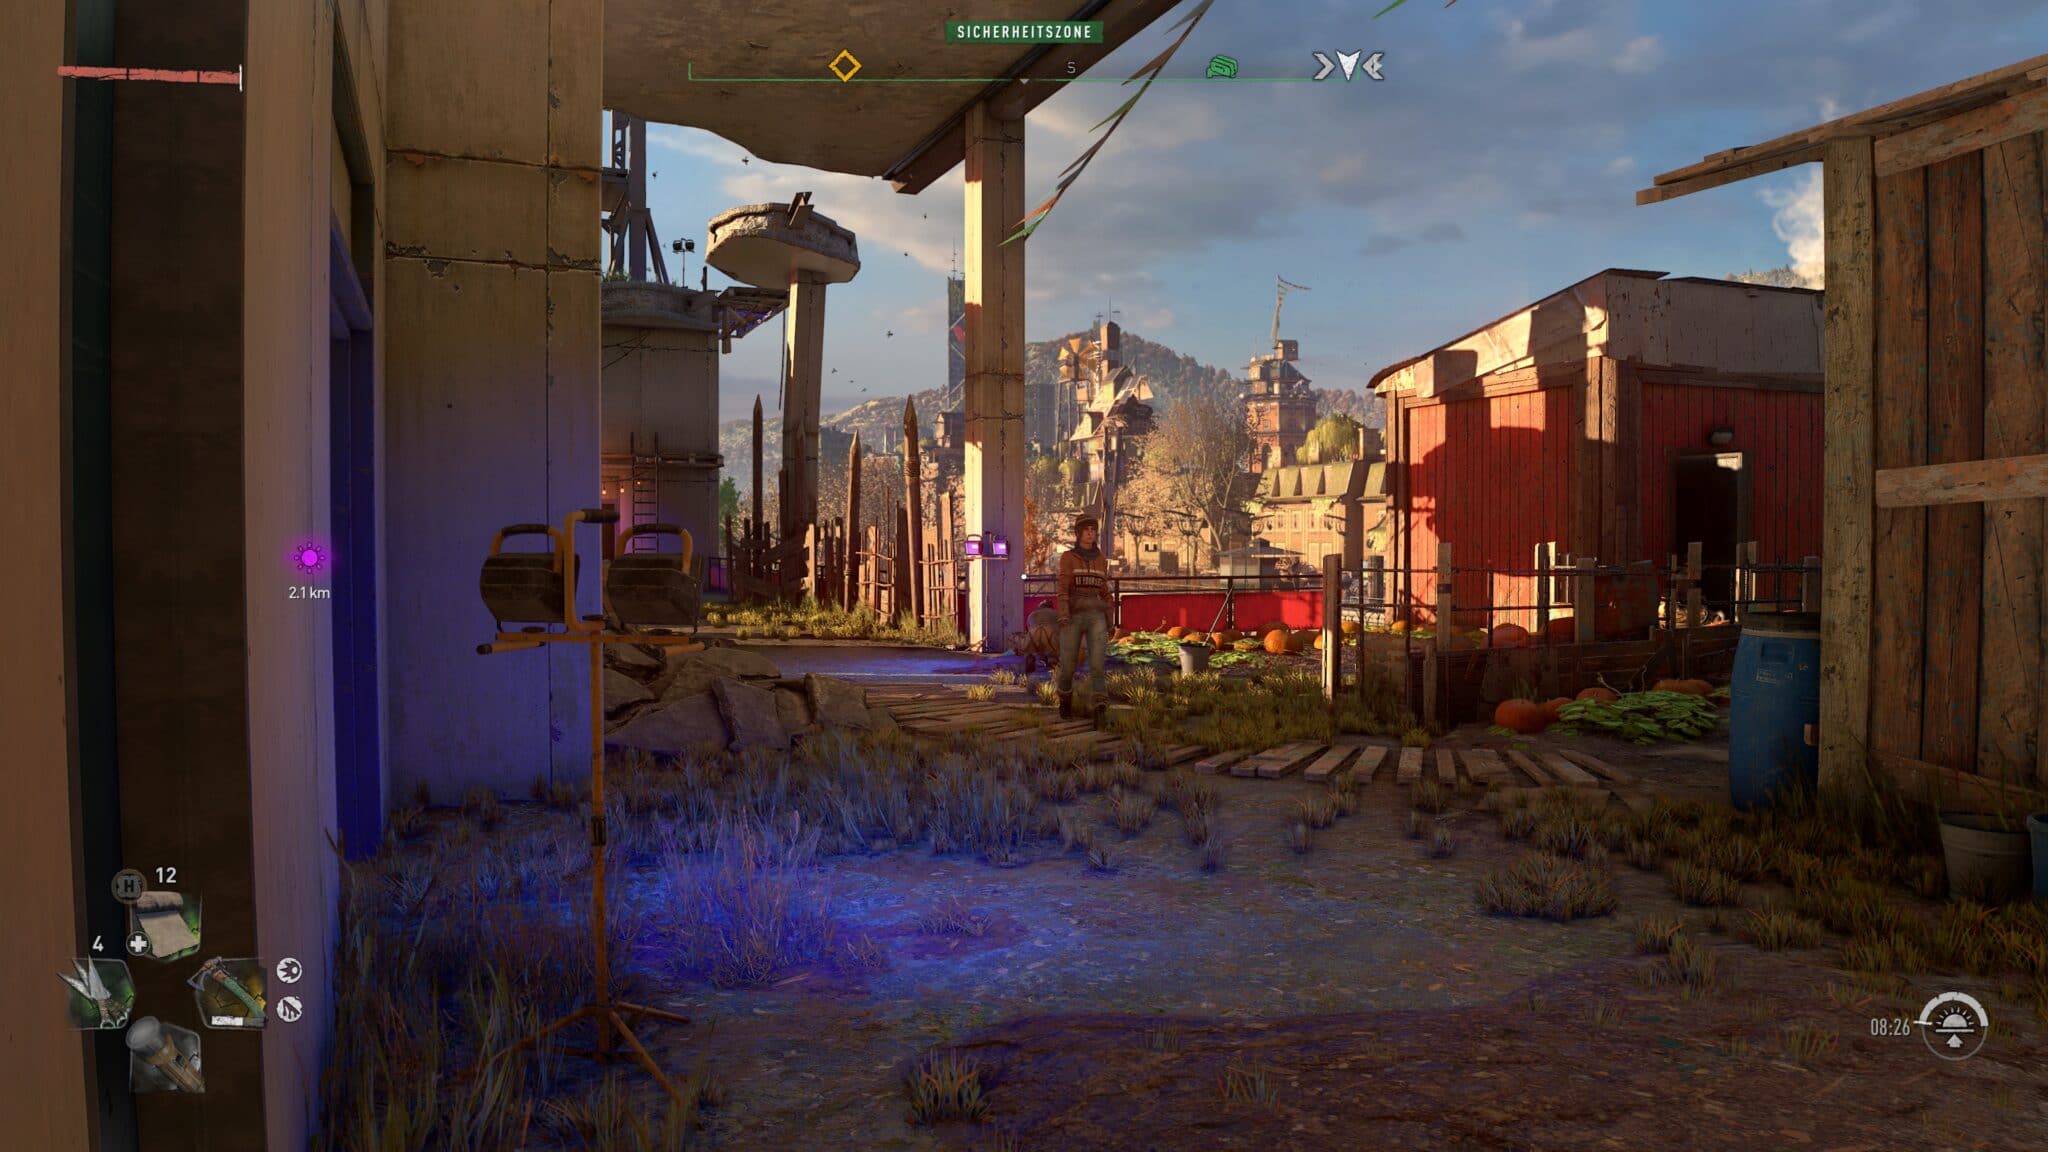
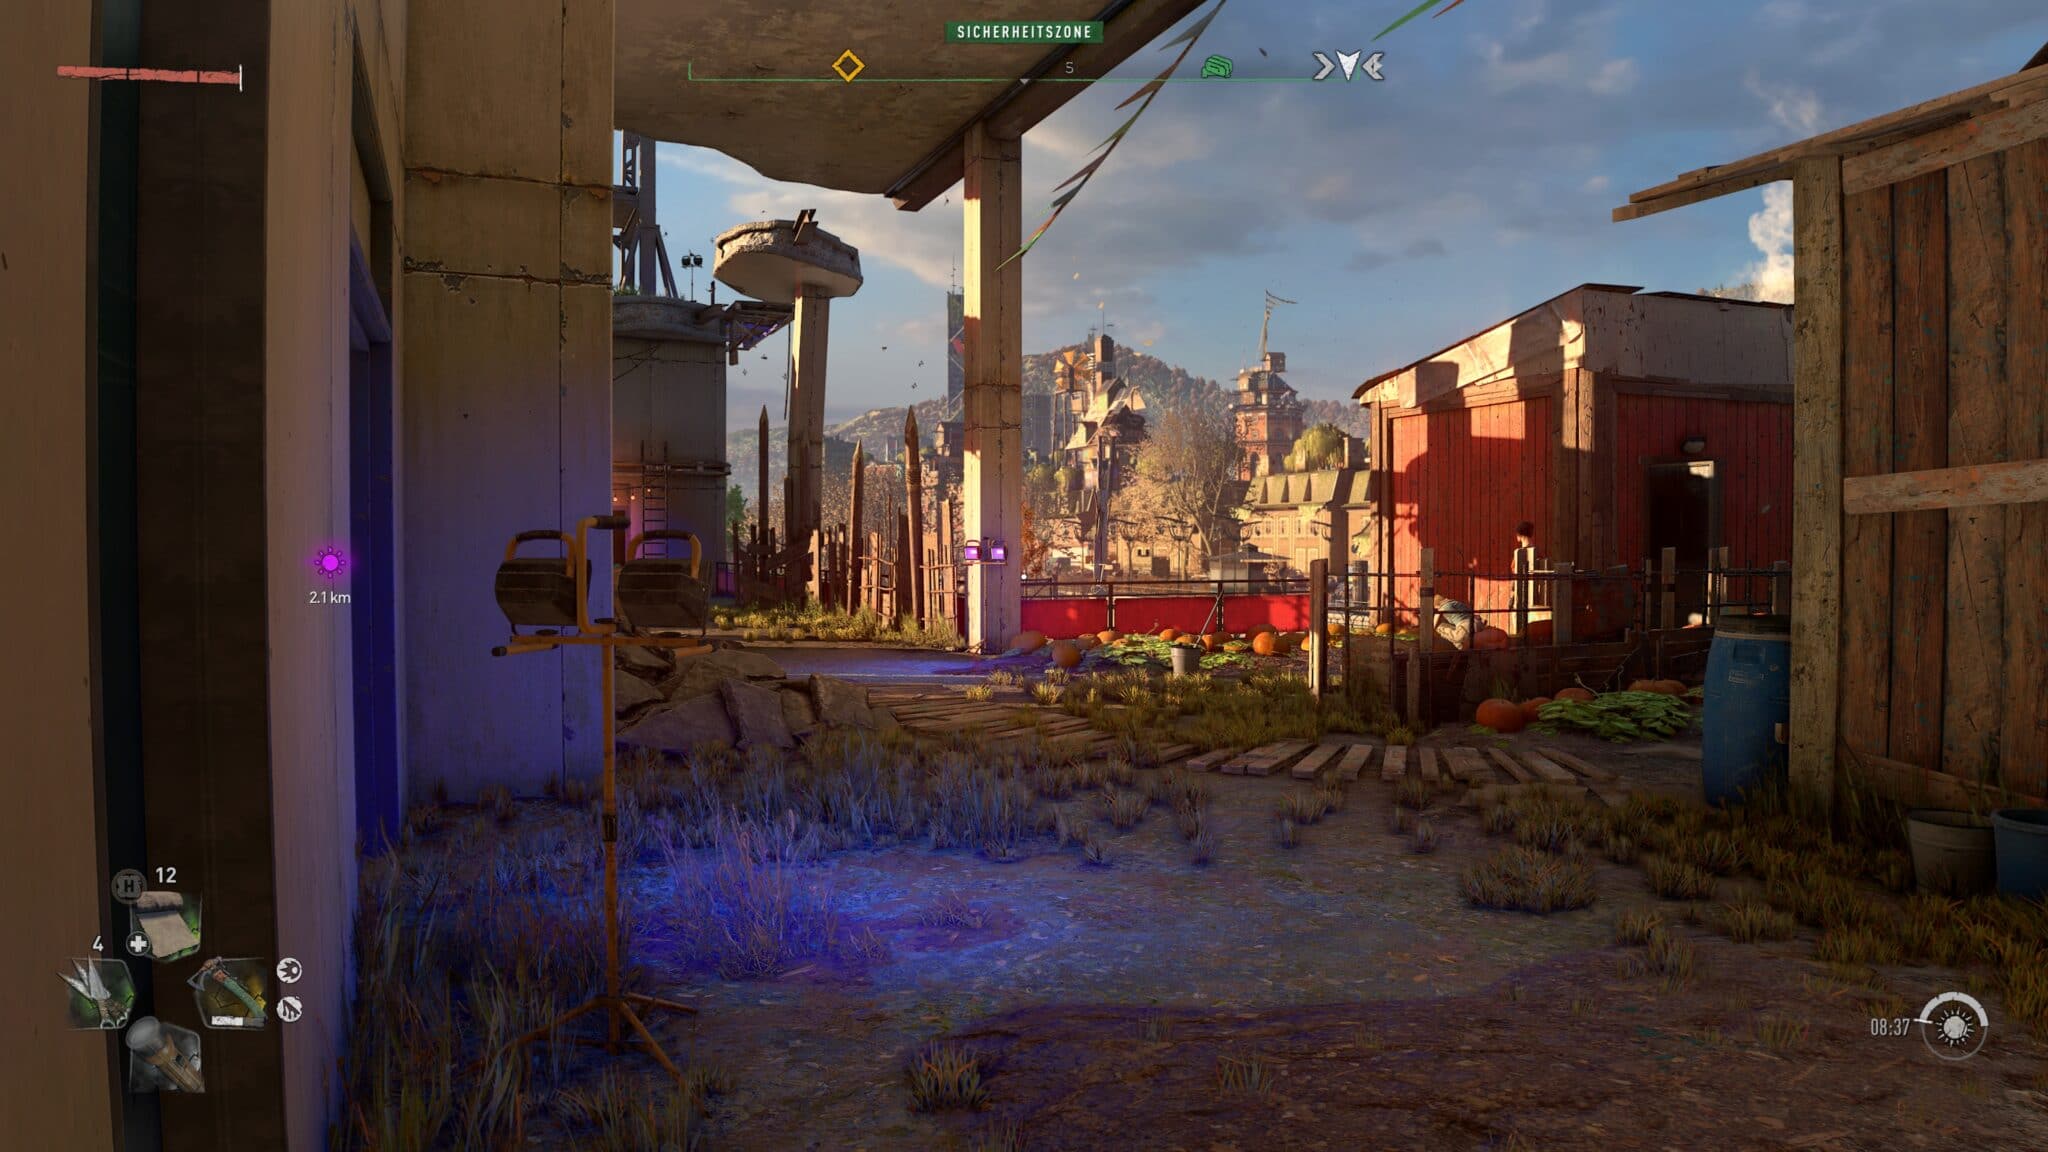
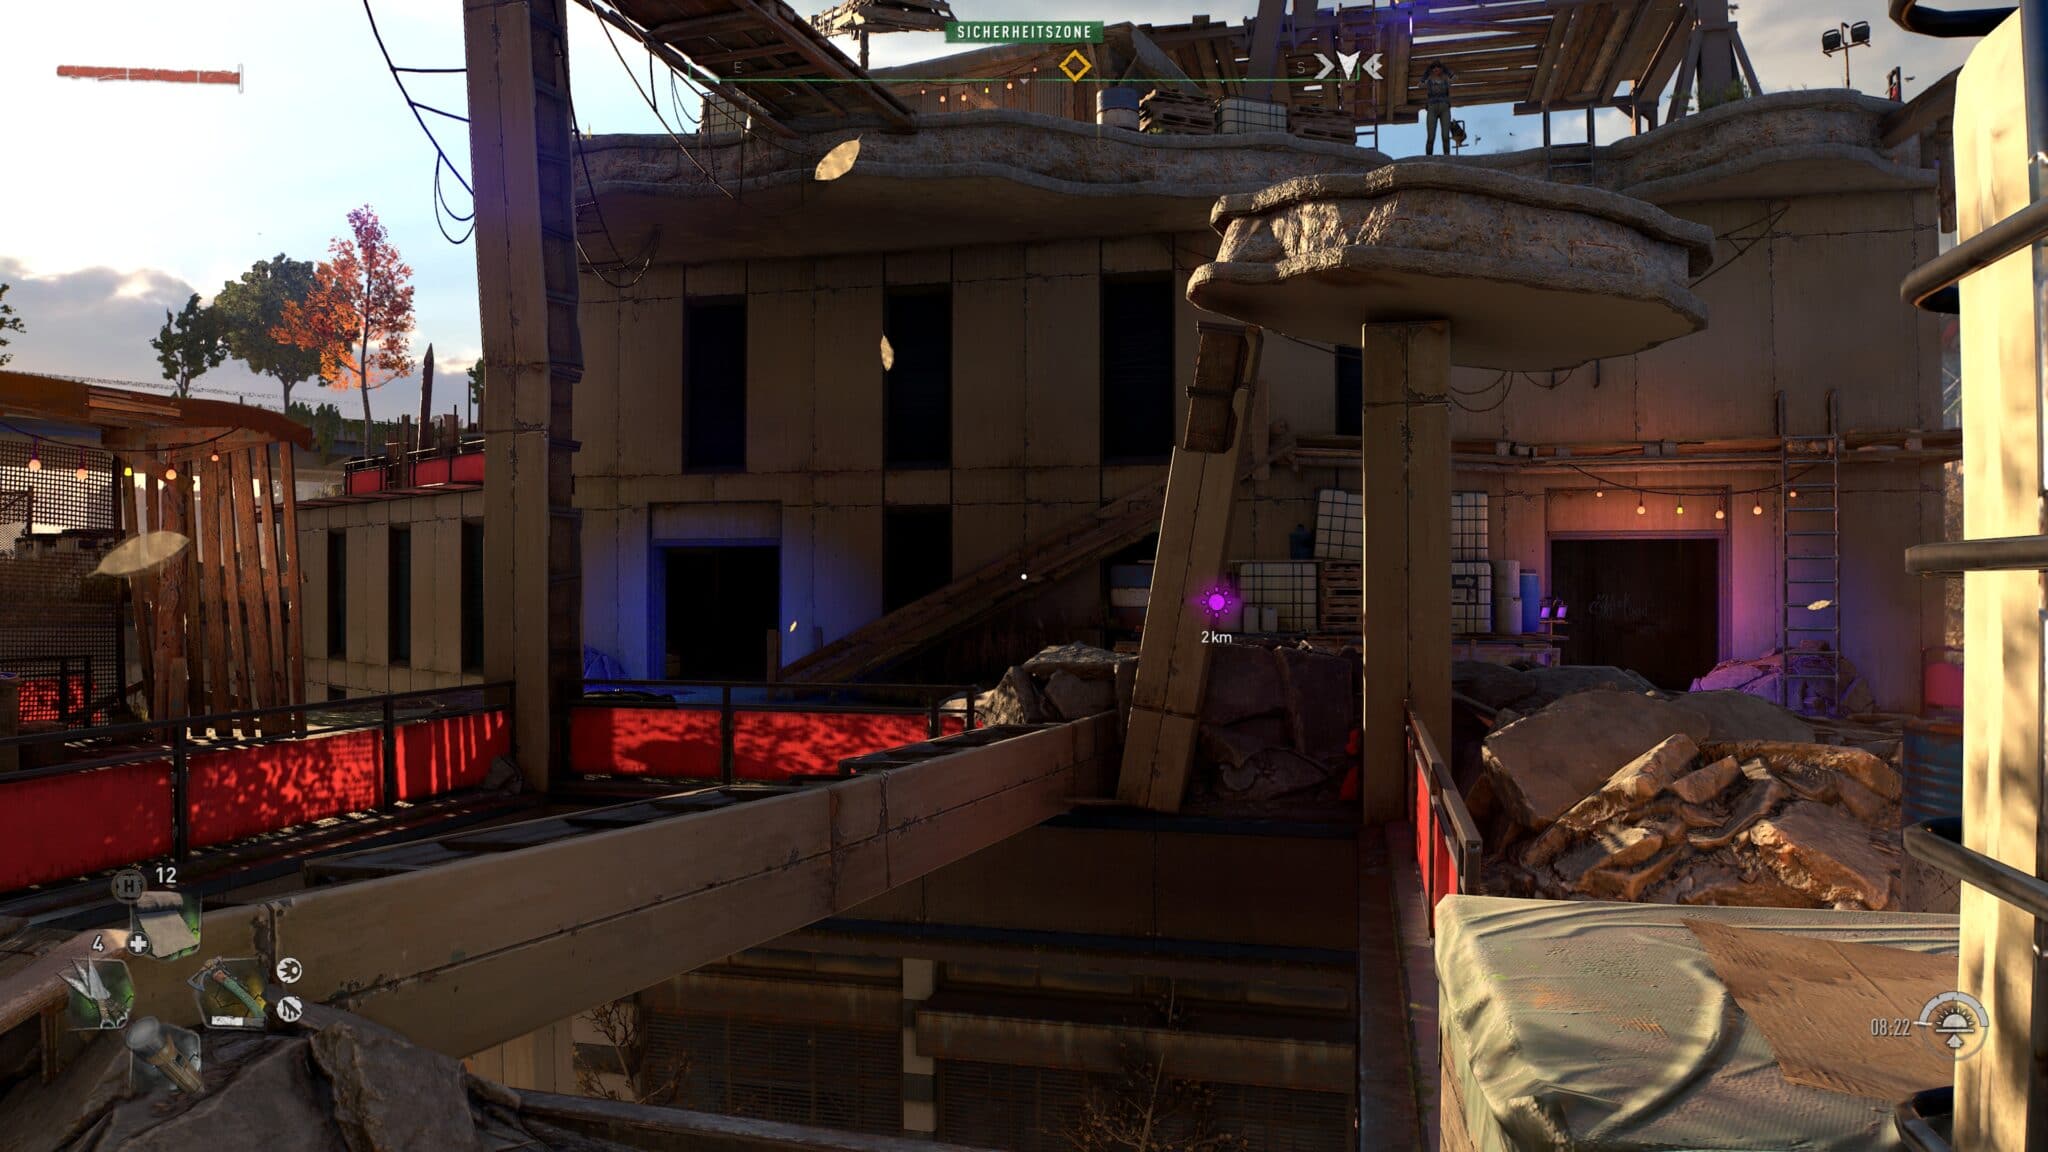
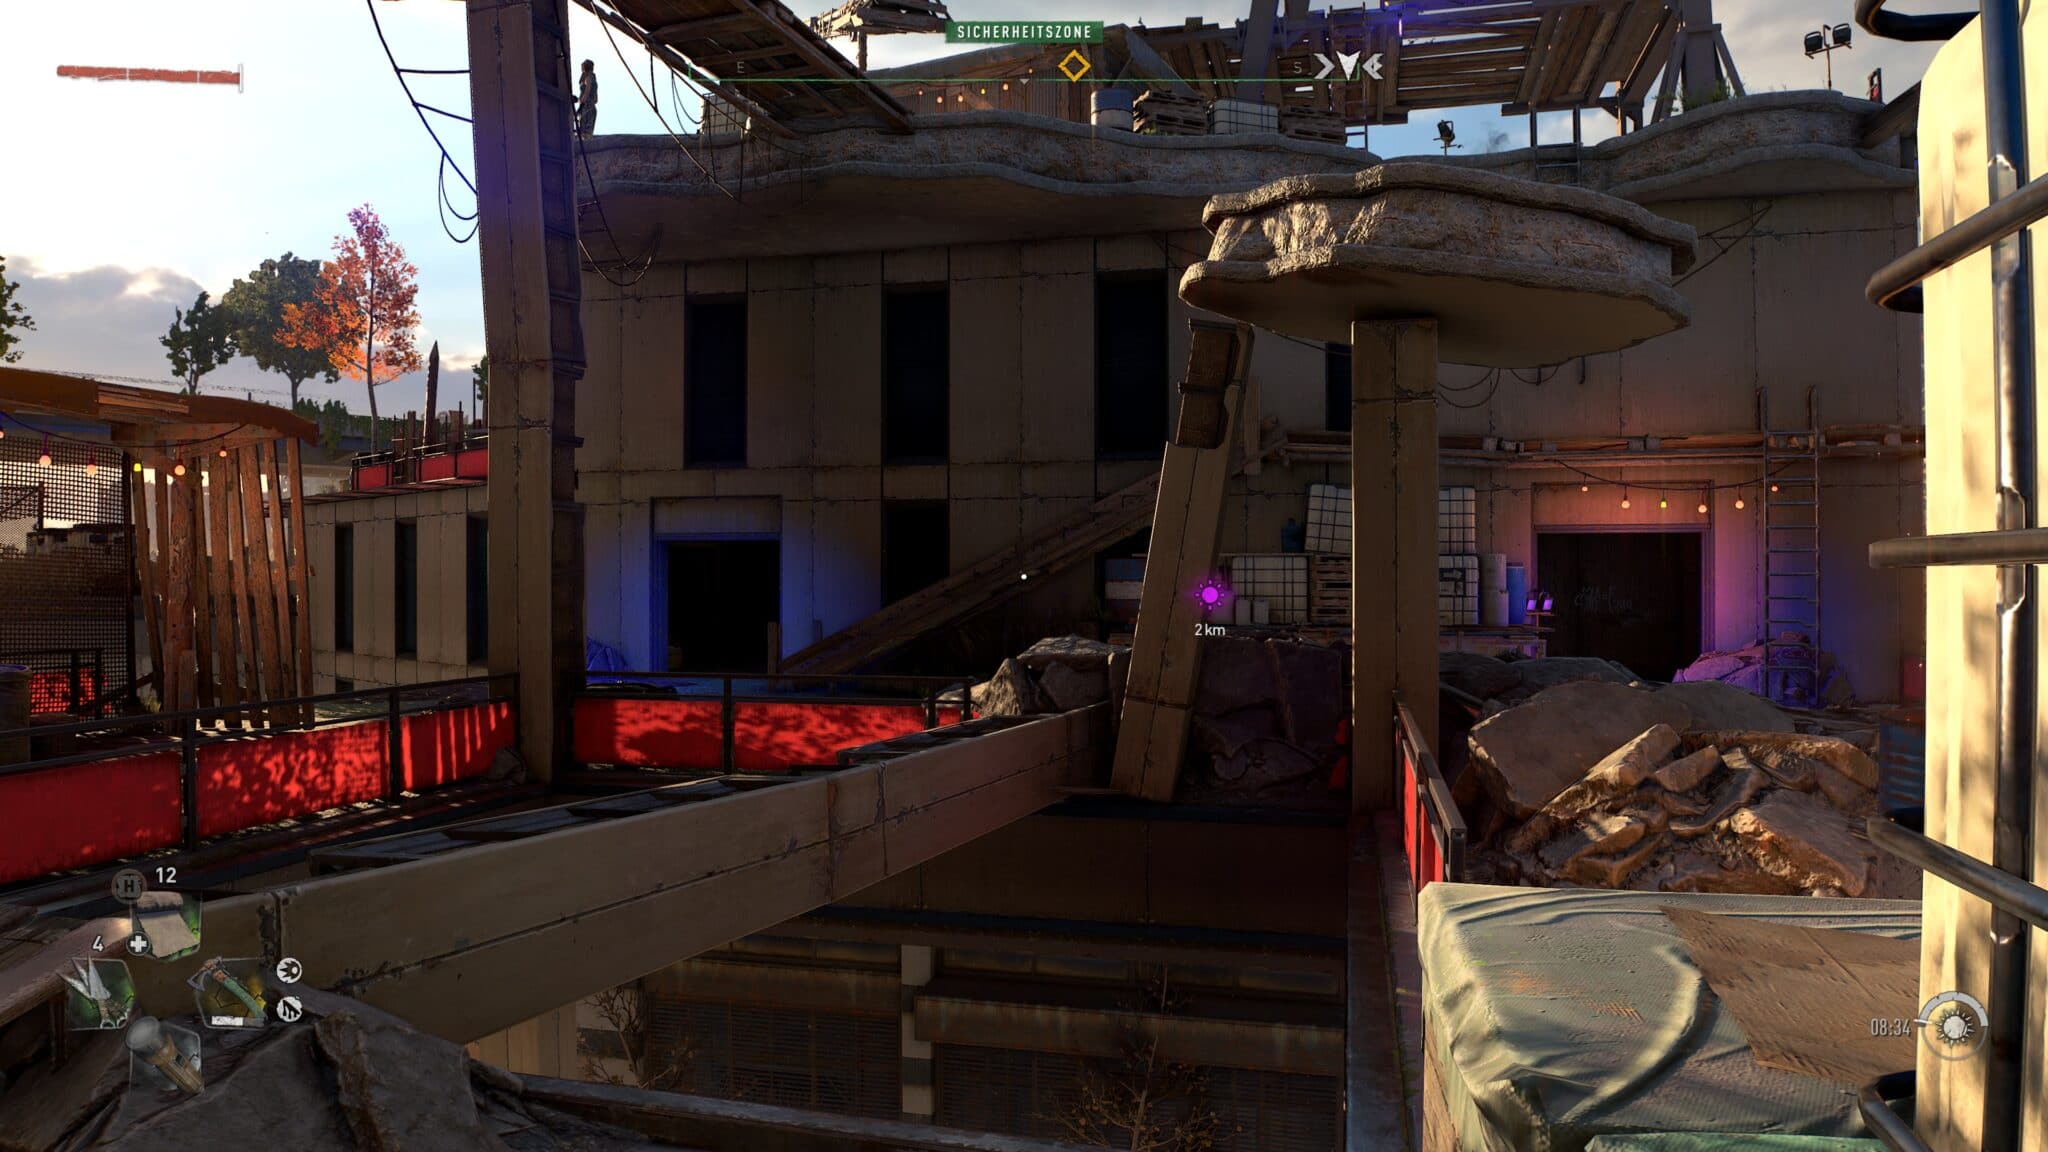
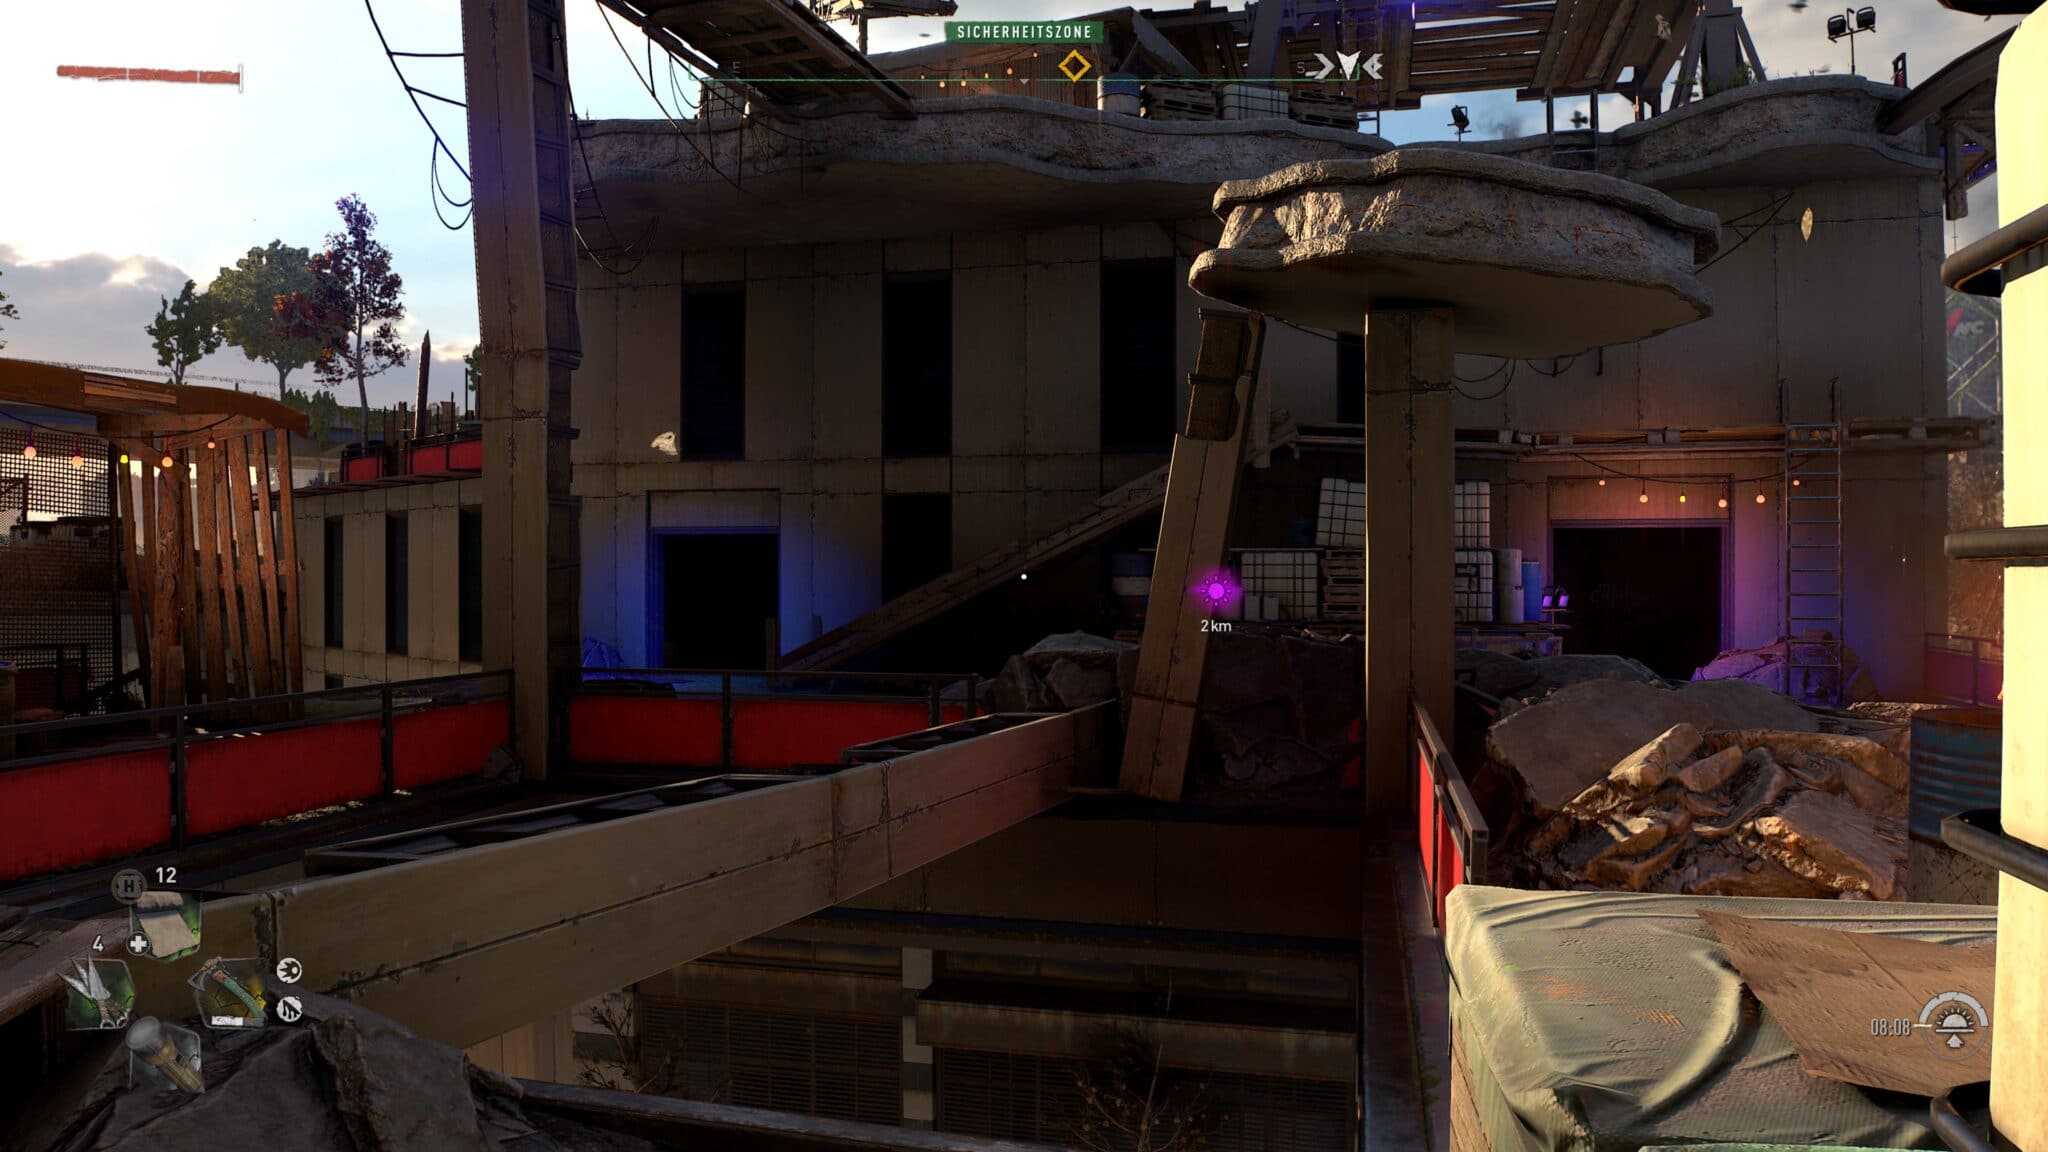
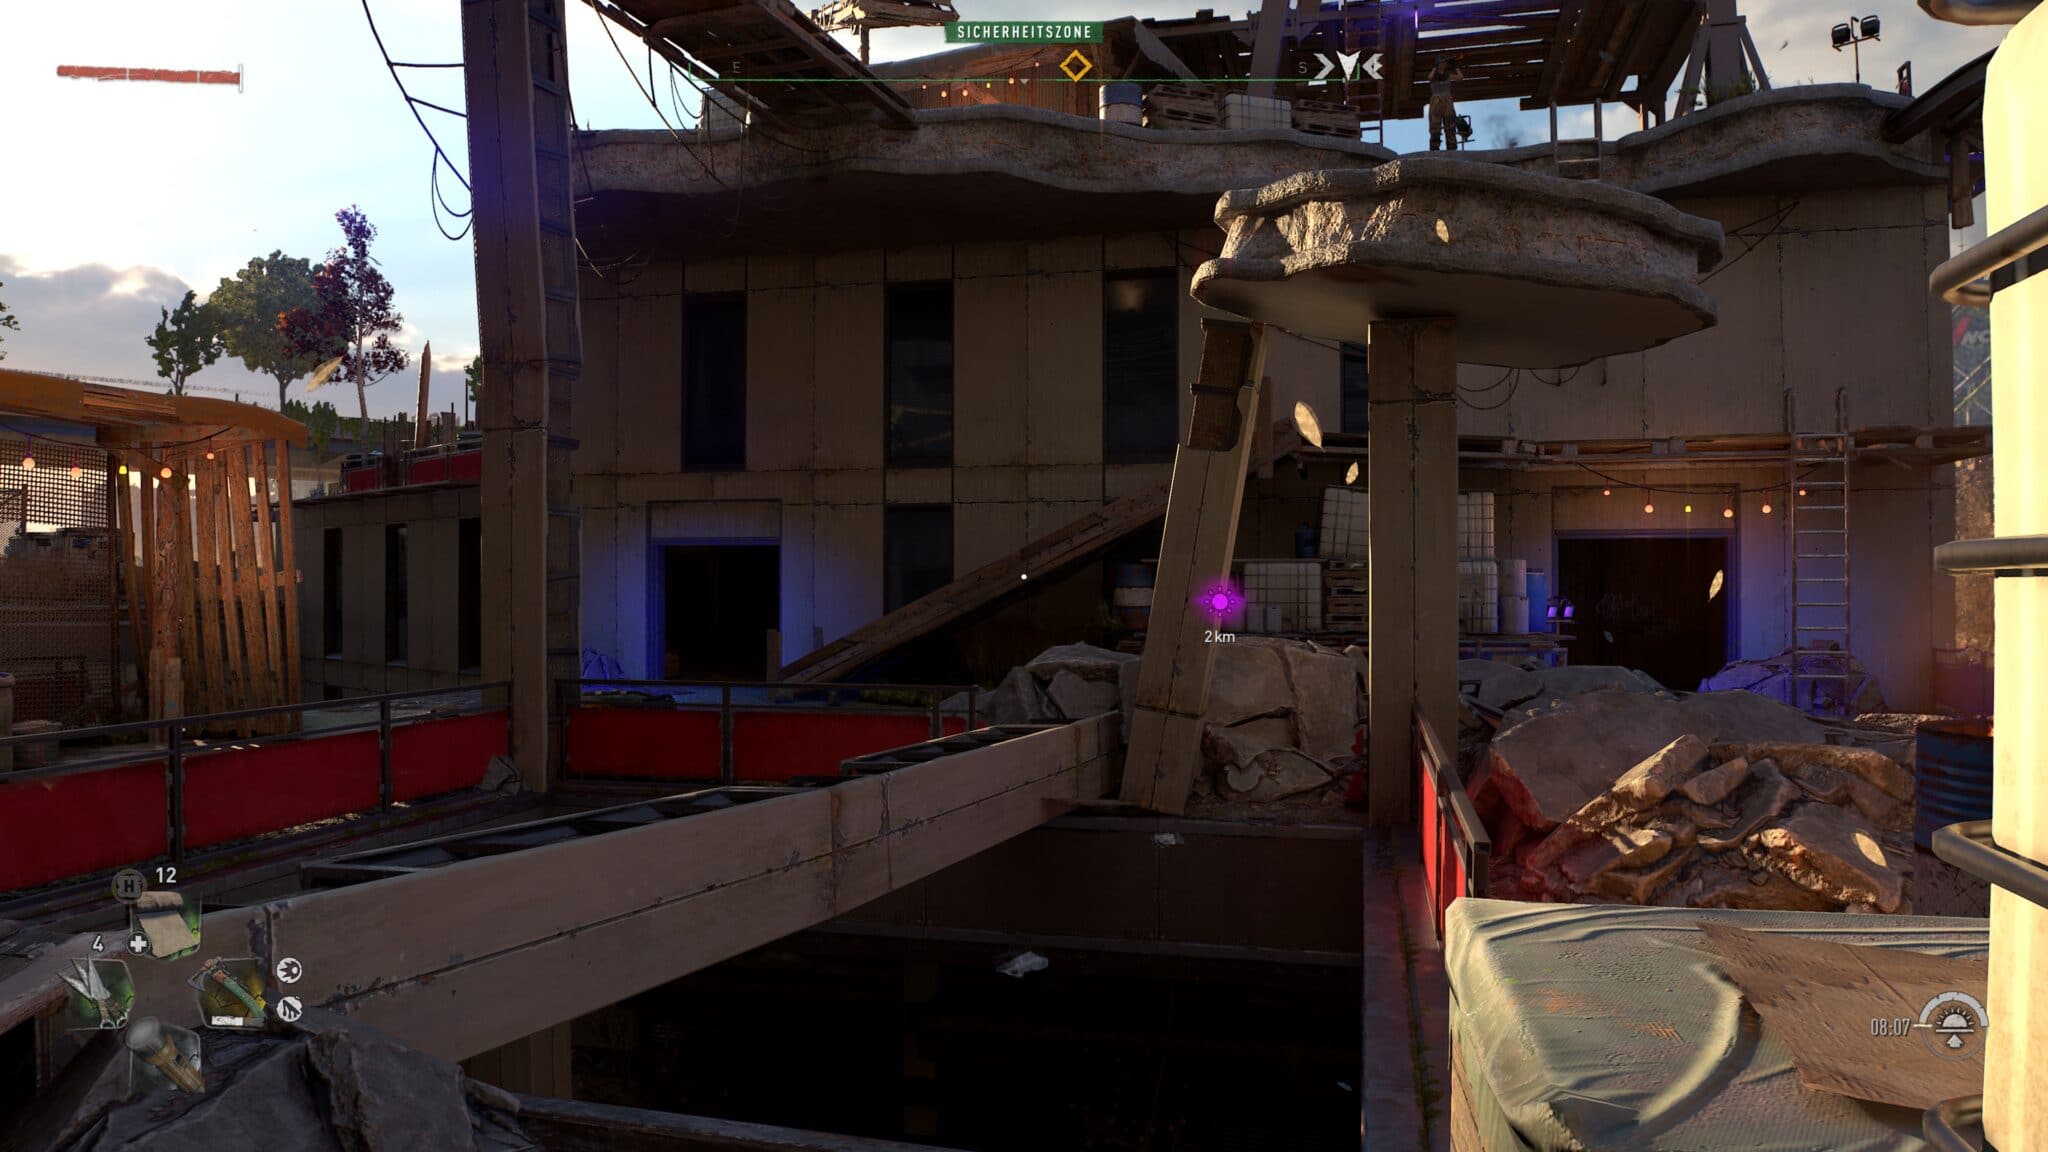
Preset comparison: All comparison pictures
Note: You can see the differences best if you download the pictures in their original size. To do so, click on the respective screenshot and select the option Show in original size in the enlargement at the bottom left.
Scene 1
Scene 2
Scene 3

Scene 4
Scene 5
Upscaling method: All comparison images
Scene 1
Scene 2

